

When it comes to bread, I go in rather blind and haphazardly and emerge just about the same. So I thought that perhaps being a bit more systematic – i.e. making the same bread slightly differently, a number of times, might give me some insight.
Did it? Well, possibly. Yes, I used (errr sometimes…) the same formula, but even if I disregard deviations in ambient conditions and the liveliness of my starter and the rising times, there so many sources of inconsistency: irregular and poor boule shaping, lazy folding and turning of the dough, and ability to crush all the air out when I score.
I certainly wouldn’t claim that these are a set of well-controlled trials…and perhaps I shouldn’t even hope that my results are even the slightest bit comparable between loaves. I think the solution would be for me to do a lot a lot of trials. But I have no idea how all that bread would get eaten!
Bread #1:

Bread #1:
- 20% red fife bread
- 100% flour (20% red fife, 80% all purpose)
- 75% water
- 2% salt
- 20% starter
- 1.5% wheat gluten
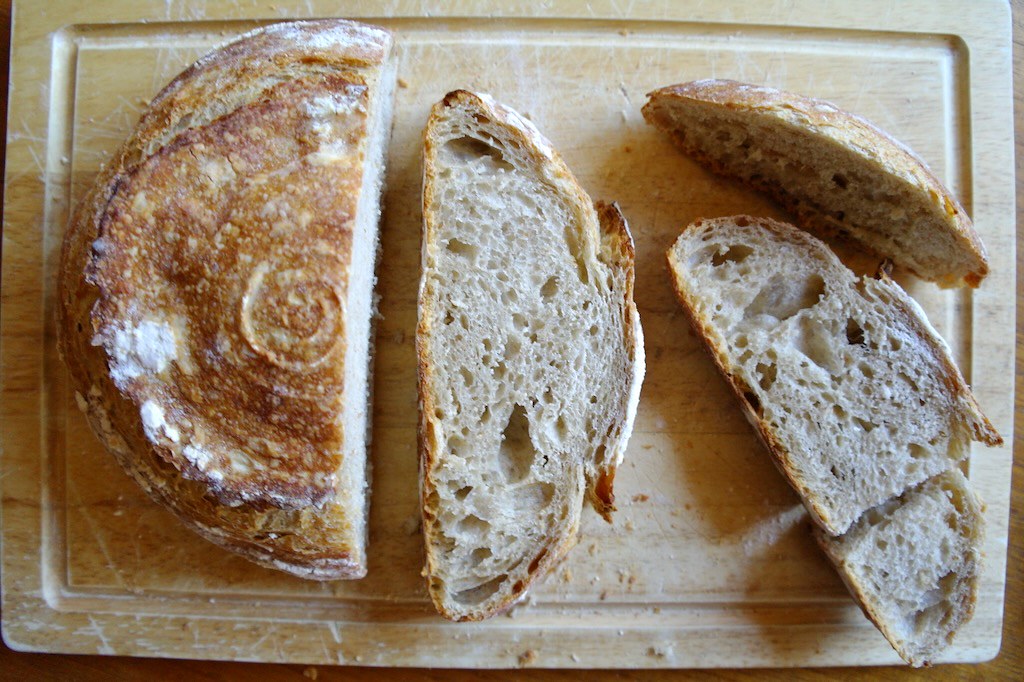
The dough was a tad bit too stiff and dry; it appeared to have a pleasant rise, but the crumb remained consistently denser. I preheated the cloche to 500F and then dropped the dough inside.
Bread #2:

Bread #2:
I added just a bit extra water, and got a slightly looser crumb. I also ended up spraying the top of the bread liberally with water to try to encourage more steam and oven spring. However the act of dropping the bread into the bottom of the cloche seemed to really deflate (or at least deform) the dough, and the water on the crust only seemed to made the bread a bit sloppy.
Bread #3:
Bread #3:
Ran out of red fife and so I used spelt instead. This time I put a baking stone in the oven instead of the cloche base and slid the dough onto that. I also let the dough rise in a 1 kg banneton instead of a towel-lined bowl (and only used around 4/5 of the dough–less than 1 kg, but it seemed to fit better). It didn’t seem as though there was much ovenspring, but the crumb was much much improved, with a bit of craggyness from the occasional loose hole. But then I got confused. I changed a few too many variables at once to identify the difference maker.
Bread #4:

Bread #4:
This time I went right ahead and made a 4/5 of the original amount of dough, and the size was much better for the banneton, and I was able to be considerably more gentle when handling the dough. I did not spray the top of the loaf with as much water (which was a better choice I think–the last loaf of bread had an odd sort of mottled crust and a weird spring to some of the scoring) and mostly sprayed the parchment paper around the loaf in hopes of generating some steam inside of the cloche. Again I slid the loaf onto a stone instead of dropping it into the base of la cloche and that also seemed to be much better. I think there was a decent amount of ovenspring.
One deviance from the procedure was that I forgot and incorporated the red fife in during the main dough instead of the sponge. I’m not certain whether that would be significant to create any issues–did it encourage or did it reduce the amount of gluten formation? I could somehow rationalize it going either way, which indicates I really have no idea.
Concluding thoughts:
I think I actually had a consistent trend of improvement across these four breads which is something that never happens. Now if only I can keep that up.
Some pointers:
- Gluten formation is very good. During the first proof you can stretch the dough around in the bowl (a few turns) to help. Or you could knead. The choice is yours.
- Shape very gently–after the first proof, you want to retain a fair amount of that air. There are various videos on forming boules to which I intend to one day pay more attention so I can have a better grasp of it.
- Slide the bread, don’t drop the bread. Yes, yes, yes!
- Don’t overproof–this was something I learned quite a while ago, and now also facilitates my impatience. I tend to have better ovenspring when the bread is slightly underproofed than when it is overproofed. So then it’s just a matter of finding the right balance–underproof means less initial holes, but more ovenspring; overproof means more initial holes, but less ovenspring. I prefer more ovenspring because it’s exciting, and I think it may help encourage the formation of a loose crumb.
- Steam…how? Steam is important. I know that. But it’s more difficult when you’re baking in a small closed space such as la cloche–you can’t spray water into the oven or rely on a pan of steaming water on the bottom rack. My compromise (though I’ve no idea whether it’s actually helping) is to spray the parchment around the bread with water–then some steam should be formed inside la cloche.
- Let the bread cool completely. I usually let it cool overnight because I bake in the evenings. Though I do always get very curious about what the crumb is like, I try to resist. I find when I cut into warm bread, the crumb gets a bit mushy and soft and crumbly, as though it hasn’t finished cooking; something that I seem to be able to avoid when I let the bread cool overnight.
- Have you got any more to add to the list?
By the way…it’s already Saturday, so happy Fiesta Friday! Angie‘s lovely party this week is being co-hosted by Josette, the Brook Cook and Julie, the Hostess at Heart. And did you hear that Dini at the Flavour Bender has started a Saucy Saturday linkup party? I’ll see whether I can get a post together for that one as well.
20% red fife wheat bread
I add some additional wheat gluten to the dough because I’m not using bread flour. Start the night before, make the bread the next day, and eat it the day after.
Sponge:
- 80 g red fife
- 80 g starter
- 80 g water
Dough
- 320 g flour
- 228 g water
- 7 g salt
- 5 g wheat gluten
Mix sponge, let ferment overnight.
Combine all ingredients to form a loose dough. Let proof for an hour, turning intermittently. Then let rise until doubled.
Dust a banneton generously with flour OR dust a tea towel with rice flour and use that to line a bowl.
Gently scrape dough out onto a floured surface. Form into a tight boule as gently as possible. Place seam side up in the banneton/bowl, cover, and let rise.
Preheat the oven to 500F, with the top of the la cloche resting on top of a baking stone. If you have enough room, shift the stone to one corner and the top of la cloche to the other corner–this way when you remove la cloche during the baking you can leave it in the oven and avoid any potential of heat shock (which I am very afraid of, but it is probably not an issue actually).
Once it is well risen, but not quite doubled, gently invert onto a rimless tray (or an upside down jelly roll pan) lined with parchment. Score.
Lift up the top of la cloche with one hand and slide the bread from the tray onto the stone with the other hand. Put the top in place and bake for 25 minutes. Remove top, bake for 15 minutes.
Let cool completely (i.e possibly overnight) on a wire rack before cutting into the bread.

In so intimidated by baking bread. I’ve had red fife baguettes from Whole Foods and I liked the chewy-ness of the bread. Great job!
LikeLiked by 1 person
I’m always intimidated, but it helps when I’m not worrying (obsessing) too much about how well the bread turns out. Red fife baguettes sound great…though baguettes definitely intimidate me! I hope you give some bread baking a try someday 😉
LikeLiked by 1 person
I will and hopefully I will travel to an amazing bakery in NYC and write a lovely post because you’ll be my inspiration. Now to look for a real bakery.
LikeLiked by 1 person
Ah, now you’re making me want to visit a bakery as well!! I’m sure New York must have so many great bakeries… I’m jealous already!
LikeLike
I know Whole Foods is supplied by Baluchi’s but I’ve never been there but have heard good things. Maybe that will be my stop. I have to research more.
LikeLiked by 1 person
Bakery research is the best sort of research! 🙂 Hope you enjoy yourself!
LikeLiked by 1 person
Yes it does sound good right? Just have to set aside time and I wonder if they’ll been keen to all my pictures? They’ll think I’m a food inspector..
LikeLike
Absolutely amazing! 🙂
LikeLiked by 1 person
Aww, thank you! 🙂
LikeLiked by 1 person
All four loaves are absolutely GORGEOUS! I hope that you put all of this deliciousness to good use! YUM. 🙂 I am very impressed by your quest for perfection- SO much work! SO helpful for other bread bakers out there- and inspiring to me. 🙂
LikeLiked by 1 person
Thanks for such a sweet comment! I still have no idea how to produce consistent results, but I’m working on it 🙂 However, working on it has made me a bit tired of bread, haha! I almost always end up with a very hard, dehydrated bread end at the end of the week with no viable use other than bread crumbs. And you can only have so many bread crumbs!
LikeLiked by 1 person
French toast!?!? 🙂
LikeLiked by 1 person
Brilliant!! 🙂
LikeLike
I love baking bread, and love how you experimented and explained the differences in your technique. Your bread came out beautifully, and I would love to see more posts like this. This bread looks like it came from a bakery!
LikeLiked by 1 person
Thanks Julie! I think I’m starting to feel a bit bread-ed out…at least of the red fife variety 🙂 I love reading your bread posts as well!
Oh gosh, I’m always very excited when I think my bread looks nice from the outside, but then when I cut it open sometimes I’m very disappointed by the crumb! I never know what to expect 😀
LikeLiked by 1 person
I don’t see any reason why you can’t link this post to both parties, Laurie! More fun and friends, I’d say! 😃
LikeLiked by 1 person
Quite right! Though it would be nice to encourage myself to post twice a week! 🙂
LikeLike
They all look so good! Really proffessional! Looks like your a bread expert now 🙂
LikeLiked by 1 person
Aww! Thanks! I am far, far from a bread expert but I’m trying to learn 🙂
LikeLike
Beautiful bread and processes Laurie! Love them all, and their structures and patterns too… yum… 🙂
LikeLiked by 1 person
Thanks Lili! I’m quite pleased that you think the structure is nice 🙂 I only need to figure out how to be consistent… I’m thinking I may switch to making a 20% spelt loaf instead as I think (but only a very vague and unjustified notion) I tend to get a nicer crumb (and I do love spelt!)! 🙂 But right now I’d much rather make a cake now. Or a souffle!!
LikeLiked by 1 person
Yes, do throw some spelt in there – you know I love spelt too! 🙂 oooh soufflé .. yay! 🙂
LikeLiked by 1 person
Your bread looks just amazing! It makes me want to reach for a slice, the butter and just eat! And lovely pictures 🙂
LikeLiked by 1 person
Thank you Petra! I absolutely second the butter. It’s certainly the best…and it always helps me save a loaf! Even if the bread is too sour and dense and gummy, it’s all fine with some butter! 🙂
LikeLike