coconut, lychee & strawberry shortcake

strawberry lychee coconut shortcake

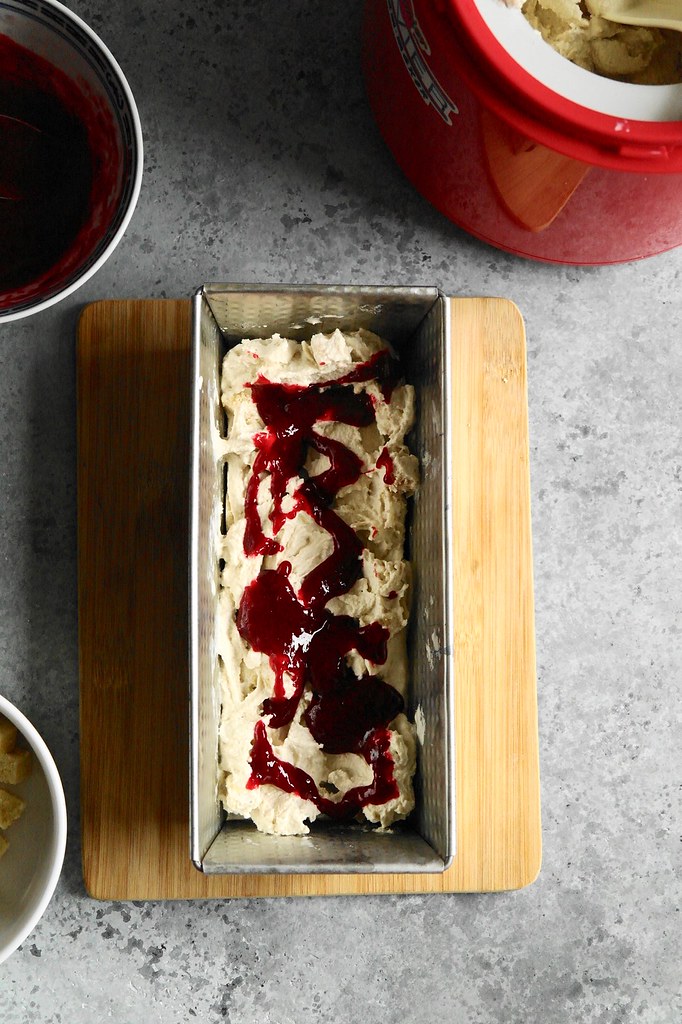
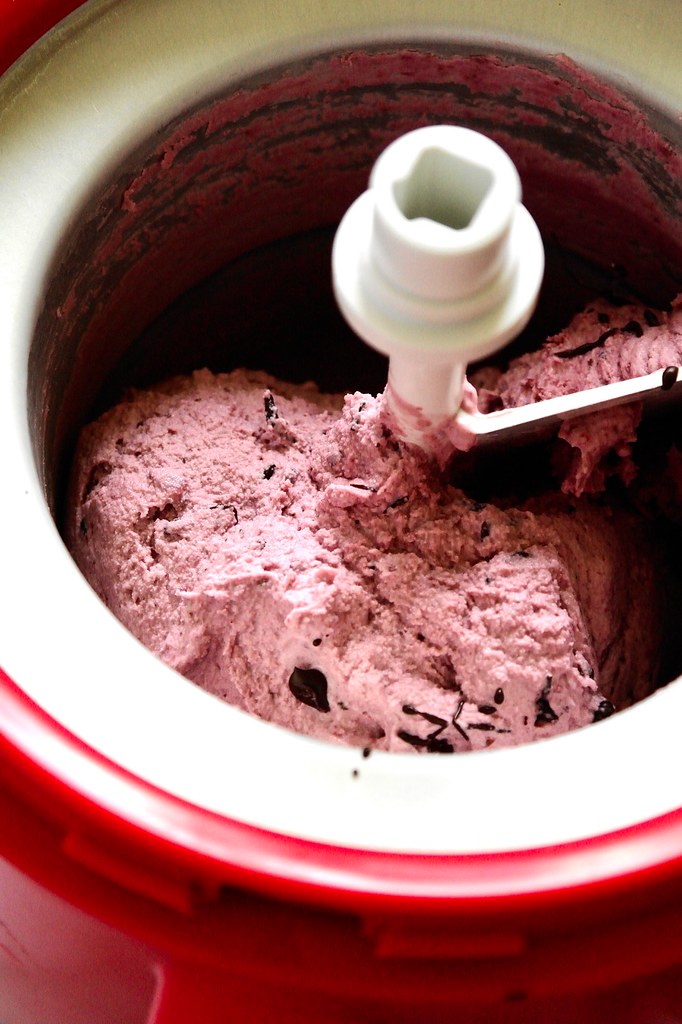
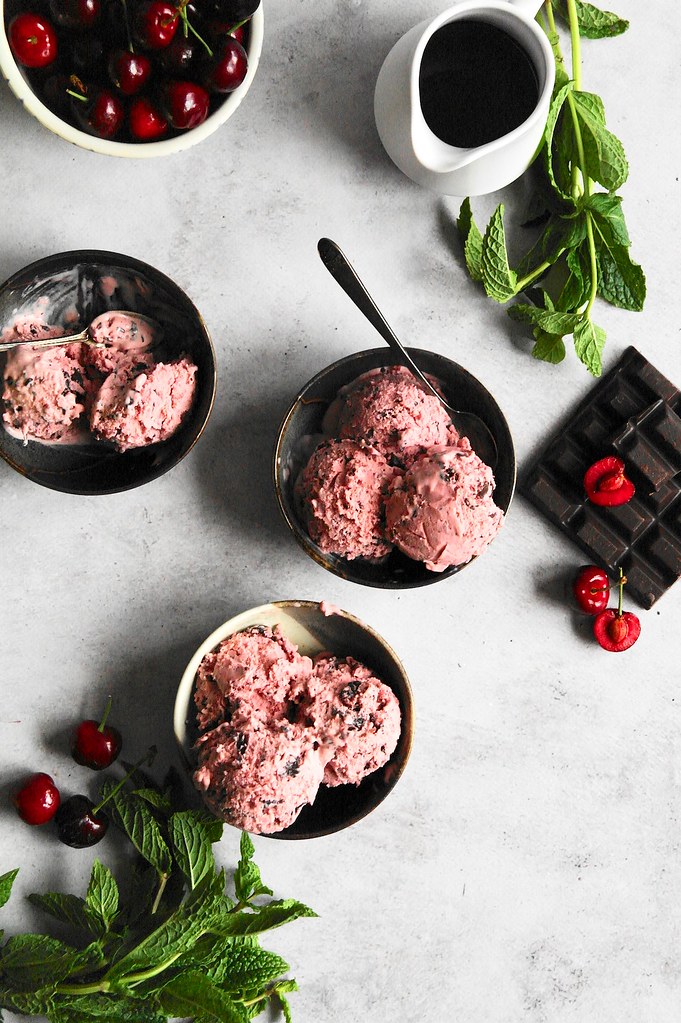
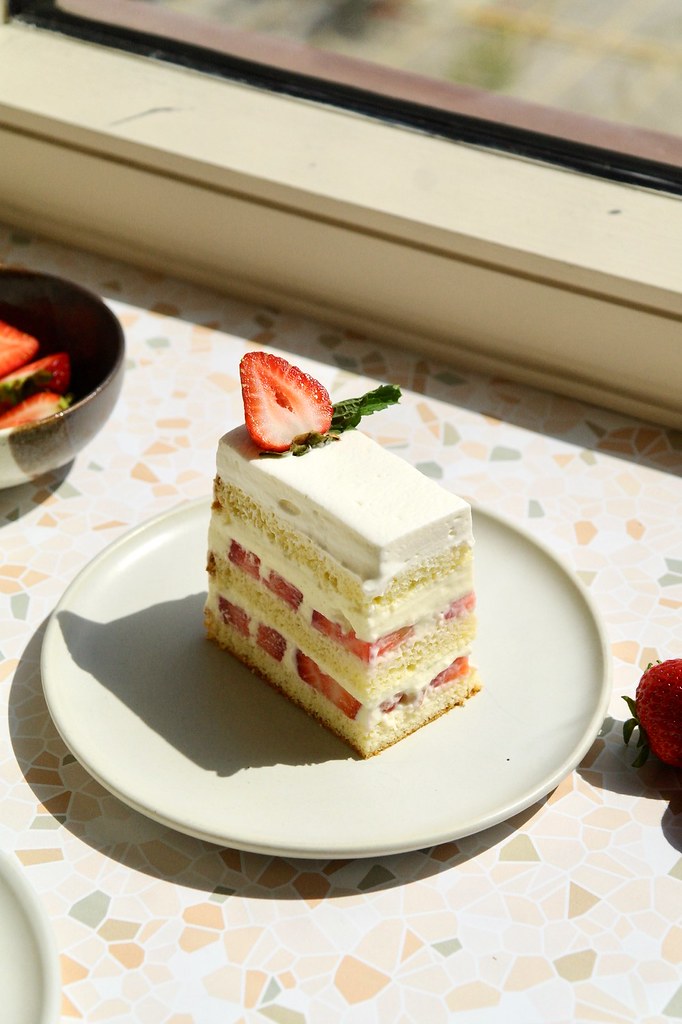
This is a take on a Japanese style strawberry shortcake – sponge cake, cream, strawberries – but layered with coconut milk bavarian cream, strawberries and lychees. Not to miss out on the cream, the whole thing is topped with a nice thick layer of it. Between a milk soak for the cake layers, the mousse, fruit and cream, it makes for a wonderfully moist cake!

strawberry lychee coconut shortcake

I had a lot of fun making it, though there are a couple tricky bits – be sure to let the cake set completely before un-molding and slicing. Use a long serrated knife to slice the cake with a gentle sawing motion in order to work your way through each of the layers.

strawberry lychee coconut shortcake

coconut, lychee & strawberry shortcake

  • Servings: about 8 from a 6-inch square cake
  • Print

Genoise from Spoonful Passion – you could make do with a 3/4 recipe, but this makes sure you have enough cake in case it turns out a bit stout.

special equipment: square 6″ cake tin 2″ tall with a removable bottom (alternatives could be a 7″ round springform tin)

genoise

  • 4 large eggs
  • 75g granulated sugar
  • 10g honey
  • 113g cake flour, sfited
  • 18g butter
  • 20g milk

coconut bavarian cream

  • 180g full fat coconut milk
  • 20g granulated sugar (you can use more if you prefer sweeter desserts)
  • 3 egg yolks
  • 1 3/4 tsp gelatin bloomed in 2 tbsp water
  • 180g whipping cream

assembly

  • 3 tbsp milk
  • a few drops vanilla extract
  • about 250g strawberries, hulled and thickly sliced
  • about 80g chopped lychees
  • an addition ~150g whipped cream, sweetened to taste
  • more strawberries to garnish

genoise

Preheat the oven to 350F. Line the tin with parchment paper; an easy way to line a square tin is to use two slings of parchment paper, one going in each direction to cover all the sides.

Whisk together the eggs, sugar and honey in a glass bowl and set over a pot of simmering water. Whisking constantly, heat the mixture until lukewarm to touch or around 100-105F. Pour into the bowl of a standmixer fitted with the whisk attachment.

Place the milk and butter together in a small glass bowl and set in the hot water to warm and melt. (I put a small steaming rack in the bottom of the pot so the water level isn’t too high).

Now return to the eggs: whip on high until the mixture is fluffy but still ribbony. You’ll know it’s ready when you can draw a figure eight with batter flowing from the whisk and it can hold its shape on top of the batter. Whisk on low for one more minute to help reduce any large air bubbles.

Add half of the sifted flour overtop and fold gently until just combined. Repeat with the remaining flour. The milk and butter should be warm by now – remove from the pot and add a dollop of the batter, and mix until cohesive. Add this to the rest of the batter and fold until just combined.

Transfer the batter to the prepared pan. Bake about 35-40 minutes or until browned an inserted skewer is removed clean. Let cool completely.

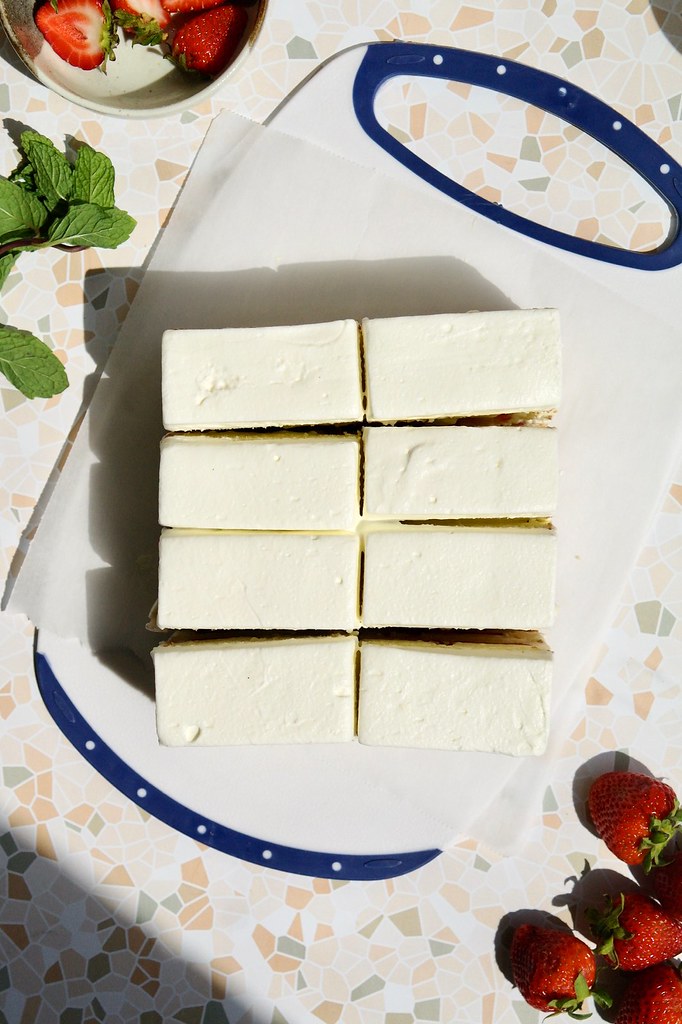
Once cooled, trim the top of the cake flat and slice into 1cm thick layers – you’ll only need three, but you’ll probably have enough cake to cut four. To do this, I find it’s best to use a ruler to mark on all four sides of the cake and trace a shallow cut. Then, while slicing the cake, you can follow those as a guide to make sure you get even layers.

bavarian cream

Once the mousse is made, it will need to be used soon – keep that in mind before you start and be sure to read ahead to the assembly portion of the recipe so you know what you’ll need.

Whisk together the coconut milk, egg yolks and sugar in a glass bowl and set over a pot of simmering water. Cook, stirring constantly with a rubber spatula, until the mixture reaches about 160F. Remove the bowl from the pot and add the bloomed gelatin, stirring until melted. Then set aside to let it cool to room temperature, giving it an occasional stir so that it cools evenly (this can be sped up by placing the bowl in another bowl of ice water but be careful to stir more often and make sure it doesn’t set completely).

Meanwhile, whip the cream – you can keep it in the fridge until the custard is cool enough. Whisk about one third of the whipped cream into the coconut milk mixture to lighten and thicken it, then add the remaining whipped cream and fold until combined. You’re now ready to assemble the cake.

assembly

Stir together the 3 tbsp milk and vanilla extract in a small bowl.

Place a layer of cake into the bottom of the same tin you baked the cake in. Brush with a bit of the milk. Arrange a layer of strawberry slices over the cake and scatter with half of the chopped lychees. Pour about half of the mousse overtop to cover the fruit. Give the pan a couple a couple taps on the counter to help the mousse settle around the fruit. Now repeat this for another layer of cake, milk soak, strawberries, lychees and the remaining mousse. Put a final layer of cake on top and brush with milk.

There will be a bit of a height left between the cake and the top of the pan – take the whipped cream and spread it into a smooth layer over top the cake flush with the top of the pan. (The amount you need to fill up the pan might vary depending on the thickness of your cake layers and fruit. I found about 150g of whipped cream was sufficient for a 1.5cm layer of cream.) Chill the cake for at least a few hours or preferably overnight to allow the mousse to fully set.

Wrap a towel soaked in hot water around the pan for about 10 seconds, and then push the removable bottom up to unmold the cake. Cut in half and then cut each half into four slices. Top with a strawberry half if desired.

strawberry lychee coconut shortcake

strawberry matcha pandan chiffon cake

matcha pandan strawberry chiffon cake

The flavours of this cake were inspired by the matcha pandan latte at the cafe Rustle & Still. I’ve made something inspired by this combination before, in these matcha pandan brownies where pandan takes the place of vanilla extract in the brownie base; it’s a nice brownie with a matcha topping and a subtle pandan, but it is first and foremost a chocolate brownie, which doesn’t quite do the matcha-pandan combo justice. This time I wanted to be able to taste (and see!) both flavours more clearly, which resulted in this pandan chiffon cake covered with matcha whipped cream and filled with fresh strawberries.

matcha pandan strawberry chiffon cake

This cake has an intensely green centre from the pandan paste which is hidden by the relatively mild and subtle green of the matcha cream – until you cut the cake open! I think it’s a lovely simple strawberry layer cake for summer!

As I don’t have a tube pan, I approximated one by combining a springform tin with an empty drink can in the centre. Of course if you have a tube pan, that is probably simpler to use, but this trick is handy for getting that tube pan shape. For a smaller 18cm/7″ “tube pan” you’ll need a narrower drink can than the standard pop can, only about 2″ in diameter. They’re relatively common – I had one lying around with a coconut water drink in it. Some carbonated drinks are also sold in these narrower cans, so keep your eye out.

matcha pandan strawberry chiffon cake

strawberry matcha pandan chiffon cake

  • Servings: one 7-inch cake
  • Print

Makeshift tube cake pan method adapted from epicurious. Chiffon cake adapted from Make Fabulous Cakes.

special equipment: 18cm/7″ springform + a narrow ~5.5cm/2″ diameter empty drink can to approximate a tube pan (similar to as seen here, but on a smaller scale) OR a 7″ tube pan

pandan chiffon cake

  • 105g all-purpose flour
  • 1 tsp baking powder
  • good pinch salt
  • 3 eggs, separated
  • 68g whole milk
  • 56g vegetable oil (or ~67mL)
  • 1 tsp pandan extract
  • pinch cream of tartar
  • 65g granulated sugar

to fill and assemble

  • 360g heavy cream
  • 1 tbsp matcha
  • 1 1/2 tbsp granulated sugar, or to taste
  • sliced strawberries

For the chiffon cake, preheat the oven to 325F. Begin by preparing the pan. Line the bottom of a 7″ springform with parchment paper. Butter and flour the sides. Take a narrow empty drink can about 5.5cm in diameter and wrap a piece of parchment around the can, securing it with a piece of string. Put about 2-3 tbsp of water in the can to weigh it down, and place it in the centre of your springform tin. Tube pan approximated!

Now for the actual cake… whisk together the flour, baking powder and salt in a bowl and set aside. Separate the eggs and in a large mixing bowl place the egg yolks along with the milk, oil and pandan extract. Whisk to combine.

Put the whites in the bowl of a stand mixer along with the cream of tartar. Beat until frothy, then sprinkle in the sugar and whip on high speed until nearly stiff peaks.

Meanwhile, add the dry ingredients to the egg yolk mixture and whisk until just combined. Add a large scoop of the egg whites and whisk until mixed in to lighten the batter, then add the remaining whites and gently fold until just combined. Carefully dollop the batter into the prepared tin – I found it’s best transfer scoops of batter all around the pan to not knock over or shift the can in the centre.

Tap the pan on the counter a couple times to pop any large air bubbles, then bake about 40-45 minutes or until an inserted skewer is removed clean.

Carefully tip the pan upside over the sink so any remaining water in the can drains, then let the cake cool upside down, balancing on the drink can in the centre.

To assemble, whip the cream with the matcha and granulated sugar (I found 1 1/2 tbsp was enough to counteract the bitterness of the matcha, add more to taste if you prefer a sweetened whipped cream).

Remove the completely cooled cake from the pan and slice in half. Spread some whipped cream on the bottom half of the cake and arrange strawberry slices overtop. Top with some more whipped cream and spread into an even layer. Put the top half of the cake back on, then cover the cake entirely with the whipped cream.

To garnish, if you like, transfer some softly whipped cream to a piping bag with a large round tip and pipe dollops on top, and swoop a spoon through them. Arrange some strawberry halves over top of the cake as well.

It is best to chill the cake at least an hour before slicing and serving – it let the cream firm up a bit and will make the slicing process a bit tidier.

matcha pandan strawberry chiffon cake

earl grey, raspberry & financier ice cream

earl grey raspberry & financier ice cream

Ice cream is the perfect receptacle for trying out different flavour combinations – an easily infusible base, plus ample room for mix-ins, both solid and swirly. Today’s ice cream is just about copying though… but with such a great combination of flavours (and making use of all the infusible and mixable components), I was a pretty happy copier!

earl grey raspberry & financier ice cream

This flavour combination is based off of a Made by Marcus ice cream (not one I’ve had the chance to try, but I hope to eventually!): earl grey-infused ice cream base, chunks of financier and a raspberry jam swirl. In typical Made by Marcus-brilliance, it is fantastic combination.

Perhaps the most surprising aspect of this ice cream to me was the financier. I wasn’t too sure how it would freeze and considered brushing the cake with sugar syrup or some rum to help keep it soft. However, it stayed soft and plush, with the chill giving it a bit of a toothsome chew.

earl grey raspberry & financier ice cream

earl grey, raspberry & financier ice cream

  • Servings: about 2 1/2 cups ice cream base
  • Print

Financier adapted from Thomas Keller and Sebastien Rouxel’s Bouchon Bakery. Fruit swirl adapted from Stella Parks.

ice cream base

  • 370g whole milk
  • 10g loose leaf earl grey tea
  • 4 egg yolks
  • 30g granulated sugar
  • good pinch salt
  • 160g heavy cream

financier

  • 50g butter
  • 30g ground almonds
  • 20g all-purpose flour
  • 1/8 tsp kosher salt
  • 40g granulated sugar
  • 50g egg whites
  • 1 tsp vanilla extract

raspberry swirl

  • 200g raspberries
  • 50g granulated sugar
  • pinch salt
  • 1-2 tsp lemon juice, to taste

ice cream base

Combine the milk and tea and let cold infuse in the fridge for 24 hours. Pass through a sieve to remove the tea leaves and extract about 320g of infused milk.

Place the milk, egg yolks, sugar and salt together in a heatproof glass bowl and whisk to combine. Set the bowl over a saucepan of simmering water and cook, stirring constantly with a rubber spatula, until the mixture thickens and reaches 160-165F. Immediately transfer to a container and stir in the heavy cream. Let cool then chill completely.

financier

Preheat the oven to 425F. Line the bottom of a loaf tin with parchment and butter the sides.

Place the butter in a small pan and cook, stirring, until the solids are browned and fragrant. Immediately transfer to a bowl to prevent burning. Set aside to cool a bit while you prepare the rest of the batter.

In a medium bowl, whisk together the ground almonds, flour, sugar and salt. Make a well in the centre and add the egg whites and vanilla extract. Whisk to combine until smooth. Fold in the butter in a few additions.

Scrape the batter into the bottom of the prepared pan and spread into an even layer. Place in the oven and turn the temperature down to 375F. Bake for about 10 minutes or until just browned along the edges and a skewer inserted into the centre is removed clean. Let cool on a wire rack.

Cut into 1cm cubes and freeze.

raspberry swirl

Place the raspberries, sugar and salt in a small saucepan. Heat over medium to soften the berries and crush them with your spoon. Bring to a simmer and cook for about 6 minutes, stirring frequently, until the raspberries are reduced and thickened – the weight should be about 160-170 when you take it off the heat.

Put the hot raspberry mixture into a sieve set over a bowl. Use a rubber spatula to vigorously press as much of the raspberries through as possible, leaving the seeds behind. It will take a bit of time and effort, but you should end up with about 100-110g of smooth raspberry sauce. Cover and place in the fridge to chill completely.

assembly

Churn the ice cream base in an ice cream maker according to the manufacturer’s instructions. At the end add about 2/3 – 3/4 of the financier cubes (depending on how chunky you like it) and churn in. Spread half of the ice cream base into a pre-chilled loaf tin. Dollop half of the chilled raspberry sauce over top. Top with the remaining ice cream and then remaining raspberry sauce. Use a small offset spatula to swirl the ice cream a few times and scatter some more financier cubes over top. Freeze completely.

cherry, chocolate & hazelnut tart

cherry, chocolate and hazelnut tart

Pro-choice stances support people’s autonomy to have a child if and when it is best for them. All of the many personal views on abortion aside, it’s about having the right to make that personal decision in the first place, whether it be straightforwards or complicated.

Now for many, the choice is lost. As it currently stands, about half of American states face bans or severe restrictions which will worsen already inequal reproductive health access. It’s a move steeped in partisanship more than anything else, which only makes the infringement on bodily autonomy all the more frustrating and incomprehensible.

The fallout from the loss of Roe vs Wade has also highlighted how abortion is an integral and necessary part of health care, including in the treatment of nonviable and life-threatening ectopic pregnancies, pregnancy complications, and miscarriages. When a necessary procedure is artificially criminalized, fear of litigation compromises health care providers’ professional judgement to provide the best care for their patients. For instance, treatment of medical emergencies have already been delayed due to fetal heartbeat laws in Texas, resulting in more dangerous complications. Even individuals requiring methotrexate for various autoimmune conditions have had trouble receiving their prescriptions because it can also be used for medical abortion. It’s evident that abortion bans were written by lawmakers without any regard for the wellbeing of individuals who can become pregnant, and without any practical sense for the actual ramifications of these laws in medical practice.

When it comes to mourning the overturning of Roe vs Wade, there is much written, much better, than I ever could. But the response in Canada has also about remembering what not to take for granted and where our systems are still very lacking. While the legal status of abortion in Canada does not appear to be under immediate threat, access always has been; take New Brunswick, where access to provincially funded abortions is nearly non-existent.

cherry, chocolate and hazelnut tart

In the remaining provinces and territories, access can still be fraught. With the vast majority of providers located in major urban centres, rural residents must contend with the costs and burden of travel and time off, which only exacerbate socioeconomic disadvantages. Further, in some provinces, actual abortion-providing facilities are far outnumbered by crisis pregnancy centres (CPCs). These organizations target pregnant individuals to discourage abortion, including through misrepresentation of the options. Recent events only underline what has always been the case – that we need the continued work of pro-choice advocates and organizations like Action Canada and Abortion Rights Coalition of Canada to ensure that reproductive health care can be accessed by everyone as needed.

The larger issue is more than just abortion though: some people face discrimination for being or wanting to become parents, and there are myriad ways in which societal inequities can make raising children more difficult. Addressing abortion rights as part of reproductive justice extends to supporting those who are already or may become parents – including addressing the deep racism which underlies atrocities such as forced sterilizations, birth alerts, and over-representation of Indigenous children in care.

More things:

cherry, chocolate and hazelnut tart

And as for cherry season – while I haven’t made too much with cherries this year yet, I have been sitting on this cherry, chocolate and hazelnut tart for a couple years.

This tart is fun (and also rather uncontroversial) – a bottom chocolate layer that slices like a smooth and thick ganache, a soft nutty hazelnut mascarpone cream layer over top and then covered with plenty of cherries. I’ve made small tarts with a ring of cherries arranged this way and it’s even more fun in a large tart for multiple concentric rings of cherries! It’s a bit tricky to cut though, so admire your carefully arranged fruit before slicing. If you chill the tart for a couple hours after the assembly, it will help the top layer firm up and keep the cherries in place.

cherry, chocolate and hazelnut tart

cherry chocolate and hazelnut tart

  • Servings: 15cm (6-inch) tart
  • Print

Chocolate tart filling adapted from Tasty. Be careful not to overcook this layer or it becomes dry!

special equipment: tart ring 15cm in diameter and 4cm tall – no idea how I found this anymore, but I realize it certainly isn’t a standard dimension! You can definitely use a rings of a different size, just be aware it might affect how much tart dough, filling and fruit you need, as well as baking time. For instance, a 15cm wide/2.5cm tall ring would hold less, whereas I think a ~20-24cm wide ring/2.5cm tall might hold a similar volume but would likely need more tart dough to line the ring, and still have a shorter baking time to accommodate the thinner layer of filling.

tart shell

  • 56g soft butter
  • 1/4 tsp kosher salt
  • 2 tsp granulated sugar
  • 25g egg, at room temperature
  • 15g cocoa powder
  • 90g flour, half all-purpose and half whole wheat

chocolate layer

  • 85g 85% dark chocolate
  • 15g granulated sugar
  • pinch salt
  • 40g water
  • 56g butter
  • 1 tbsp kirsch, optional
  • 1 1/2 large eggs (75g)

hazelnut mascarpone cream

  • 40g slightly coarse hazelnut praline paste (recipe here)
  • 100g mascarpone
  • 50g heavy cream
  • 1 tsp granulated sugar

assembly

  • 400g cherries
  • halved hazelnuts
  • grated dark chocolate

tart shell

Cream together the butter, sugar, and salt. Add the egg, a bit at a time, beating in each addition before the next. Lastly mix in the flours and cocoa powder until a cohesive dough is formed. 

Roll out between two sheets of parchment paper until about 3mm thick and chill completely.

Place a 16cm (6 1/2″) tart ring that is 4cm tall on a baking tray lined with parchment paper. Line the tart ring with the pastry – I prefer to line the bottom and sides separately – for details of the method look at this page. Cover and chill completely.

Preheat the oven to 375F. Dock the bottom of the tart shell with a fork. Bake for about 12 minutes or until the pastry appears to have dried and firmed up.

chocolate filling layer

Preheat the oven to 300F.

Place the chopped chocolate and sugar together in a bowl. Heat the milk and butter together in a small saucepan until it comes to a boil, then pour over the chocolate and whisk until the mixture is smooth and glossy. Whisk in the kirsch and eggs. 

Scrape into the prebaked tart shell and tap to level. If bubbles are visible, bounce the back of a spoon over the surface of the filling to pop them. 

Bake until the filling is mostly set and the centre is still a little jiggly, around 15-18 minutes. Let cool then chill completely.

hazelnut mascarpone

Cream together the praline paste and mascarpone. Whip the cream together with the granulated sugar and fold into the mascarpone mixture. Spread over the chilled tart, return to the fridge and chill.

This layer is quite soft initially but it does firm up after a couple hours in the fridge – this can be before or after adding the cherries, but be sure to take time to chill the tart again before attempting to slice it. 

assembly

Cut the cherries in half, like you would a clingfree peach or nectarine: use a small knife to cut the cherry around the pit and then twist the two halves to split them. Pry the pit out of the half that hangs onto it. Arrange the cherry halves in circles on the surface of the tart, starting from the edge and working your way in. In the very centre place two cherry halves stacked on top of each other. Scatter some some halved hazelnuts on top. Grate a bit of dark chocolate over the tart. Chill the tart in the fridge for an hour or two to allow the hazelnut mascarpone to firm up, which will make it a bit easier to slice.

birch flower & hazelnut summer fruit tarts

birch flower fruit tarts

Épices de cru, in Montreal’s Jean-Talon Market, occupies a brightly painted narrow stall, shelves stacked with tins of different spices, as well as ingredients that aren’t spices in the most traditional sense, like local Quebec dried spruce tips or clover flowers. My aunt/uncle/cousin had gotten me the most lovely assortment of spices for baking one year and I’ve been excited to try using them in a dessert. These tarts are based around dried yellow birch flowers – minute, pale flowers which come with an aroma of oolong tea, grass, sandalwood incense and tonka bean.

birch flower fruit tarts

The starting point for these tarts were the dried yellow birch flowers, but even after getting multiple people to smell the dried flowers and tell me what they thought they smelled like (you can thank them for the bougie aroma profile in the previous paragraph), I still had no idea what to pair it with. So I went with all the fruits I had on hand: plumcots, cherries and strawberries. Given the woodiness of the yellow birch flower, I thought nuts could also be a nice accompaniment; in the bottom of each tart I layered a thin slick of hazelnut praline paste. It worked out very well actually – the praline paste anchors the pastry cream, with a rounded dessert-y caramel nuttiness that brings out the more amicable flavours of the yellow birch flower.

I wasn’t sure what to expect, but I ended up loving these tarts!

birch flower fruit tarts

birch flower & hazelnut summer fruit tarts

  • Servings: four 3-inch tarts
  • Print

tart shells

  • 115g butter
  • 2 tsp sugar
  • 1/4 tsp kosher salt
  • 1 large egg
  • 200g flour, half whole wheat and half all-purpose

hazelnut praline paste

  • 100g hazelnuts
  • 100g sugar

yellow birch flower pastry cream

  • 240g whole milk
  • 2 1/2 tbsp very lightly packed dried yellow birch flower (approx 1-2g)
  • 2 egg yolks
  • 10g cornstarch
  • 1 tbsp + 1 tsp sugar (or more to taste – typically recipes classically use 3-4 tbsp)
  • 1 tbsp butter

assembly

  • fruit! I used 1 plumcot, and about 8 cherries and 8 strawberries, but use whatever you have on hand

tart shells

This makes about twice the amount of pastry you’ll actually need to line the tart shells, but having this much pastry makes it easier – and then you can use the rest for another project.

Cream the butter with the sugar and salt. Beat the egg in a small bowl and add to the butter in four additions, thoroughly mixing in each addition. Add the flours and stir until a dough is formed. Knead a couple times to bring it together.

Divide the dough in half and roll out each between parchment to about 2-3mm thick. Chill completely. 

Set four 3″ tart rings on a parchment lined tray and line with pastry – for details of methods, you can look at this page.

Trim one half of the dough into a rectangle and slice into long strips – they should be longer than the circumference of the rings and wider than the height of the tart rings. Take a strip and use it to line the sides of a tart ring, cutting the excess length and pressing the two edges together to seal (have a bit of overlap to help seal).

Cut circles 0.5cm smaller than the diametre of the tart ring from the other half of the dough. Fit these circles of pastry into the bottom of rings and press along the seam between the side and base to seal. If there is a bit of a gap, press along the edges of the base to make it slightly wider until it meets the pastry lining the walls. Trim the excess pastry height with a sharp knife to bring it level with the side of the tart rings. Cover and chill completely.

Preheat the oven to 375F. Dock the bases of the chilled tart shells with a fork. Bake for about 20 minutes or until golden brown. Let cool completely.

hazelnut praline paste

This makes quite a bit more than you’ll need, but if you’re going to the trouble of making it, you may as well make more as it keeps very well.

Spread the hazelnuts out over a baking tray covered with parchment paper. Place the sugar in a small saucepan along with a splash of water. Heat the mixture until it boils and the sugar is dissolved. Allow to continue cooking over medium to medium-high heat until the sugar caramelizes, swirling occasionally. Cook to the desired degree of caramelization – I went for a darker amber. Pour over the hazelnuts. Allow to cool.

Chop the praline into pieces. Place in the bowl of a food processor along with 1/4 tsp kosher salt and pulse until a paste is formed. Place in the fridge. 

yellow birch flower pastry cream

Begin by infusing the milk. Bring the milk to a simmer and stir in the yellow birch flowers. Cover and set aside to cool, then transfer to the fridge to finish steeping overnight. 

The next day whisk the sugar, egg yolks and cornstarch together in a bowl. Set aside.

Pass the infused milk through a sieve to remove the flowers. Place the milk in a saucepan and heat until it simmers. Slowly pour the milk into the egg yolks, while whisking constantly to temper the eggs. 

Return the mixture to the saucepan and cook over medium to medium-high while whisking constantly. Look for the pastry cream to begin to bubble and to thicken considerably. To ensure the starch is cooked, let the pastry cream cook at a bubble for at least 1 minute (all the while whisking very vigorously!).

Whisk in the butter and then immediately transfer to a bowl (at this point you can taste for sweetness and add more sugar as per your preference). Cover and chill. 

assembly

Spread 1-2 tsp of hazelnut praline paste on the bottom of each baked tart shell. Whisk the pastry cream to loosen and smooth it, then dollop into the tart shells and spread smooth with an offset spatula. Arrange fruit on top. 

birch flower fruit tarts

ispahan cream puff

ispahan cream puff
ispahan cream puff
ispahan cream puff
ispahan cream puff

I’ve always loved election nights as a kid. My family and I would watch the whole thing, starting from the first counts as polls closed on the East coast to a final declaration late in the evening. I would cheer on the underdog Green Party because, as a seven-year old, their platform was by far the easiest to grasp. It wasn’t so much the election itself, which at the time was blissfully meaningless to me, but that I loved any chance for an occasion.

These days my election-mania is tempered by plenty of stress. Alongside a climate crisis and a long-overdue commitment to reconciliation, if anything, the pandemic has solidified the immediacy and impact of government in our lives (though it’s mostly the provincial government in terms of public health). But yes, I am still excited at the prospect of watching the numbers slowly climb and listening to endless commentary on the leaders, campaigns and battleground ridings. Any chance for an occasion, I guess.

ispahan cream puff

These cream puffs are based on Pierre Herme’s formidable flavour combination, ispahan – raspberry, rose and lychee. I filled choux au craquelin with lychee mousse, topped them with raspberry rosewater ganache and a ring of fresh raspberries. It really is a remarkably good combination – the floral aspects of lychee play off the rosewater, and all the sweetness balanced by the tartness of raspberry. (There is an ispahan roll cake on the blog too, by the way!)

I will warn you though: these cream puffs are definitely a bit more on the sweet side given that I used syrupy canned lychees in the mousse and a white chocolate whipped ganache!

ispahan cream puff

ispahan cream puff

  • Servings: about 10-12 puffs
  • Print

choux pastry

craquelin

  • 56g brown sugar
  • 50g whole wheat flour
  • 36g soft butter

choux pastry

  • 56g butter
  • 120g milk
  • pinch kosher salt
  • sprinkle of granulated sugar
  • 60g whole wheat flour
  • 2 eggs (may not use all)

For the craquelin, mix all ingredients together until it forms a cohesive dough. Place the dough between two sheets of parchment and roll out to a thickness of 1-2mm. Slide onto a pan and freeze until firm.

For the choux pastry, preheat the oven to 400F. Line a baking pan with a sheet of parchment paper – on the backside, trace twelve well-spaced 4.5cm circles (a couple extra too if you can fit them).

Place the butter, milk, sugar and salt in a saucepan and bring to a boil. Add the flour and quickly mix in with a wooden spoon. Lower the heat and continue to cook the mixture until it forms a ball. Remove the pastry from the heat and let cool a bit before adding the egg.

Beat the eggs in a small bowl. Add a bit at a time to the pastry. Assess the consistency of the dough after each addition of egg and stop once you’ve achieved the right consistency. I find it easiest to begin beating in the eggs with a wire whisk and then transition back to stirring with a wooden spoon once the batter loosens. The dough should be shiny, but not fluid (if its something a bit new to you, look up a video or a more detailed tutorial for the right consistency – such as looking for the “triangle” of dough!). Importantly, you don’t need to use all the egg – or you may need a bit more or less! 

Transfer the pastry to a piping bag fitted with a large round tip. Pipe mounds of pastry onto the 4.5cm circles. To make the size consistent, I position the piping bag a little ways above the pan (1.5-2cm or so – it will be quite natural!) and pipe until the mound of dough nearly fills out the circular guide drawn on the parchment. I avoid lifting the piping bag too much further up as I pipe – if you do that, you end up with a larger and taller mound of pastry and the size will not be as consistent. Depending on how tall you pipe the puffs (I usually pipe them 1.5-2cm tall), you’ll end up with about 10-12.

Take the craquelin out of the freezer and cut 5cm circles from the dough. Top each puff with a round of the craquelin.

Bake for 10 minutes at 400F, then decrease temperature to 375F and bake about 30 minutes more or until well browned. You can rotate the puffs after they’ve been in the oven for 20-25 minutes or so, once there are no worries of them deflating. Use a small knife to cut a small slit on the top or side of each puff to let the steam release and let cool on on a wire rack.

rose raspberry whipped ganache

  • 50g white chocolate, chopped
  • small pinch kosher salt
  • 85g heavy cream
  • 15g strained raspberry puree (from about 40g raspberries)
  • 1/4 tsp rosewater, or to taste (may vary depending on the strength of your rosewater)

Place the chopped chocolate and salt in a heatproof bowl. Place the cream in a small saucepan and bring to a boil. Pour over the white chocolate. Allow to sit for a couple minutes for the chocolate to begin melting, then whisk until smooth. Whisk in the raspberry puree and rosewater.

Cover and chill completely. Whip up the ganache when you’re ready to assemble the cream puffs (see assembly section below). 

lychee rose mousse

  • 3/4 tsp powdered gelatin bloomed in 1 1/2 tbsp water
  • 90g strained lychee puree, at room temperature
  • 3/4 tsp rosewater, or to taste (may vary depending on the strength of your rosewater)
  • 90g heavy cream

Microwave the bloomed gelatin until melted (about 10 seconds should suffice) and whisk into the lychee puree along with the rosewater.

In a separate bowl, whip the cream. Add the lychee puree and use a whisk to fold gently fold together (reference this souffle cheesecake video – watch from 4:54-6:05 for a demonstration). At the end you can switch to a rubber spatula for the last few folds.

Use the mousse right away, before it sets!  

assembly

  • 10-12 raspberries for the centre of each cream puff (optional)
  • about 25-30 raspberries (2-2.5 per puff), cut in half, for topping each puff – the number needed may vary depending on the size of your raspberries and circumference of cream puffs

Slice the top off of each cream puff.

Fill the puffs with the freshly made lychee mousse by spooning it into each puff. If you like, you can push in a raspberry into the mousse now so there is one in the centre of each cream puff. To make sure the entire puff is filled, tap the puffs on the work surface to settle the mousse. If the level drops, spoon more mousse into the puff and repeat the tapping and filling as needed until each puff is filled.

Place the puffs in the fridge for 1 hour to allow the mousse to set.

Once set, whip the rose raspberry ganache until thick and stiff. Transfer to a piping bag fitted with a large round tip (I used one about 1.7cm in diametre). Pipe a dollop of the whipped ganache on top of each puff. Arrange raspberry halves around the ganache. Finally, replace the top of each cream puff. If the edges of the cream puff lids are a bit rough, you can trim them to even out the edges and make the lids more circular. Serve right away!

cherry mint stracciatella

cherry mint stracciatella

The ice cream has a mint-infused roasted cherry base ribboned throughout with snappy veins of chocolate. It makes a wonderfully fruity mint ice cream with a chocolate flavour that doesn’t overwhelm.

cherry mint stracciatella

I first thought of this ice cream as a cherry mint chocolate chip. My mum, however, isn’t a fan of how hard frozen chocolate chips get, so I decided to use a stracciatella-type technique. Stracciatella is a term which applies to both gelato and egg-ribboned soup; on the gelato side it is usually done by drizzling melted chocolate into a gelato base while it churns. The chocolate freezes upon contact with the ice cream, forming small shards which snap and melt in the mouth. To enhance the meltiness, I took inspiration from Stella Parks’s recipe in which she stirs in some coconut oil to lower the melting point (here I used a smaller quantity of canola oil, given its even lower melting temperature).

If you have a manual ice cream maker like me, drizzle in a bit of chocolate, then replace the lid and give the base a few churns. Repeat several times until the chocolate is done. I found I didn’t need too much chocolate (though of course you can add more if you prefer) so it goes quite quickly despite the extra steps.

(In the pictures I’m pouring David Lebovitz’s chocolate sauce made with a good pinch of salt.)

cherry mint stracciatella

cherry mint chocolate ice cream

  • Servings: about 2 cups ice cream base
  • Print

Some techniques taken from Stella Park’s cherry ice cream and stracciatella

  • 400g cherries
  • 2 tbsp granulated sugar, divided
  • 250g heavy cream
  • 4g (1/4 cup gently packed) fresh mint leaves, coarsely chopped
  • 100g whole milk
  • 1 egg yolk
  • 30-60g dark chocolate
  • 3-6g neutral oil

Begin by roasting the cherries. Preheat the oven to 400F. Use a baking casserole or line a small baking tray with parchment paper. Combine the cherries and 1 tbsp of granulated sugar. Bake, stirring every so often, for about 45 minutes or until the cherries are cooked and have started to wrinkle a bit. Do turn down the heat if anything begins to burn. 

Once the cherries have cooled, pop out the pits and reserve. Grind up the roasted cherry flesh using either an immersion blender or a food processor.

Then infuse the cream. Warm the cream until it is steaming. Stir in the reserved cherry pits and mint leaves. Cover and let cool, then transfer to the fridge to infuse overnight. The next day strain the cream to remove the mint and cherry pits.

Prepare the custard. Whisk together the milk, egg yolk and remaining 1 tbsp of sugar in a glass bowl. Set the bowl over a pot of simmering water. Stir constantly until it thickens or reaches about 160F. Transfer to a container, cover and chill completely.

Combine everything together. Stir the roasted cherry puree into the cream, then whisk in the custard. At this point to make it a bit smoother you can use an immersion blender or transfer the base to a blender/food processor. 

Churn the ice cream. Melt the chocolate and stir in the oil. Once the ice cream has become thick, but still soft enough to churn, drizzle in the chocolate. You can either drizzle it in continuously while the ice cream stirs. As my ice cream maker needs the lid on to stabilize the paddles, I drizzled in just a spoonful of the melted chocolate at a time, closed it up, gave it a few turns, then repeated it again until all the chocolate was used. 

houjicha, kinako & peach tiramisù

houjicha kinako peach tiramisu

Maybe I have developed a bit of a tiramisù obsession. I love the flavours of coffee and marsala, but also the format of a well saturated cake component with plenty of thick cream – and it lends itself well to other flavour profiles too. Which means I can make even more tiramisù!

And I think this one is particularly lovely – it has both the toasty flavours of houjicha (roasted green tea) and kinako (roasted soybean powder), layered with fresh peaches and a mascarpone cream.

houjicha kinako peach tiramisu

I put this together much like one would a regular tiramisù. Begin with a layer of ladyfingers soaked in houjicha – I think it’s a great substitute as it has the body of coffee, but with a gentler tea flavour. After that, scatter a layer of diced peaches and cover it all with a marscarpone-based cream. Finish with kinako, which is often served heavily dusted over different varieties of wagashi, generously sprinkled overtop.

I made mine in a 23x32cm (~9×12″) oval saute pan (area of about 577cm2) ; alternatively, you could make this in a 9×9″ square pan (area of about 480cm2 so layers will be a bit thicker). If you have a deeper dish for a double layered tiramisù, you may need to double the recipe.

houjicha kinako peach tiramisu

houjicha, kinako & peach tiramisù

  • Servings: 23x32cm oval pan
  • Print

Mascarpone cream adapted from Sally’s Baking Addiction, with technique for cooking the eggs borrowed from Stella Park’s semifreddo.

mascarpone cream

  • 2 large eggs
  • 35g sugar
  • 200g mascarpone
  • 2 tbsp marsala
  • 200g heavy cream, whipped

houjicha soak

  • 60mL hot water
  • 1 tbsp houjicha powder

assembly

  • 2 peaches, peeled and chopped into 1-1.5cm cubes (200g chopped peaches)
  • ~2 dozen homemade ladyfingers (see recipe below; you’ll need fewer if storebought larger ones)
  • kinako

special equipment

  • 23x32cm (~9×12″) oval pan – the closest standard pan is probably a 9×9″ square tin, or use whatever you have and spread the components thicker or thinner

for the mascarpone cream, whisk together the eggs and sugar in a glass bowl. Set over a saucepan of simmering water and stir constantly with a rubber spatula, heating the eggs until they reach 165F. They’ll appear syrupy and quite warm to the touch.

Transfer the eggs to the bowl of a standmixer and whip until they become pale, opaque, more voluminous and cool, about 10-15 minutes on medium-high to high speed. The eggs should be thick enough to mound up when dropped from the whisk. (As it’s a smaller volume, it’s a bit tricky to really whip them up with the standmixer – they’ll likely only be doubled in volume instead of quadripled.)

Cream the mascarpone and marsala together in a large bowl. Fold in the whipped cream, then fold in the eggs. 

for the houjicha soak, whisk together the hot water and houjicha powder.

to assemble, have a 23x32cm (~9×12″) oval pan at hand. Dip both sides of the ladyfingers in the houjicha soak and use to cover the bottom of the pan. Break the cookies into pieces as needed to fill in all the gaps. Scatter the chopped peaches evenly over the cookies, then dollop the mascarpone overtop. Spread into an even layer with an offset spatula. Place in the fridge for at least couple hours or overnight. Just before serving, dust the top generously with kinako.

savoiardi (ladyfingers) 

Makes about 3 dozen 9cm savoiardi. Adapted from As Easy as Apple Pie, with some adjustments to the method. 

  • 43g all-purpose flour
  • 20g potato starch or corn starch
  • 2 eggs, separated
  • 50g sugar, divided
  • Pinch salt
  • pinch cream of tartar
  • 7g milk

Preheat the oven to 350F. Line a 3/4 baking sheet with parchment paper (or use two regular half baking sheets).

Whisk together the flour and cornstarch in a small bowl. 

Place the egg whites in the bowl of a standmixer along with half of the sugar (25g), salt and cream of tartar. Whip until stiff peaks are just formed (if anything, aim a little under – very firm, approach stiff). 

While the egg whites whip, in a large bowl whisk the egg yolks and remaining 25g sugar with a handwhisk until very light, fluffy and doubled or tripled in volume. Whisk the milk into the egg yolks.

Whisk a dollop of the egg whites into the egg yolks to lighten, the fold in the remaining egg whites with a rubber spatula. Sift the flour mixture over top. Fold in gently until just combined.

Fill a piping bag fitted with a 1.2cm round tip (I used Wilton 2A – you can also pipe them bigger if you prefer!) and pipe strips of batter about 9cm long on the prepared trays. 

Bake for about 10-15 minutes or until lightly browned. Let cool, then store in an airtight container.

peach almond crostata

peach almond crostata

Please be advised that this post discusses residential schools and the recent tragic discoveries of unmarked graves.

What sort of school comes with a graveyard?

About three months ago the Tk’emlúps te Secwépemc First Nation found the remains of 215 children buried at the former Kamloops Residential School. Not long after, the Cowessess First Nation who reported 751 unmarked grave sites by Marieval Residential School. Then there were more and more – and still many other investigations are currently underway. These finding reflected what families and survivors had been explaining all along. Survivors of these “schools” (and remember, the last one closed in only 1996) live with trauma, their descendants with intergenerational trauma, yet have been continually questioned and disbelieved. I can only begin to imagine the complexity of the recent news for affected communities: the importance of these discoveries, but also the retraumatization, the grieving, and even after all this, encountering the resistance of institutions to release records and minimal political will for change.

And to be clear, it doesn’t end there and never really has. The Sixties Scoop saw, through child welfare services, a mass removal of indigenous children from their families. These policies persist to this day: over half of children in care are Indigenous and there are more children currently separated from their families today than there were during the height of the residential school system. Dozens of children continue to die in care every year – see in Alberta, Saskatchewan and Ontario. This is not just something for us to move past – and we have blueprints from the TRC and MMIWG recommendations of what needs to change.

peach almond crostata

Just how many wake-up calls do we need? This should be an election issue, yet it doesn’t seem to be. With the federal election happening soon, ask candidates in your riding what plans they have to implement the TRC and MMIWG recommendations.

Read:

Support:

peach almond crostata

This peach almond crostata is very much inspired by Forno Cultura‘s summer peach crostata. And what a great formula for a fruit tart it is: pastry, almond cream, jam, sliced fruit and slivered almonds to fill in the gaps. The exciting new component for me is the pasta frolla, which makes up a sweet and tender crust with a biscuity crispness to it… I can’t wait to make more crostatas next summer!

peach almond crostata

peach almond crostata

  • Servings: one 14 by 4 1/2 inch tart (36 by 12cm)
  • Print

Crostata inspired by Forno Cultura. Pasta frolla adapted from Domenica Marchetti. Almond cream based on a typical frangipane ratio.

special equipment

  • 14×4 1/2 inch rectangular tart tin (36x12cm)

pasta frolla

  • 180g all-purpose flour
  • 40g icing sugar
  • 1/4 tsp kosher salt
  • scant 3/4 tsp baking powder
  • 110g cold butter, cut into small cubes
  • 1 large egg

peach jam

  • 2 peaches, peeled, pitted and finely chopped
  • 1 tbsp granulated sugar

almond cream

  • 56g soft butter
  • 45g granulated sugar
  • 65g finely ground almonds
  • 1 large egg
  • 12g all purpose flour
  • 2 tbsp amaretto (or dark rum)

assembly

  • about 2 peaches
  • slivered almonds
  • apricot jam to glaze (optional)

For the pasta frolla, place the flour, icing sugar, baking powder and salt in the bowl a food process and pulse to combine. Add the butter and process until the mixture resembles fine crumbs. Add the egg and process until the dough begins to come together into a few large clumps – it will take a little while, around 30 seconds.

Press the dough together into a disc, wrap in plastic and chill completely.

For the peach jam, place the chopped peach and sugar together int a small saucepan. Heat over medium heat until the peach is softened. Crush with a potato masher or back of a fork to a rough puree, then bring to a simmer for a few minutes until the mixture is thickened and jam-like. Let cool.

For the almond cream, cream the butter and sugar until fluffy. Mix in the almonds, then beat in the egg. Next, mix in the flour and finally the amaretto.

To assemble, roll out the pasta frolla on a lightly floured surface until it’s about 3mm (1/4″) thick. Drape over a 36x12cm rectangular tart tin, pressing the dough into all the edges and corners and trimming off the excess. Patch any tears. Cover and chill completely.

Preheat the oven to 375F. Spread the almond cream into the bottom of the tart. Dollop small spoonfuls of the jam evenly overtop and then gently spread to cover most of the surface (if you’re having trouble spreading the jam you can chill the almond cream first to firm it up a bit).

Cut the two peaches in half. Slice each half into thin slices. Set aside a few of the smaller slices from each end and fan the remaining slices alongside one edge of the tart (see pictures). Sprinkle the remaining surface area with slivered almonds.

Bake about 35-40 minutes or until the tart is browned. If you’d like to glaze the peach slices, melt together 2 tsp apricot jam with 1/2 tsp water and brush over the baked peaches. Let cool completely.

sugared walnut raspberry buns

sugared walnut raspberry buns

Soft semi-whole wheat dough, walnut frangipane, raspberries, rolled in butter and sugar. Sometimes I wish I was just writing a menu because then all I’d have room for was that sentence. But this seems to be a blog so let’s forge onwards…

sugared walnut raspberry buns

These buns first originated for a picnic a few years ago. At the time I was intent on baking the buns in cylindrical metal rings – inspired by Vanilla Bean Blog’s iconic cinnamon buns – so I cobbled together variously sized metal rings. The different diameters are hardly a recipe for consistency! That, and I found the rings all in all too finicky, so in the third try I backtracked to muffin tins – consistent and convenient.

I use frangipane (well, not quite – more accurately, nut cream) as a filling – it puffs and crisps where it leaks from the dough, and bakes up rich and nutty where it’s rolled snugly in the middle of the buns. For the best flavour I recommend toasting the walnuts ahead of time, then cooling them down very well and finely chopping them before grinding (warm nuts leak oil far more easily). Despite all the visible sugar, these buns aren’t too sweet.

If you’re making these buns ahead of time, leave the butter and sugar dip until the day you’re serving them – when packed into an airtight container, the sugar tends to moisten and the buns lose their frosty sugared appearance.

sugared walnut raspberry buns

sugared walnut raspberry buns

Bun dough adapted from, though over multiple renditions it no longer much resembles, basic sweet dough from The Nordic Baking Book by Magnus Nilsson. Filling based on a standard frangipane ratio. 

dough

  • 100g whole-wheat flour
  • 150g all-purpose flour
  • 1 1/4 tsp instant yeast
  • 1/4 tsp kosher salt
  • 150g warm milk
  • 40g egg
  • 70g soft butter

filling

  • 50g soft butter
  • 50g granulated sugar
  • scant 1/4 tsp kosher salt
  • 75g toasted and finely ground walnut
  • 1/2 tsp ground cardamom
  • 1 large egg
  • 15g all-purpose flour
  • 130g raspberries

coating

  • melted butter
  • granulated sugar

To make the dough, in a bowl, combine the flour, salt and yeast. Add the warm milk and the egg and stir with a wooden spoon until a rough dough is formed. Knead for a few minutes or until smooth. If the dough is sticky, you can use some additional flour. At this point the dough may be fairly stiff.

Knead a bit of the butter into the dough at a time. At the beginning it will feel like you’re only smearing the butter on the counter, but persist and eventually the butter will become incorporated. Knead in each addition of butter completely before the next. At the end you’ll have a very smooth and soft dough. Place in a bowl, cover and let rise for about 1 hour or until doubled.

For the filling, cream the butter, sugar and salt together. Add the ground walnut and cardamom. Beat in the egg, and lastly mix in the flour.

Meanwhile, butter a standard 12-cup muffin tin. I did not have too many problems with sticking, but you can put a small square of parchment paper in the bottom of each cup to be safe.

Once the dough is risen, deflate it and turn it out onto a very lightly floured counter. Roll out the dough to around 13 1/2″ by 15″. I find it easiest to allow the dough to cling to counter by using little flour, roll it out to the desired size, and then cover the dough with a damp towel or plastic to rest for about 15-20 minutes. This way the dough relaxes and will not spring back much.

Spread the dough with the walnut mixture, leaving just one strip along a long side bare in order to seal the log. Scatter the raspberries evenly overtop. Beginning at a long end, roll up the dough into a log.

Use floss to cut the log into 12 pieces and place each into a muffin cup. Cover and let rise until puffed, about 45 minutes.

Meanwhile, preheat the oven to 375F. Once risen, place the buns in the oven and turn the temperature to 350F. Bake until browned, about 20-25 minutes. Once cooled enough to touch, remove the buns from the tin to finish cooling on a wire rack. You may need to use a knife around the edge and then slide it to free the bottom of the bun if any have stuck.

Once cooled completely, brush the buns with melted butter and roll in granulated sugar. If you’re not serving the buns until the next day, wait to butter and sugar them until then.