pineapple & fennel seed pineapple bun shortcake

pineapple fennel pineapple bun shortcake

Perhaps you expected this – for if there is a savoury pineapple pineapple bun, surely there should be a sweet pineapple pineapple bun.

Introducing pineapple in a pineapple bun part 2: sweet edition!

I was initially inspired to make a pineapple bun shortcake from a brilliant strawberry shortcake pineapple bun at Pearl River Deli in LA (another example of a faraway restaurant I like to longingly look at the menu of). Analogous to an American-style strawberry shortcake, this version has all the same elements: cream, fruit, and starchy receptacle, with pineapple instead of strawberry, and biscuit swapped out for fluffy pineapple bun instead.

pineapple fennel pineapple bun shortcake

I tried a couple types of filling. A lemongrass-infused cream and minty pineapple was okay, but didn’t quite land right. It was the second go, a fennel seed and brown sugar pineapple, that was my favourite.

These are not easy or tidy to eat, but nor is the usual shortcake anyways – cream squishes out everywhere, it takes a bit of maneuvering to get all the components in one bite. Should you pick it up and bite it? Hack at it with a fork? There are no perfect answers to this question.

And while this was an excuse for me to make pineapple buns, you could of course do this with pineapple buns from a bakery for a quicker dessert!

pineapple fennel pineapple bun shortcake

pineapple & fennel pineapple bun shortcake

Enough to generously stuff 4 pineapple buns.

brown sugar fennel seed pineapple

  • 1 tbsp butter
  • 2 tbsp brown sugar
  • 1/4 tsp fennel seeds, finely ground (or to taste, depending on your fennel preferences; feel free to leave out if you don’t like fennel)
  • 1/2 pineapple, peeled, cored, sliced 1cm thick, and cut into chunks

assembly

  • 180g whipping cream
  • sugar, to sweeten cream to taste
  • 4 pineapple buns, recipe follows
  • mint leaves, chiffonaded, optional
  • cilantro leaves, optional

For the brown sugar pineapple, place the butter, brown sugar and ground fennel in a pan over medium-high heat. Cook until it comes to a bubble and the sugar melts into the butter, then add the pineapple and cook for a few minutes more until the juices are reduced and syrupy, and all the pineapple is coated and warmed.

To assemble, whip the cream and add a bit of sugar to sweeten to taste. Cut the pineapple buns in half. Put a generous dollop on cream on the bottom, spoon over some warm pineapple with juices, and scattered with some chopped mint and cilantro, if using. Eat right away.

While I like the aesthetic of cream-then-pineapple, pineapple-then-cream is a bit tidier to eat I think. Up to you!

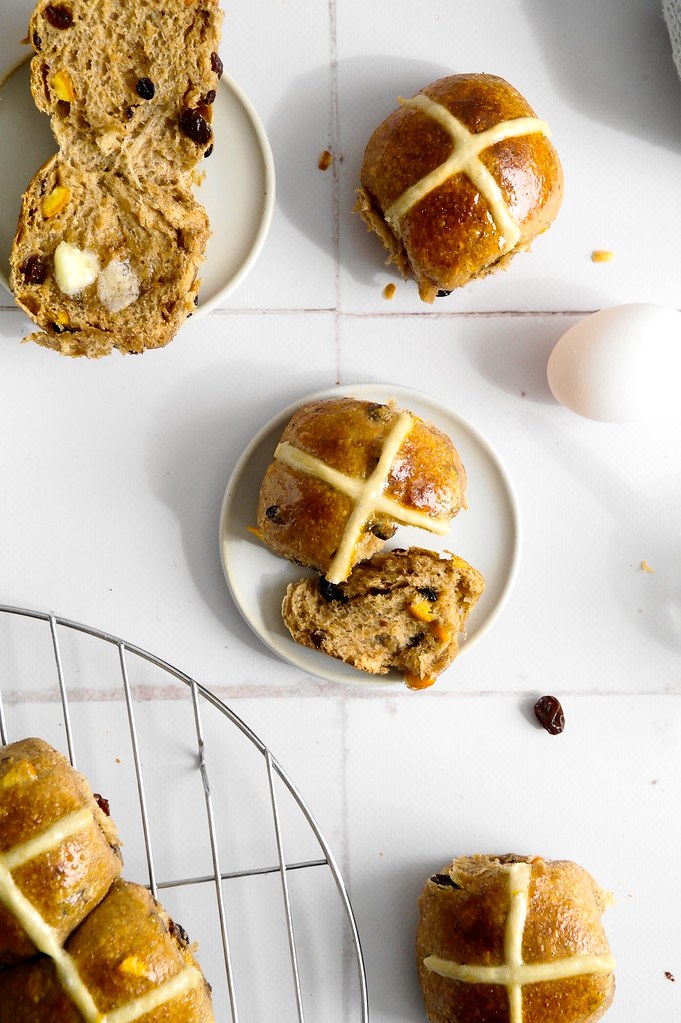
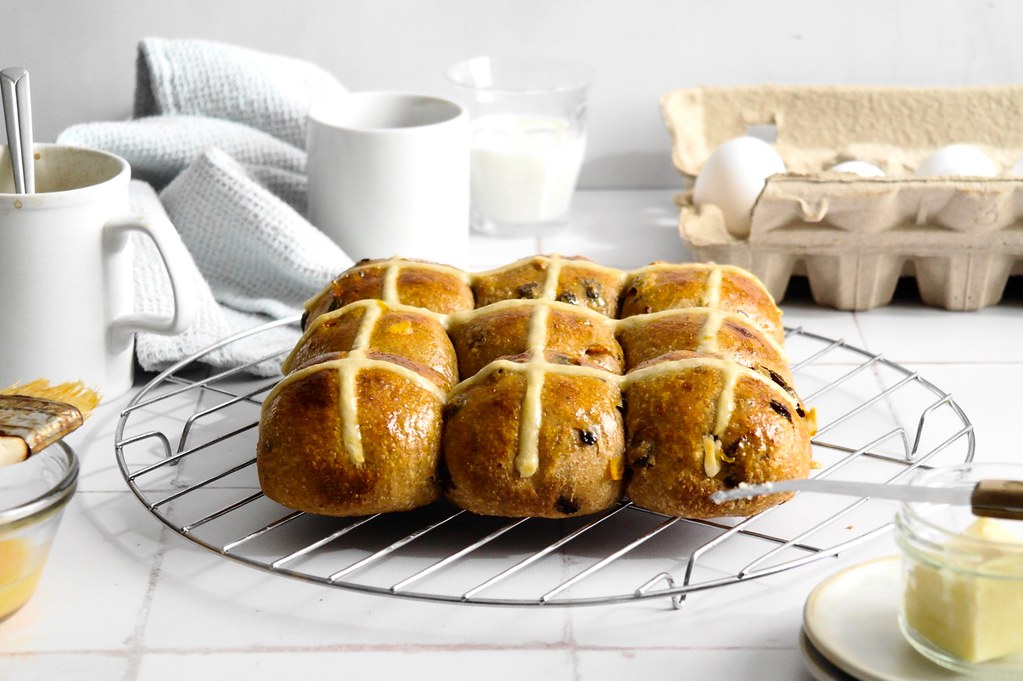
pineapple buns (makes 6)

Six pineapple buns so there are a couple extra to eat as is. Pineapple topping adapted from mthmchris and bun dough adapted from Christine’s Recipes.

pineapple bun topping

  • 50g butter
  • 50g granulated sugar
  • 1/2 tsp baking powder
  • 1/4 tsp kosher salt
  • 10g egg
  • 75g all-purpose flour

tangzhong

  • 64g water
  • 13g flour

dough

  • slightly generous 1/2 tsp active dry yeast
  • 1 tbsp warm water
  • 50g milk
  • 15g cream
  • 30g egg
  • 190g all-purpose flour + 6g wheat gluten (or 196g bread flour)
  • 1/2 tsp kosher salt
  • 30g granulated sugar
  • 22g soft butter
  • beaten egg for egg wash

For the pineapple bun topping, cream butter, sugar, baking powder and salt with a spoon until combined. Beat in the egg. Finally add the flour, mixing with a spoon until just combined. Scrape onto a piece of plastic wrap, mold into a short wide log, wrap and chill completely.

To make the tangzhong, whisk together the flour and water in a small saucepan until there are no lumps. Heat over low-medium, stirring constantly with a rubber spatula until the mixture thickens into a thin paste and lines are left in the roux behind when stirring (check by stirring without touching the bottom of the saucepan). If you have a thermometer, check the temperature – it should be 65C or 149F. Remove from the heat and transfer to a bowl to cool.

For the dough, mix together the yeast, tbsp of water and a sprinkle of sugar. Allow to sit 5 minutes until it bubbles and smells yeasty.

Whisk the milk, cream and egg into the tangzhong. Meanwhile in the bowl of a standmixer, stir together the flour, wheat gluten, sugar and salt. Add the dissolved yeast and tangzhong mixture. Mix slowly with the dough hook to form a cohesive dough. Add the butter and work into the dough until smooth. Knead on medium-high speed for about 10 minutes or until the dough is very smooth and elastic.

Cover and then let rest until doubled, about an hour or so

Line a baking tray with parchment paper. Turn the dough out onto a lightly floured surface and deflate it. Cut into 6 portions – each will likely be around 67g. Shape each into a ball. To tighten the surface tension, you can cup your hand over the ball of dough as it sits on the countertop and move your hand in a tight circle.

Place the balls of dough on the parchment-lined tray. Cover with plastic or a damp kitchen towel and let rise until puffed, about 45 minutes to 1 hour. To determine whether the buns are adequately risen, look for the dough to slowly bounce back when poked with a damp finger, but for the dent to not completely fill in.

Near the end of the rise start preheating the oven to 400F. Cut the log of topping into 6 slices. Take a piece, turn it so the cut side faces up, and roll it out between two small sheets of plastic wrap into a circle large enough to drape over the risen bun. Drape each bun with a circle of pineapple topping. Brush with beaten egg.

Bake for 5 minutes at 400F, then turn the temperature down to 350 for about 10 minutes more (total 15 minutes) or until the buns are golden. Let cool on a wire rack.

If you’re not using the same day, store in an airtight container and then reheat briefly in the oven to recrisp the topping. Let cool before filling.

cha siu, adobo & pineapple buns

cha siu, adobo and pineapple buns

With the 100th anniversary of the Canadian government’s Chinese Exclusion Act this past summer, and the scholarship, remembrances, and advocacy it has helped bring to the forefront, my family has been talking a lot more about Chinese Canadian history. First recommended by my aunt, Karen Cho’s documentary Big Fight in Little Chinatown has been doing the rounds. The documentary chronicles resistance to the gentrification of Chinatowns in the centre of several North American cities, and in doing so, reminds us the role they’ve played both historically and currently, and why they need to be saved.

While Chinatowns were first established in more undesirable areas, many eventually became part of the contested urban core as the city expanded. It was in Chinatown, just around the corner from my grandpa’s childhood home, that the city decided to place an incinerator and landfill – where else, after all? Many years later the rubbish facilities are long gone, redeveloped into large office towers. So too are the rows of tenement housing my grandpa grew up in, leaving only a few blocks of Chinatown that remain. While not all communities have been chipped away to the same degree, many of them are facing the same pressures.

cha siu, adobo and pineapple buns

Why does this matter? At first thought, older Chinatowns are of questionable relevance – fenced in, priced out, the aging population subject to atrophy as the community shifts elsewhere. As is the case with ethnic enclaves, a tension around Chinatowns has always existed, where for many “making it” was moving out. I think about my grandma’s family, who lived in a predominantly white suburb. In many ways this made their life easier; they were regarded by their neighbours as a singular benign curiosity, whereas my grandpa, living in the heart of Chinatown which embodied the so-called “yellow peril” of Chinese immigration, faced much more overt discrimination. But even then, every weekend my grandma and her mother would head to Chinatown to hear the news and gather with the small Chinese community that existed. As the documentary explores, these are still valuable places of community today, particularly for seniors and newer immigrants.

Furthermore, given the long history of Chinatowns being displaced and expropriated, their existence signals continued resistance and a fight for visibility. Along this vein, Big Fight brought up an interesting perspective on architecture. When the San Francisco Chinatown burnt down in a fire in 1906, it was rebuilt with stereotyped Chinese architectural features: decorative rooftops, ornate lampposts, strings of paper lanterns, and stylized street signs, part of a strategy to establish Chinatown as a tourist destination. The documentary explains the reconstruction another way: the city wanted Chinatown relocated, but the community determinedly rebuilt, incorporating these architectural details as defiant proof that this here was Chinatown, and it was not going anywhere.

While Big Fight makes an empathetic and moving case, if anything, I would say that it felt a bit lacking in intersectionality. I understand wanting to keep the documentary focused on a Chinese North American perspective, but it felt like a missed opportunity to comment on the role of this fight within a larger struggle towards equitable city development. Watching footage of community protests for Chinatown made me think of the complicated history of both solidarity, and lack thereof, with other groups and movements.

cha siu, adobo and pineapple buns

Still, I can’t help but feel the specialness of these places. My family doesn’t have historical ties to the tiny Chinatown in the city I grew up in, but it’s the one in my memories. Since I was a kid, we would go there for a box of buns and Cantonese barbeque – a roast duck, a chunk of cha siu, and a few ribs of crispy roast pork. My mum and I would hop out while my dad would circle the block a few times in the car – there never was any parking.

A few months ago, I realized we hadn’t actually been by since the pandemic, and convinced my parents to join me. Many of the places we used to go are no longer there; now there’s only a single bakery and one barbeque place left. But we were also pleasantly surprised: while the name had changed, it was the same lady who had worked the barbeque counter for over 30 years. She still ran the business together with her son, and the duck and cha siu tasted even better than we remembered. Against all odds, Chinatown is still here. Albeit, partially through the popularity of being now mostly bubble tea franchise central … but it’s still here.

You can watch the full documentary here through TV Ontario!

cha siu, adobo and pineapple buns

The starting inspiration behind these buns were to put pineapple into a pineapple bun, a Chinese bakery classic with a cookie-like pineapple-textured topping. Not that pineapple buns need actual pineapple – they are plenty delicious as is, and look sufficiently like their namesake that they don’t need to prove their pineapple-ness to anyone! But don’t you also sort of want to put pineapple in a pineapple bun? You do too, right? For twice the pineapple-ness?

I was thinking about pineapple, and then about tacos al pastor and the combination of marinated spit roasted pork and pineapple. These buns are a play on the sweet/savoury vibes of al pastor and cha siu and pineapple buns. I’ve supplemented a classic cha siu bao filling with broiled pineapple and canned chipotles in adobo, as a shortcut to invoke some of the flavours of al pastor. I think this is the most delicious savoury bun filling I’ve made in a while – salty and sweet and spicy and saucy filling, fluffy bun, crisp top.

cha siu, adobo and pineapple buns

cha siu, adobo & pineapple buns

Filling adapted from Woks of Life (for cha siu bao aspects) and i am a food blog (for shortcut al pastor-inspired aspects). Pineapple topping adapted from mthmchris and bun dough adapted from Christine’s Recipes.

filling

  • 100g chopped pineapple from a can of pineapple (or you could certainly do fresh if you have on hand)
  • 1 tbsp oil
  • 1/4 cup minced onion
  • 1 tbsp oyster sauce
  • 1 tsp light soy sauce
  • 1 tsp dark soy sauce
  • 1 tsp sesame oil
  • 2 chipotles from a can of chipotle in adobo, finely chopped (use more or less depending on your spice preferences – see note at end)
  • 1 tbsp of the sauce/saucy bits from a can of chipotles in adobo
  • 60g (1/4 cup) pineapple juice from can of pineapple (if it’s packed in juice; or substitute more water)
  • 30g (2 tbsp) water
  • 1 tbsp flour
  • 150g (1 cup) finely diced cha siu
  • 1 finely chopped green onion

pineapple bun topping

  • 50g butter
  • 50g granulated sugar
  • 1/2 tsp baking powder
  • 1/4 tsp kosher salt
  • 10g egg
  • 75g all-purpose flour

tangzhong

  • 64g water
  • 13g flour

dough

  • slightly generous 1/2 tsp active dry yeast
  • 1 tbsp warm water
  • 50g milk
  • 15g cream
  • 30g egg
  • 190g all-purpose flour + 6g wheat gluten (or 196g bread flour)
  • 1/2 tsp kosher salt
  • 30g granulated sugar
  • 22g soft butter
  • beaten egg for egg wash

For the filling, begin by broiling the pineapple. Line a small baking tray with foil and spread the pineapple over the tray. Broil for about 10 minutes on a rack set in the upper third of the oven until pineapple pieces have a bit of char. Watch so they don’t burn.

For the rest of the filling, place the oil in a pan and heat over medium. Add the onion and cook a couple minutes until softened, then stir in the oyster sauce, soy sauces, sesame oil, as well as the finely chopped chilis and sauce from the chipotle in adobo. Stir and continue to cook until it comes to a bubble, then add the pineapple juice, water and flour. Reduce heat to medium low and cook about 2-3 minutes or until the mixture is thickened and saucy. Take off the heat and stir in the cha siu, green onion and broiled pineapple.

Once the filling has cooled, store in the fridge. It will stick together better when cold and make it easier to fill the buns.

For the pineapple bun topping, cream butter, sugar, baking powder and salt with a spoon until combined. Beat in the egg. Finally add the flour, mixing with a spoon until just combined. Scrape onto a piece of plastic wrap, mold into a log, wrap and chill completely.

To make the tangzhong, whisk together the flour and water in a small saucepan until there are no lumps. Heat over low-medium, stirring constantly with a rubber spatula until the mixture thickens into a thin paste and lines are left in the roux behind when stirring (check by stirring without touching the bottom of the saucepan). If you have a thermometer, check the temperature – it should be 65C or 149F. Remove from the heat and transfer to a bowl to cool.

For the dough, mix together the yeast, tbsp of water and a sprinkle of sugar. Allow to sit 5 minutes until it bubbles and smells yeasty.

Whisk the milk, cream and egg into the tangzhong. Meanwhile in the bowl of a standmixer, stir together the flour, wheat gluten, sugar and salt. Add the dissolved yeast and tangzhong mixture. Mix slowly with the dough hook to form a cohesive dough. Add the butter and work into the dough until smooth. Knead on medium-high speed for about 10 minutes or until the dough is very smooth and elastic.

Cover and then let rest until doubled, about an hour or so

Line a baking tray with parchment paper. Turn the dough out onto a lightly floured surface and deflate it. Cut into 6 portions – each will likely be around 67g. Shape each into a ball. Working with one ball of dough at a time, roll out the ball into a disc (at least about 13cm or 5″ in diameter to accommodate all the filling) making the centre thicker than the edges. Cup the dough in your hand and dollop about 1/6th of the chilled filling over top. Close the dough over the filling and pinch the edges together to seal. Place the filled bun on the prepared tray, then repeat with the remaining pieces of dough.

Cover with plastic or a damp kitchen towel and let rise until puffed, about 45 minutes to 1 hour.

Near the end of the rise start preheating the oven to 400F. Cut the log of topping into 6 slices. Take a piece, turn it so the cut side faces up, and roll it out between two small sheets of plastic wrap into a circle large enough to drape over the risen bun. Drape each bun with a circle of pineapple topping. Brush with beaten egg.

Bake for 5 minutes at 400F, then turn the temperature down to 350 for about 15 minutes more (total 2- minutes) or until the buns are golden. Let cool on a wire rack. Best eaten fresh while the pineapple topping is still crispy. If you save them for another day, store in the fridge and reheat to recrisp the topping.

Note on chipotles: For my tastes, two chipotles gave a nice bit of spice – noticeable but not very spicy – make of that what you will! I recommend adding according to your own taste. When trying the filling be sure to keep in mind that the spice will be diluted with plenty of fluffy bread so the end result will not taste as spicy.

beet, za’atar & honey brioche

beet, feta & za'atar brioche

I love these – salt and sweet and herbs to balance the beets, encased in a pillowy dough crusted with toasted sesame.

beet, feta & za'atar brioche

These breads are really from last year (and the first trial a year before that), and I had been planning to finally post them sometime this fall. The flavours are very much inspired by a beetroot, za’atar, and honey galette in Sami Tamimi and Tara Wigley’s beautiful cookbook, Falastin (Palestine in Arabic). The feature seasoning, za’atar, has itself has been one of the faces of the Israel-Palestine conflict.

It feels only right to acknowledge the Palestinian inspiration behind this recipe, but also so very, very heartbreaking at the same time.

What I’ve been reading: on the intergenerational traumas of both sides, and on the reality of right now.

beet, feta & za'atar brioche

beet, za'atar & honey brioche

Flavours inspired by the beetroot, za’atar, feta and honey galette from Sami Tamimi and Tara Wigley in Falastin. You can also find this recipe republished in The Guardian. Brioche dough adapted from Peter Reinhart’s The Bread Baker’s Apprentice.

brioche dough

sponge

  • 24g all purpose flour
  • 3/4 tsp instant yeast
  • 1/2 tsp granulated sugar
  • 48g whole milk

remainder of dough

  • 155g all purpose flour + 6g vital wheat gluten (or substitute bread flour)
  • 1 tsp kosher salt
  • 2 large eggs
  • 90g soft butter

beets

  • 400g beets (6 medium beets – I used a mix of red, golden and pink)
  • olive oil

filling

  • 60g thick greek yoghurt
  • 40g crumbled feta
  • 1 tsp za’atar
  • 1 garlic clove, crushed
  • 20g beaten egg

to assemble and bake

  • beaten egg for egg wash
  • sesame seeds
  • crumbled feta
  • fresh thyme
  • honey
  • za’atar

Day 1: make the brioche dough.

For the brioche dough, begin by mixing the ingredients for the sponge. Let ferment on the counter for around 30 minutes or until very bubbly.

Now for the remainder of the dough: mix together the flour, wheat gluten and salt in the bowl of a standmixer. Add the fermented sponge and eggs to the flour mixture and mix with a wooden spoon until a rough dough is formed. Then use the dough hook on the standmixer to knead the dough for a about five minutes or until smooth and stretchy. It will be quite sticky.

Add the butter, a lump at a time, incorporating each addition fully before the next. Occasionally scrape down the dough hook. Once all the butter is added, knead the dough until smooth and stretchy, another few minutes. Cover and let rise overnight in the fridge, or if you’d like to continue the same day, about 1 1/2 – 2 hours at room temperature, or until doubled. Note that brioche dough is easier to handle (less sticky and firm) when cold, so I generally favour an overnight rise.

Day 2 (or continue on the same day): Assemble and bake.

For the beets, scrub the beets until clean. Place in a saucepan, cover with water, and bring to a boil. Cook until the beets are cooked through – how long it takes will depend on the size of the beets. Once cooked, let the beets cool, peel them and then cut them into wedges. Toss the wedges with a bit of olive oil, and season with some salt and pepper. (Note: to avoid the colour bleeding, separate the beets by colour while mixing with the oil.) Set aside.

For the filling, stir together all the ingredients. Set aside.

To assemble, begin by lining a baking tray with parchment paper. Deflate the dough and turn out onto a floured countertop. Divide into 6 equal pieces, each about 67g. Roll each piece into a ball. Dust with flour, then roll out each ball into a circle about 9cm in diameter and 1.25cm tall. Space the circles apart on the baking tray. Cover with plastic and let rise until puffed, about 45 minutes to 2 hours, depending if the dough starts from cold or room temperature.

Near the end of the rise, begin preheating the oven to 425F.

Once the dough is risen use your fingers to tamp down the centre of the dough, leaving a ~2cm raised rim of dough around the centre. Brush the puffy edges of the dough with eggwash and sprinkle with sesame seeds and salt. Put a couple spoonfuls of the feta filling into the depressed centre of each bread. Arrange wedges of beets overtop, using a bit of each colour. Scatter some more crumbled feta and fresh thyme over top.

Pop in the oven and bake about 12-15 minutes or until deeply browned. While the buns are still warm, drizzle a bit of honey over each and sprinkle with some more za’atar and fresh thyme leaves. Best eaten fresh!

beet, feta & za'atar brioche

seeded olive hot cross buns

seeded olive hot cross buns

It was probably only a matter of time before I crossed the hot cross bun line. Anyways, here we are: a savoury seedy olive hot cross bun! It is, to echo my last post, not really a hot cross bun at all, except perhaps marginally in spirit.

But lest you be unconvinced, let me make a case for it. The same way I like my hot cross buns, these buns are thoroughly packed with mix ins – in this case, black olives, feta, sundried tomatoes, parsley, nigella and fennel seeds. It’s a mixture of shapes and colours (black! red! green!) which lends the bun’s cross-section the same vibrant speckling as raisins, peel and mixed glacéed fruit. The dough itself is slightly spiced with fennel seed and cayenne (plus turmeric for the golden hue). And piping lines of flour and water paste on top of any bun doesn’t exactly add to the flavour, but does give it a signature look.

So yes, a travesty, but look, some thought went into it. Also, I think they’re quite tasty – especially with a thick swipe of butter and salt.

seeded olive hot cross buns

The dough itself is based on a many times morphed base recipe I’ve used for other hot cross buns on the site. I did err on higher hydration this time to make it easier to work in the more fragile mix-ins – they’ll all break down a bit, especially the feta, but either way they’ll make it in there. As the olives and feta are potentially very damp, so be sure to drain well and pat them dry before adding to the dough – excess moisture makes it harder to work them into the dough and can make the dough more wet.

seeded olive hot cross buns

seeded olive hot cross buns

for the bun dough

  • 120g all-purpose flour
  • 120g whole wheat flour
  • 1 tsp instant yeast
  • 1/2 tsp fennel seeds, finely ground
  • 1/2 tsp cayenne pepper
  • 1/2 tsp ground turmeric
  • 1 1/2 tsp coarse kosher salt
  • 1 large egg
  • 140g milk
  • 45g butter, softened
  • 1/2 tbsp sesame seeds (black or white)
  • 1/2 tbsp nigella (kalonji) seeds
  • 75g drained canned black olives in water, sliced and patted dry (if using brined kalamata style olives, they will be a lot stronger in flavour and this may be far too much olive; try using less)
  • 5 dry packed sundried tomato halves (18g), soaked in hot water to soften, then drained, patted dry, and finely chopped (my sundried tomatoes were quite bland so I hope to try this again with oil packed ones someday!)
  • 1 handful parsley, chopped
  • 80g feta, drained and broken into large chunks

to top

  • 30g flour mixed with 32g water for flour cross
  • beaten egg for egg wash
  • more seeds and salt for sprinkling

In the bowl of a stand mixer, whisk together the flour, yeast, spices and salt. Add the egg and milk and mix using the dough hook until a soft dough is formed. Knead with the dough hook until smooth, then add the butter, a knob at a time, working in each before the next. Knead a couple more minutes on medium-high speed until the dough is very smooth and elastic. Lastly, add the seeds, olives, sundried tomatoes and parsley and knead for a few minutes on medium-low speed to start working it into the dough. Add the feta chunks, and knead until everything is worked into the dough (the feta break apart into small bits as this happens). If the dough becomes quite sticky, which can happen due to excess moisture on the mix-ins, work in a bit more flour as needed.

Place the dough in a covered container and place in the fridge to rise overnight (or you may proceed directly with a ~ 1 hour room temperature rise).

Line a baking tray with parchment paper. Turn out the risen dough on a floured surface and cut into ten equal pieces (each about 63g). This dough is a little stickier, so use more flour as needed. Roll each piece into a tight ball and space evenly apart on the prepared tray. Cover with plastic and let rise, another hour or two (depending on if the dough is cold), until the buns are puffed.

Meanwhile, preheat the oven to 350F.

To make the flour cross, whisk together the flour and water to form a thick, pipeable paste. Transfer to a piping bag with a fine round tip (I used one 2mm in diameter). Brush the risen buns with a bit of beaten egg. Pipe crosses over each bun. Sprinkle the buns with some extra seeds and salt. Bake for about 20 minutes or until golden. Eat with salted butter!

colomba di pasqua buns

colomba di pasqua buns

There have been sights of hot cross buns in the supermarket for weeks now – hot cross bun season is most definitely here!

I was going to write that these aren’t quite hot cross buns per se, but really, these aren’t remotely hot cross buns at all – aside from the bun bit. Rather, these buns are based on another Easter bread, colomba di pasqua, rendered in pull apart bun form.

Colomba di pasqua is an Italian dove-shaped bread, similar to pannetone, but with a sugary almond topping and flavour heavy on citrus. Usually it doesn’t have raisins, but I’ve included some here for perhaps a slightly more hot cross bun ethos. But the flavour is all about citrus, with both candied peel and finely grated zest.

colomba di pasqua buns

I think these buns are quite lovely! They’re definitely qualitatively different from a hot cross bun – all citrus instead of mixed spice. The almond sugar topping is a crisp contrast to the soft dough (especially on the first day!) – just be careful not to let it burn in the oven.

colomba di pasqua buns

colomba di pasqua buns

Almond topping adapted from Christina’s Cucina blog (and she fashions her own mold out of foil if you’re interested in making a true colomba and don’t have the rather niche paper mold). For flavour inspiration I also referenced recipes on an Italian in My Kitchen and Dave Bakes.

  • 240g flour
  • 1 tsp instant yeast
  • 1/2 tsp kosher salt
  • 1 tsp granulated sugar
  • 1 large egg
  • 130g whole milk
  • finely grated zest of 1 lemon
  • finely grated zest of 1 orange
  • 1/2 tsp vanilla extract
  • 1 tsp orange blossom water
  • 42g butter, softened
  • 70g raisins (plumped in hot tea if quite dry, and drained)
  • 75g candied lemon and orange peel, chopped and patted dry (a recipe for candied peel here)

topping

  • 1 egg white
  • 20g granulated sugar
  • 25g ground almond
  • 1 tsp cornstarch
  • whole almonds
  • pearl sugar

In the bowl of a stand mixer, whisk together the flour, yeast, salt and sugar. Add the egg, milk, grated zests, vanilla and orange blossom water and mix using the dough hook until a soft dough is formed. Knead until smooth, then add the butter, a knob at a time, working in each before the next. Knead a couple more minutes until the dough is very smooth and elastic. Lastly, work in the raisins and peel. If the dough becomes quite sticky, which can happen due to excess moisture on the fruit and peel, work in a bit more flour as needed. Place the dough in a covered container and place in the fridge to rise overnight (or you may proceed directly with a ~ 1 hour room temperature rise).

Butter an 8″ square baking tin and line with a parchment paper sling. Turn out the risen dough on a floured surface and cut into nine equal pieces. Roll each into a ball and place in the prepared pan. Cover and let rise another hour or two (depending on if the dough is cold) until the buns are puffed.

Meanwhile, preheat the oven to 350F. Make the topping by stirring together the egg white, sugar, ground almonds and cornstarch. Put a dollop of the topping on top of each bun and spread evenly over the top with a small offset spatula. Dot an almond on top of each bun and sprinkle all over with pearl sugar.

Bake around 25-30 minutes or until browned and the internal temperature of the middle bun is at least 190F. These buns are the best day of while the sugar topping is still crisp!

hot cross bun loaf

hot cross bun loaf

I remember eating supermarket hot cross buns as a child and wishing there was no fruit in them at all (I was an extra strange child.) But these days the fruit is my favourite part… and no hot cross bun ever really has enough dried fruit in it for me. So in this loaf, I succumbed to all my hot-cross-bun-dreams, with the ratio of weight of fruit and peel to flour being 1:1! The end result in a spiced, soft bread replete with all the dried fruit and peel one could hope for – but not too much that it overly weights the dough down. Toasted and buttered, it makes for a very nice breakfast indeed.

hot cross bun loaf
hot cross bun loaf
hot cross bun loaf
hot cross bun loaf

For the dough itself, I worked off of what has become my usual hot cross bun dough. It bakes up very nicely in loaf form, though if you’d rather, this could make 10-12 buns instead. Alongside the classic raisins and currants, I included dried apricots – one of my favourite dried fruits, which I suppose I hadn’t put in buns previously because it would feel like I was pushing out the raisins and currants. But here, with this much fruit, there’s enough room for everyone. (And they make for nice golden cubes in the terrazzo-like cross-section.)

This dough is only partially whole wheat to keep it from being too dense. And yes, the dough will look a little ridiculous, with bits of fruit falling out everywhere, but keep in mind that the fruit will spread apart as the dough rises – and that the whole point of this loaf is the fruit!

hot cross bun loaf

hot cross bun loaf

Dough based on previous hot cross buns.

  • 60g dried currants
  • 80g raisins
  • 100g dried apricots, cut into raisin-sized dice
  • 150g whole wheat flour
  • 145g all-purpose flour + 5g wheat gluten (or 150g bread flour)
  • 1 1/2 tsp instant yeast
  • 3/4 tsp kosher salt
  • 1 1/4 tsp ground cinnamon
  • 1/2 tsp ground cardamom
  • 1/4 tsp ground nutmeg
  • 1/4 tsp ground clove
  • 1 large egg
  • 190g whole milk
  • 55g butter, softened
  • 73g candied orange peel, chopped
  • beaten egg, for egg wash
  • flour cross: 30g flour and about 30-32g water

Begin by plumping up the dried fruit. Combine the dried fruit in a jar or bowl and cover with a cup of hot tea – if your fruit is extremely dried out, you may want to let it sit and plump overnight. Otherwise, half an hour or so is good enough to just soften. Once done, drain the dried fruit and pat dry.

Stir together the flours, wheat gluten, instant yeast, salt and spices in the bowl of a stand mixer. Add the egg and milk and stir until a soft dough is formed. Knead using the dough hook (alternatively, do this by hand) until the dough is smooth. Add the butter a lump at a time, working in each addition before the next. Knead for a few more minutes to ensure the dough is soft, stretchy and elastic. Add the dried fruit and chopped peel and knead into the dough. It will look a bit ridiculous but the fruit will spread out as the dough rises.

Cover the dough and let rise until puffed, about 1 to 1 1/2 hours (as there is a lot of dried fruit, the volume won’t have appeared to have doubled). Meanwhile, grease a loaf tin and line with a parchment paper sling (I used a 9x4x4″ pullman loaf tin – the amount of dough could be a bit much for a standard loaf tin).

Turn out the dough onto a lightly floured surface and divide into eight equal pieces, each about 120g. Roll each piece into a ball and pack together in two rows of four in the loaf tin. Pick off any pieces of dried fruit or peel which have come to the surface (uncovered by dough) as they will burn in the oven. Cover and let rise until well puffed, about 1 hour.

Meanwhile, preheat the oven to 350F. Stir together the flour and water for the flour cross and transfer the paste to a piping bag fitted with a very fine round tip (I used a tip with a 2mm diameter opening). Once the dough is risen – it won’t appear doubled due to all the dried fruit – brush the loaf with a bit of beaten egg. Use the piping bag to pipe lines of flour paste over the loaf.

Bake for about 45 minutes or until well browned and the internal temperature reaches at least 190F. (I found this took a bit of a longer longer bake then I expected – if you have a thermometer, I recommend checking the internal temperature to make sure the centre is cooked through!) Let cool 5 minutes in the loaf tin, then finish cooling on a wire rack. Serve in slices smeared with lots of butter.

marzipan-stuffed hot cross buns

marzipan-stuffed hot cross buns

Surely there is little that cannot be improved by the addition of marzipan. As such, there is a whole wad of marzipan in the centre of these hot cross buns. Especially while the buns are still slightly warm, the marzipan is sticky and soft, and acts as a sort of built-in spread – though I think it’s best with some butter piled on top of the whole thing as well.

I thought I may as well post the recipe now, though I’ve made these buns at random non-Easter times of year. They have a great general holiday-ish vibe, not least in their resemblance to stollen.

marzipan-stuffed hot cross buns

I’ve used the same dough as in these whole wheat sourdough hot cross buns, but converted it back to instant yeast. Either dough will do depending on your preference. Again, no sugar is needed in the dough because there is more than enough to sufficiently sweeten the bun between the dried fruit, candied peel, glaze, and (did I mention?) wad of marzipan.

marzipan-stuffed hot cross buns

marzipan-stuffed hot cross buns

dough

  • 85g dried fruit, about 1/3 each golden raisins, dark raisins and currants (or other fruit as per your preference)
  • 40g dark rum
  • 225g whole wheat flour
  • 1 tsp instant yeast
  • 1/2 tsp kosher salt
  • 3/4 tsp ground cinnamon
  • 1/4 tsp ground cloves
  • 1/8 tsp ground nutmeg
  • 1 large egg
  • 130g whole milk
  • 42g butter, softened
  • 55g candied orange peel, chopped (you can find the recipe here)
  • 120g marzipan (recipe below, or use storebought)

flour cross

  • 30g flour
  • 32g water (may vary – start with a bit less)

egg wash

  • beaten egg, for egg wash

glaze

  • 2 tsp water
  • 2 tsp granulated sugar
  • 1-2 drops almond extract, optional

The day before, prepare combine the dried fruit and dark rum in a small container or jar. Cover and let soak overnight.

The next day, prepare the dough. Stir together the flour, yeast, salt and spices. Add the 1 egg and milk, and stir until a dough is formed. Turn out onto a lightly floured surface and knead a couple minutes until smooth. Knead in the butter, a small knob at a time. Now add the fruit – drain the dried fruit from the rum, and knead it, along with the candied peel, into the dough. At first it will feel like it all just keeps falling out, but keep at it, adding the pieces of fallen fruit back into the middle of the dough. Once the fruit is evenly distributed, transfer the dough to a bowl, cover and let rise until doubled, about 1 1/2 hours.

Meanwhile, divide the marzipan into eight 15g portions, and roll each into a ball. Line a baking tray with a piece of parchment paper.

Once the dough is risen, turn out onto a lightly floured surface and divide into eight pieces (each about 75g). Preshape each piece into a ball. Flatten a ball of dough and place a ball of marzipan in the centre. Pinch the dough to close around it, and roll into a tight ball (a helpful technique for this is to cup your hand over the ball of dough and move your hand in a small circular motion to help pull the surface of the dough more taut). Repeat with the remaining pieces of dough.

Space the balls of dough evenly on the prepared baking tray. Pick off any exposed pieces of dried fruit or peel as they will burn in the oven. Cover with plastic and let rise until well-puffed, about 1 hour. Near the end of the rise, preheat the oven to 350F.

To make the flour cross, whisk together the flour and water to form a thick, pipeable paste. Transfer to a piping bag with a fine round tip (I used one 2mm in diameter).

Brush the buns with eggwash. Pipe lines using the flour paste over the buns. Bake about 15-20 minutes or until nicely browned.

While the buns are baking, prepare the syrup by dissolving the granulated sugar into the boiling water. Add a couple drops of almond extract to mirror the marzipan taste. Brush over the hot buns, once they are baked and out from the oven. Let the buns cool on a wire rack. Eat, smothered with butter.

marzipan

Makes 300g worth. Based on the Daring Gourmet.

  • 120g finely ground almonds
  • 160g icing sugar
  • 2 tsp almond extract
  • 1 tsp rosewater
  • 1 large egg white

Grind the almonds and icing sugar together in the bowl of a food processor until fine and all the lumps are gone. Add the almond extract and rosewater and pulse to combine. Lastly, add the egg white and process until the marzipan forms a ball. Shape into a disc, wrap tightly in plastic and store in the fridge.

whole wheat sourdough hot cross buns

whole wheat sourdough hot cross buns

Goodness, you might be thinking, so glad to see that Bartholomew the sourdough starter is finally out and about and probably getting fed! And you would be right in that these buns are the latest leavening project he embarked upon. But, alas, as I am always slow to post things, I made these buns spring last year, so….

(One day, Bartholomew, one day. Hang tight until then!)

whole wheat sourdough hot cross buns

To get us started on the hot cross bun season, here is a tribute to the classic made with whole wheat, sourdough and plenty of dried fruit. They might sound a little austere but the butter, spices and dried fruit make sure it is anything but. Let’s tackle these one by one:

  • whole wheat – I think the flavour of whole wheat flour fits well with the spice and dried fruit! With a bit of extra hydration, the buns still bake up quite soft.
  • sourdough – I don’t always love the taste of sourdough in desserts, but in this case I find it goes rather nicely with the dried fruit. Building the dough in two steps allows an (understandably) lethargic sourdough starter to keep up and prevents the acidity from overwhelming the dough.
  • good dose of dried fruit – I actually first made these a couple of years ago, but they didn’t have nearly enough dried fruit in them (this may be personal opinion though as no recipe I’ve consulted seems to have enough for me!), so when I revisited last year, I made sure to bump up the fruit content. I also found that the dough itself doesn’t need any additional sugar as each bite has some dried fruit or candied peel to provide sufficient sweetness.
whole wheat sourdough hot cross buns

whole wheat sourdough hot cross buns with lots of fruit

Makes 9 buns in an 8×8″ pan. Bun recipe adapted from King Arthur Flour – though with each subsequent adaptation the resemblance decreases – and crosses from BBC Good Food

soaked fruits

  • 85g dried raisins and/or currants
  • 4 tbsp dark rum (or substitute tea, if you prefer)

sponge

  • 50g 100% hydration sourdough starter
  • 50g whole wheat flour
  • 50g water

dough

  • 180g whole wheat flour (to start – depending on the dough consistency, you may need to knead in more in at the end)
  • 3/4 tsp kosher salt
  • 20g brown sugar
  • 3/4 tsp ground cinnamon
  • 1/8 tsp ground cloves
  • 1/8 tsp ground allspice
  • 1/8 tsp ground nutmeg
  • 60mL milk
  • 1 large egg
  • 42g soft butter
  • 65g drained candied orange or other citrus peel, chopped (recipe here)

flour cross

  • 30g flour
  • 32g water (may vary – start with a bit less)

egg wash

  • beaten egg

glaze

  • 1 tbsp apricot jam

Day 1: Soak the fruit and make the sponge.

Combine the raisins and/or currants and rum in a small bowl. Cover and let sit overnight to plump the raisins. In a separate bowl, stir together the ingredients for the sponge. Cover and let sit overnight to ferment.

Day 2: Make the dough & first rise.

Place the flour, salt, sugar and spices for the dough into the bowl of a stand mixer. Stir together, the add the milk, egg and sponge. Mix the dough until smooth using the dough hook, scraping down the hook/sides of the bowl as needed. Knead for a few minutes to develop the gluten. Then add the butter a lump at a time and mix until the butter is incorporated.

Turn the dough out onto a floured counter. If it is quite sticky, knead in some more flour (just a bit at a time) until the dough is on the slightly sticky-side of tacky. I often find the dough stiffens up a bit later with time.

Drain the dried fruit. Knead the fruit and peel into the dough – at first it will just keep falling out, but with patience it will work its way in. Continue kneading until the dough is smooth again – as you continue to knead, the fruit will continue to fall out, so occasionally add the fallen pieces back into the centre of the dough.

Place the dough in a container to rise (no need to oil it) until about doubled – how long it will take will depend on your starter, but mine took about 6 hours. At this point you can chill the dough overnight or keep going if you have another 6 hours left in your day.

Day 3 (or still day 2): 2nd rise and baking

Butter an 8×8″ square pan and line the bottom with a square of parchment paper.

Divide the dough into 9 pieces, each approximately 75g. Shape each into a ball. To tighten the form, place the ball on the counter (unfloured so the dough will grip onto the counter a bit) and cup your hand over top, and move your hand in small circles. Arrange the balls in the prepared pan. Cover with a damp towel and let rise until the buns are well puffed and touching each other. The duration will vary by sourdough starter activity again, but mine took around 4 hours. To tell when they are fully risen, the dough will spring back slowly when poked with a damp finger, and the dent will not quite completely fill in.

Preheat the oven to 350F.

To make the flour cross, whisk together the flour and water to form a thick, pipeable paste. Transfer to a piping bag with a small round tip – here I used a 2mm tip diametre round tip.

Brush the risen buns with egg wash and then pipe lines of dough overtop the buns. Bake for around 20 minutes, or until nicely browned and the internal temperature of the middle bun is at least 180-185F. Rotate halfway through baking for even browning.

For the apricot jam glaze, melt the tbsp of apricot jam with a scant tsp of water and press through a sieve to remove any chunks. Brush over the freshly baked buns.

pork floss garlic cheese bread

pork floss garlic cheese bread

My parents love to garden, especially things which grow well – and in more recent years they’ve discovered garlic. It began as one type, then a few more from the farmers market or specialty plant stores or gardener friends. Each saved bulb gets separated into papery cloves and planted in the fall, emerging next spring and harvested in the summer as a complete bulb. It all means I get access to all the garlic I could ever want and far more.

This year it is several cultivars of garlic. No one has kept track of just how many cloves got planted last year, but no doubt it is a lot.

pork floss garlic cheese bread

This is sort-of-ish inspired Korean cream cheese garlic bread – buns stuffed with sweetened cream cheese and dipped in a garlicky custard. Between the cheese and custard glaze, which soaks into the cut edges of the bread, it makes for a rich (and gooey) garlic bread with a noticeably endearing sweetness. It’s a case study in combining sweet and savoury, all in the backdrop of toasty bread and plenty of garlic.

As delicious as the classic cream cheese garlic bread it, I find myself slightly wishing it wasn’t quite as sweet (very much just my personal preference!). That, and I was thinking about how this might go well with another sweet-savoury thing, pork floss, made of dried shreds of pork which are slightly sweetened and spiced. The result were these buns, made of milk bread bread baked with a savoury garlic cream cheese filling, then brushed with garlic butter and crowned with a majestic pile of pork floss. Slid into the oven for a second bake, they emerge pungent, the bun soft and the frayed edges of the pork floss charred. By letting the pork floss be the main source of sweetness, it retains the sweet-savoury homage to the classic, but keeps it the sweetness subtle. To me, it’s the perfect balance and my ideal sweetness for a garlic bread. (Though if you’re a fan of the sweetness of Korean cream cheese garlic, I would recommend upper the sugar in the filling to better emulate that!)

After a couple batches of these two weekends in a row the entire kitchen smelled like garlic, my clothes smelled like garlic, and I smelled like garlic. I ate one every day for lunch for a week until my blood became permanently infused with garlic. I think I finally became one with the garlic. Good practice for the upcoming garlic season later this summer.

pork floss garlic cheese bread

pork floss garlic cheese bread

Milk bread adapted from Christine’s Recipes. Some Korean garlic cheese bread inspiration referenced from The Plaid Apron.

tangzhong

  • 51g water
  • 10g all-purpose flour

milk bread

  • 1/2 tsp yeast
  • 2 tsp warm water
  • 36g milk
  • 10g heavy cream
  • 25g egg
  • 150g all-purpose flour
  • 1/2 tsp kosher salt
  • 10g granulated sugar
  • 16g butter, softened

first bake

cream cheese filling

  • 150g cream cheese
  • 1/2 tsp coarse kosher salt
  • 1 tsp granulated sugar
  • 1 good-sized clove of garlic, minced
  • 1 green onion, finely chopped

eggwash

  • beaten egg for egg wash

second bake

garlic butter

  • 28g (2 tbsp) butter, melted
  • 1 good-sized clove of garlic, minced
  • 1/8 tsp each dried oregano and dried basil

garnish

  • pork floss

To make the tangzhong, whisk together the flour and water in a small saucepan until there are no lumps. Heat over low-medium, stirring constantly with a rubber spatula until the mixture thickens into a thin paste and lines are left in the roux behind when stirring (check by stirring without touching the bottom of the saucepan). If you have a thermometer, check the temperature – it should be 65C or 149F. Remove from the heat and transfer to a bowl to cool.

For the dough, mix together the yeast, tbsp of water and a sprinkle of sugar. Allow to sit 5-10 minutes until it bubbles and smells yeasty (not necessary with instant yeast but sometimes I prefer this to ensure the yeast granules break up).

Whisk the milk and eggs into the tangzhong.

In a large bowl, whisk together the flour, wheat gluten if using, salt, sugar and yeast. Add the tangzhong/milk/egg mixture and stir with a wooden spoon (or use the dough hook of a standmixer) until a cohesive dough is formed. Turn out onto the counter and knead in the soft butter in two additions. The dough should be smooth, elastic and tacky. Place the dough in a container and let rise overnight in the fridge (or if you want to do it all in one day, go ahead and let it rise 1 hour at room temperature or until doubled and then proceed immediately).

The next day turn out the risen dough on a floured surface. Deflate and divide into 6 equal pieces (each about 50g). Roll each piece into a ball, then use a rolling pin to roll each ball out to 8cm diameter disc. Place the pieces of dough on a baking tray lined with parchment paper. Use your fingers to poke the centre of each disc to thin out the amount of dough there (it will make it a bit easier for you later when filling). Cover and let rise until well puffed, 1-2 hours (longer if the dough is cold).

Meanwhile, make the filling. Mix together the cream cheese, salt, sugar and garlic. (If you prefer the sweet filling which is more classic, you can also mix in about 2 tbsp of sugar.) Set aside until ready to use.

Near the end of the rise, start preheating the oven to 375F for the first bake. Once the dough is risen, fill the dough. Wet your fingers under the tap so the dough doesn’t stick, and tamp a ~4cm diameter circle in the centre of each bun to accommodate the filling, leaving a ~2cm border. Dollop 1/6 of the filling on each bun and spread to fill the cavity. Brush the buns with beaten egg. Place the buns in the oven and turn the temperature down to 350F. Bake around 10-12 minutes or until golden brown.

Next, prepare for the second bake by turning the oven temperature up to 400F. Make the garlic butter by mixing together the melted butter, garlic and dried herbs. Brush the buns generously with the butter. Put a large spoonful of pork floss on top of each bun.

Bake the buns for about 3-5 minutes or until the pork floss has browned a bit, the buns smell very fragrant. Eat warm!

rosemary & yuzu kosho focaccia (& the cousin reviews…2021)

rosemary yuzu kosho focaccia

The Cousin (aka the Writographer) is my one and only loyal blog reader. As she lives across the country from me, she often doesn’t often get the chance to actually try my bakes but I always love hearing her impressions on the recipes. I went through our texts to collect some thoughts she had sent about the past year’s worth of recipes, for a bit of a blog year in review from her perspective. (Shared with my cousin’s permission!)

the cousin reviews…2021

Chocolate prune and whiskey ice cream: Why would you add prunes and whiskey to chocolate ice cream? Interesting though, just not my taste.  

Mango fennel mousse cake: The mango fennel mousse cake looks incredible!
Do I like mango? No…
Do I despise fennel? Yes…
But it looks really good. I am almost tempted.

Orange, fennel & almond biscotti: I almost like the flavours, but I hate fennel.

Grapefruit cream tart: I think I would eat that grapefruit tart! Yay, you’ve now made two things I’ll eat.

Saffron & cardamom hot cross buns: …hmm.

Burnt miso and star anise banana tarte tatin: Interesting. I am not a fan of bananas and I really dislike star anise. So…

Cardamom-poached rhubarb & browned butter almond tart: I hate cardamom, not sure about rhubarb and sometimes I like almond. But I love butter.

Beet morning glory muffins: Your photos for the muffins look so good! But I don’t think I’d enjoy them… (beets, coconut, raisins, and pecans…)

Caramelized banana houjicha cream puffs: Apart from the banana, the cream puffs look delicious!

Spiced chestnut pumpkin tart: I’m surprised that you’re still cooking with chestnut purée. I am scarred for life.
Pie looks great though.
Ugh I will never have chestnut puree again.

(While this might make my cousin sound picky, she does seem to eat just about anything I give her (including many of the ingredients she professes to dislike) so either she is far too trusting or far less picky than she thinks, or both.)

rosemary yuzu kosho focaccia

I made this rosemary focaccia with the addition of yuzu kosho, a fermented yuzu and chili condiment (for more on yuzu kosho and ways to use it, look at this article from Just One Cookbook!). The yuzu kosho provides spice and a bit of citrus, a combination I love along with the rosemary, and acts to really brighten up the focaccia. I’m also a big fan of this dough, adapted from a Rose Levy Beranbaum recipe: high hydration, springy and rises with a great craggy crumb.

I am on the fence about how edible my cousin thinks this focaccia would be. While I think she would like the yuzu kosho, I’m not sure how she feels about rosemary… (Edit: the cousin has spoken – rosemary is fine but she is not sure about the spice from the yuzu kosho… until next time she visits, I suppose!)

rosemary yuzu kosho focaccia

rosemary & yuzu kosho focaccia

  • Servings: one 9 by 13-inch pan
  • Print

Dough adapted from Rose Levy Beranbaum’s The Bread Bible. 

equipment: 9×13-inch baking pan

dough

  • 300g all purpose flour
  • 1 1/2 tsp kosher salt
  • 1/2 tsp instant yeast
  • 240g water
  • 1 tbsp olive oil + more for the pan

topping

  • 4 tbsp olive oil
  • 2 1/2 tsp green yuzu kosho
  • 1 heaping packed tbsp rosemary leaves
  • coarse salt

To make the dough, combine all the ingredients in a bowl with a wooden spoon. Once a rough dough is formed, cover with a damp cloth and let rest for 20 minutes.

To knead in a mixer, use the dough hook (about 10-15 minutes on medium speed; probably quicker on a higher speed) and work the dough until very stretchy and elastic and at least close to passing the windowpane test. It will become less sticky as you go on.

To knead by hand, as it’s a very well hydrated and sticky dough, this is a perfect time to use the slap and fold method à la Richard Bertinet (Beranbaum describes a method to do with pinching the dough to elongate it but I expect it accomplishes the same thing). Pick up the dough in both hands and slap it down on the countertop. Pull the part of the dough you’re holding towards you to stretch the dough, then fold it in half. Pick up the dough again, but this time from a 90 degree angle so that when you slap it back down the dough is rotated 90 degrees. Repeat. Throughout the process the dough will be very sticky, but that’s okay! Relax, tell yourself it’s okay that my hands are coated in sticky dough, and try not to use any additional flour. I find the best way to keep myself motivated about kneading is to listen to music – this dough is a three-song knead (about 10 minutes). By the end, the dough should be supple and stretchy, and perhaps less sticky than it began.

Return the dough to the bowl, cover with the damp cloth, and let rest twenty minutes. Then fold the dough right in the bowl; wet your hand or use a wet or oiled bowl scraper scrape up one edge of the dough and stretching it to the other side of the bowl, then turn the bowl 90 degrees and repeat. Let rest another 20 minutes and repeat the folding. You can also do coil folds (this link illustrates).

Let the dough rise until it appears about doubled, 1-2 hours.

Pour a bit of olive oil (about 1 to 1 1/2 tsp) into a 9×13″ metal baking tin and spread it around to grease the tin. Pull the dough out of the bowl and stretch it out in your hands first into a rectangular shape. Place the dough in the pan and turn it over so both sides are coated in oil. Use your fingers to stretch out the dough to fit the pan. It will probably spring back on your a bit so cover the pan, let the dough relax 15 minutes, and then stretch the dough again. (Repeat another time if needed – try not to overdo it on the olive oil and this process will be easier).

Allow to rise until bubbly and it appears somewhat doubled in height, approximately another 1 1/2 hours.

While the dough rises, whisk together the olive oil and yuzu kosho – it won’t become smooth, but the yuzu kosho will separate into smaller bits and become more distributed throughout the oil. Add the rosemary leaves and mix.

Preheat the oven to 450F near the end of the rise.

Once the dough is risen, dip your hands in water and use your fingers to deeply dimple the dough all over, pressing down to the bottom of the pan. Use a spoon to scatter the oil mixture evenly, being sure to get some yuzu kosho clumps in each spoonful, over the focaccia (you may need to use your fingers to separate the rosemary leaves to prevent them from clumping). Sprinkle generously!! with salt.

Place the focaccia in the oven and bake for about 15-20 minutes or until browned on top.