
With the 100th anniversary of the Canadian government’s Chinese Exclusion Act this past summer, and the scholarship, remembrances, and advocacy it has helped bring to the forefront, my family has been talking a lot more about Chinese Canadian history. First recommended by my aunt, Karen Cho’s documentary Big Fight in Little Chinatown has been doing the rounds. The documentary chronicles resistance to the gentrification of Chinatowns in the centre of several North American cities, and in doing so, reminds us the role they’ve played both historically and currently, and why they need to be saved.
While Chinatowns were first established in more undesirable areas, many eventually became part of the contested urban core as the city expanded. It was in Chinatown, just around the corner from my grandpa’s childhood home, that the city decided to place an incinerator and landfill – where else, after all? Many years later the rubbish facilities are long gone, redeveloped into large office towers. So too are the rows of tenement housing my grandpa grew up in, leaving only a few blocks of Chinatown that remain. While not all communities have been chipped away to the same degree, many of them are facing the same pressures.


Why does this matter? At first thought, older Chinatowns are of questionable relevance – fenced in, priced out, the aging population subject to atrophy as the community shifts elsewhere. As is the case with ethnic enclaves, a tension around Chinatowns has always existed, where for many “making it” was moving out. I think about my grandma’s family, who lived in a predominantly white suburb. In many ways this made their life easier; they were regarded by their neighbours as a singular benign curiosity, whereas my grandpa, living in the heart of Chinatown which embodied the so-called “yellow peril” of Chinese immigration, faced much more overt discrimination. But even then, every weekend my grandma and her mother would head to Chinatown to hear the news and gather with the small Chinese community that existed. As the documentary explores, these are still valuable places of community today, particularly for seniors and newer immigrants.
Furthermore, given the long history of Chinatowns being displaced and expropriated, their existence signals continued resistance and a fight for visibility. Along this vein, Big Fight brought up an interesting perspective on architecture. When the San Francisco Chinatown burnt down in a fire in 1906, it was rebuilt with stereotyped Chinese architectural features: decorative rooftops, ornate lampposts, strings of paper lanterns, and stylized street signs, part of a strategy to establish Chinatown as a tourist destination. The documentary explains the reconstruction another way: the city wanted Chinatown relocated, but the community determinedly rebuilt, incorporating these architectural details as defiant proof that this here was Chinatown, and it was not going anywhere.
While Big Fight makes an empathetic and moving case, if anything, I would say that it felt a bit lacking in intersectionality. I understand wanting to keep the documentary focused on a Chinese North American perspective, but it felt like a missed opportunity to comment on the role of this fight within a larger struggle towards equitable city development. Watching footage of community protests for Chinatown made me think of the complicated history of both solidarity, and lack thereof, with other groups and movements.


Still, I can’t help but feel the specialness of these places. My family doesn’t have historical ties to the tiny Chinatown in the city I grew up in, but it’s the one in my memories. Since I was a kid, we would go there for a box of buns and Cantonese barbeque – a roast duck, a chunk of cha siu, and a few ribs of crispy roast pork. My mum and I would hop out while my dad would circle the block a few times in the car – there never was any parking.
A few months ago, I realized we hadn’t actually been by since the pandemic, and convinced my parents to join me. Many of the places we used to go are no longer there; now there’s only a single bakery and one barbeque place left. But we were also pleasantly surprised: while the name had changed, it was the same lady who had worked the barbeque counter for over 30 years. She still ran the business together with her son, and the duck and cha siu tasted even better than we remembered. Against all odds, Chinatown is still here. Albeit, partially through the popularity of being now mostly bubble tea franchise central … but it’s still here.
You can watch the full documentary here through TV Ontario!


The starting inspiration behind these buns were to put pineapple into a pineapple bun, a Chinese bakery classic with a cookie-like pineapple-textured topping. Not that pineapple buns need actual pineapple – they are plenty delicious as is, and look sufficiently like their namesake that they don’t need to prove their pineapple-ness to anyone! But don’t you also sort of want to put pineapple in a pineapple bun? You do too, right? For twice the pineapple-ness?
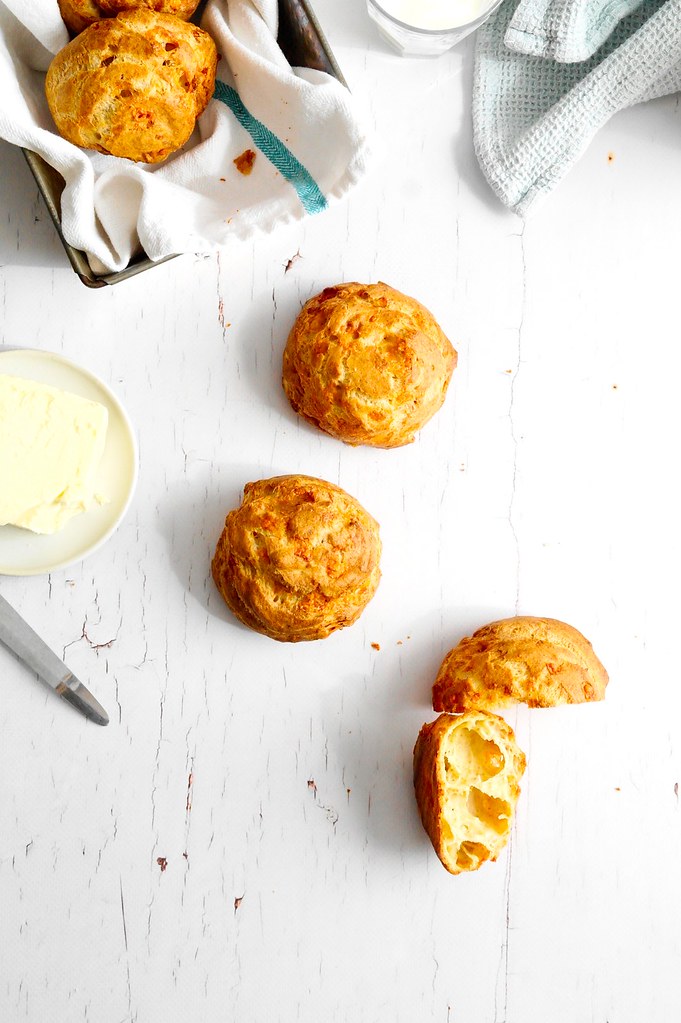
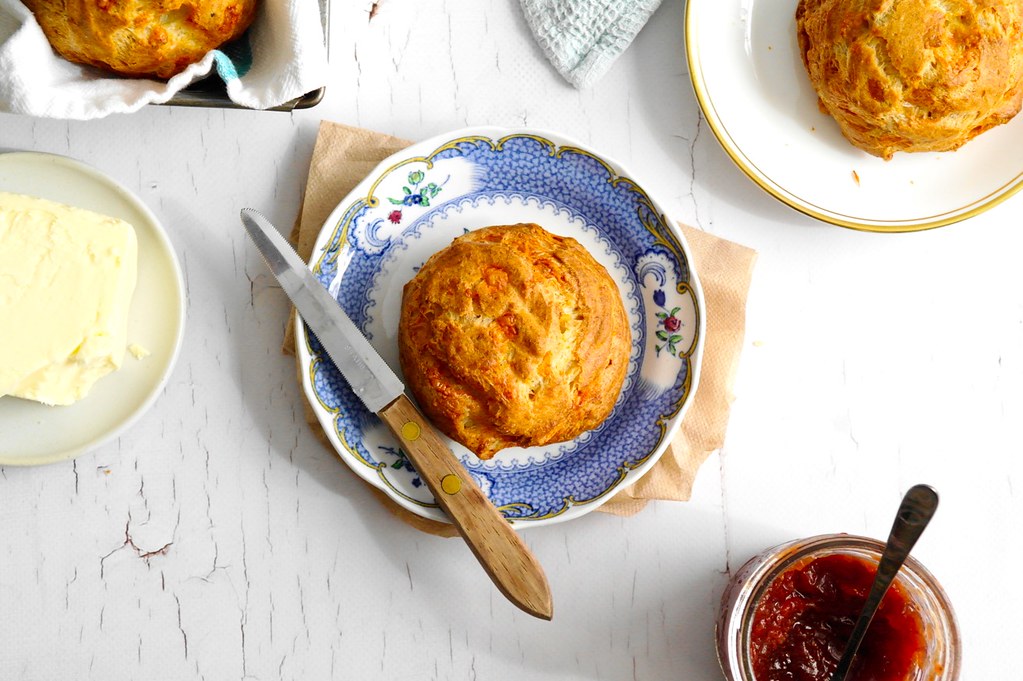
I was thinking about pineapple, and then about tacos al pastor and the combination of marinated spit roasted pork and pineapple. These buns are a play on the sweet/savoury vibes of al pastor and cha siu and pineapple buns. I’ve supplemented a classic cha siu bao filling with broiled pineapple and canned chipotles in adobo, as a shortcut to invoke some of the flavours of al pastor. I think this is the most delicious savoury bun filling I’ve made in a while – salty and sweet and spicy and saucy filling, fluffy bun, crisp top.

cha siu, adobo & pineapple buns
Filling adapted from Woks of Life (for cha siu bao aspects) and i am a food blog (for shortcut al pastor-inspired aspects). Pineapple topping adapted from mthmchris and bun dough adapted from Christine’s Recipes.
filling
- 100g chopped pineapple from a can of pineapple (or you could certainly do fresh if you have on hand)
- 1 tbsp oil
- 1/4 cup minced onion
- 1 tbsp oyster sauce
- 1 tsp light soy sauce
- 1 tsp dark soy sauce
- 1 tsp sesame oil
- 2 chipotles from a can of chipotle in adobo, finely chopped (use more or less depending on your spice preferences – see note at end)
- 1 tbsp of the sauce/saucy bits from a can of chipotles in adobo
- 60g (1/4 cup) pineapple juice from can of pineapple (if it’s packed in juice; or substitute more water)
- 30g (2 tbsp) water
- 1 tbsp flour
- 150g (1 cup) finely diced cha siu
- 1 finely chopped green onion
pineapple bun topping
- 50g butter
- 50g granulated sugar
- 1/2 tsp baking powder
- 1/4 tsp kosher salt
- 10g egg
- 75g all-purpose flour
tangzhong
- 64g water
- 13g flour
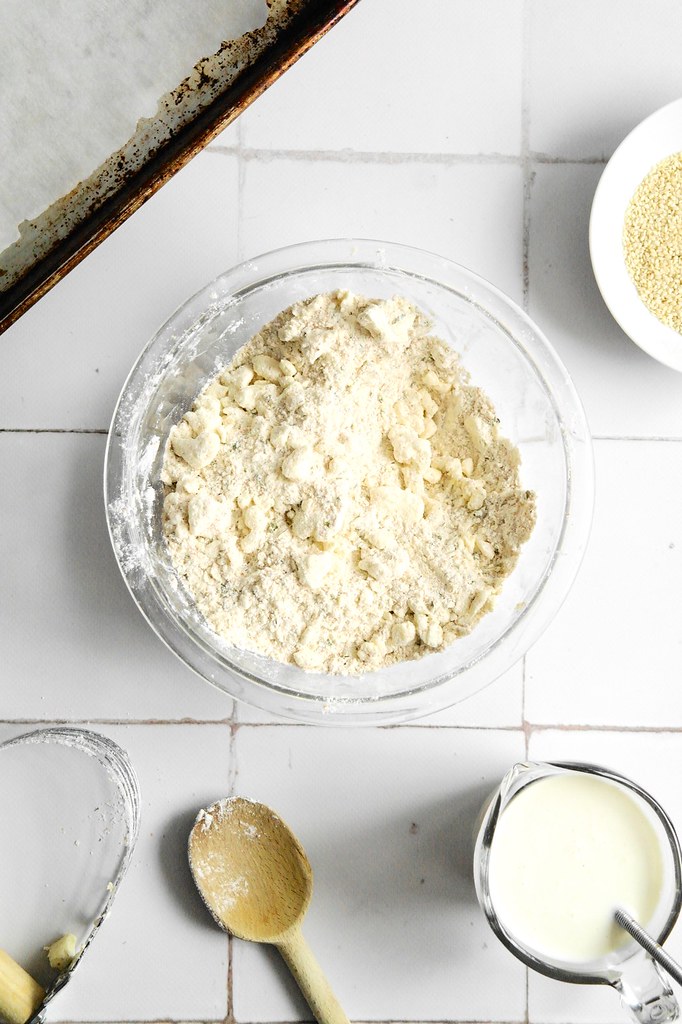
dough
- slightly generous 1/2 tsp active dry yeast
- 1 tbsp warm water
- 50g milk
- 15g cream
- 30g egg
- 190g all-purpose flour + 6g wheat gluten (or 196g bread flour)
- 1/2 tsp kosher salt
- 30g granulated sugar
- 22g soft butter
- beaten egg for egg wash
For the filling, begin by broiling the pineapple. Line a small baking tray with foil and spread the pineapple over the tray. Broil for about 10 minutes on a rack set in the upper third of the oven until pineapple pieces have a bit of char. Watch so they don’t burn.
For the rest of the filling, place the oil in a pan and heat over medium. Add the onion and cook a couple minutes until softened, then stir in the oyster sauce, soy sauces, sesame oil, as well as the finely chopped chilis and sauce from the chipotle in adobo. Stir and continue to cook until it comes to a bubble, then add the pineapple juice, water and flour. Reduce heat to medium low and cook about 2-3 minutes or until the mixture is thickened and saucy. Take off the heat and stir in the cha siu, green onion and broiled pineapple.
Once the filling has cooled, store in the fridge. It will stick together better when cold and make it easier to fill the buns.
For the pineapple bun topping, cream butter, sugar, baking powder and salt with a spoon until combined. Beat in the egg. Finally add the flour, mixing with a spoon until just combined. Scrape onto a piece of plastic wrap, mold into a log, wrap and chill completely.
To make the tangzhong, whisk together the flour and water in a small saucepan until there are no lumps. Heat over low-medium, stirring constantly with a rubber spatula until the mixture thickens into a thin paste and lines are left in the roux behind when stirring (check by stirring without touching the bottom of the saucepan). If you have a thermometer, check the temperature – it should be 65C or 149F. Remove from the heat and transfer to a bowl to cool.
For the dough, mix together the yeast, tbsp of water and a sprinkle of sugar. Allow to sit 5 minutes until it bubbles and smells yeasty.
Whisk the milk, cream and egg into the tangzhong. Meanwhile in the bowl of a standmixer, stir together the flour, wheat gluten, sugar and salt. Add the dissolved yeast and tangzhong mixture. Mix slowly with the dough hook to form a cohesive dough. Add the butter and work into the dough until smooth. Knead on medium-high speed for about 10 minutes or until the dough is very smooth and elastic.
Cover and then let rest until doubled, about an hour or so
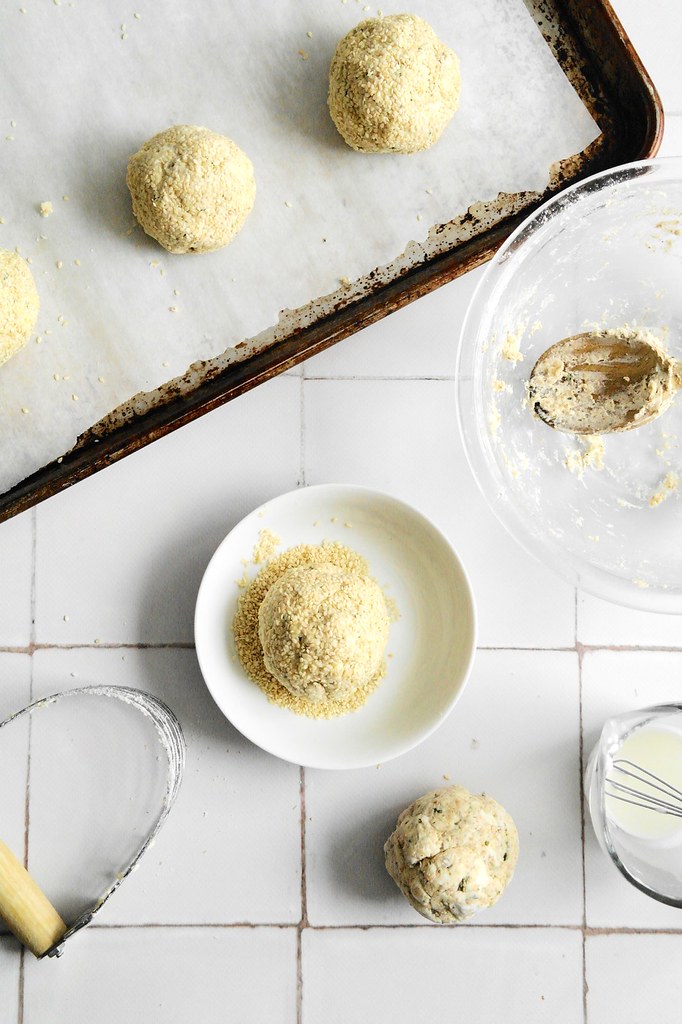
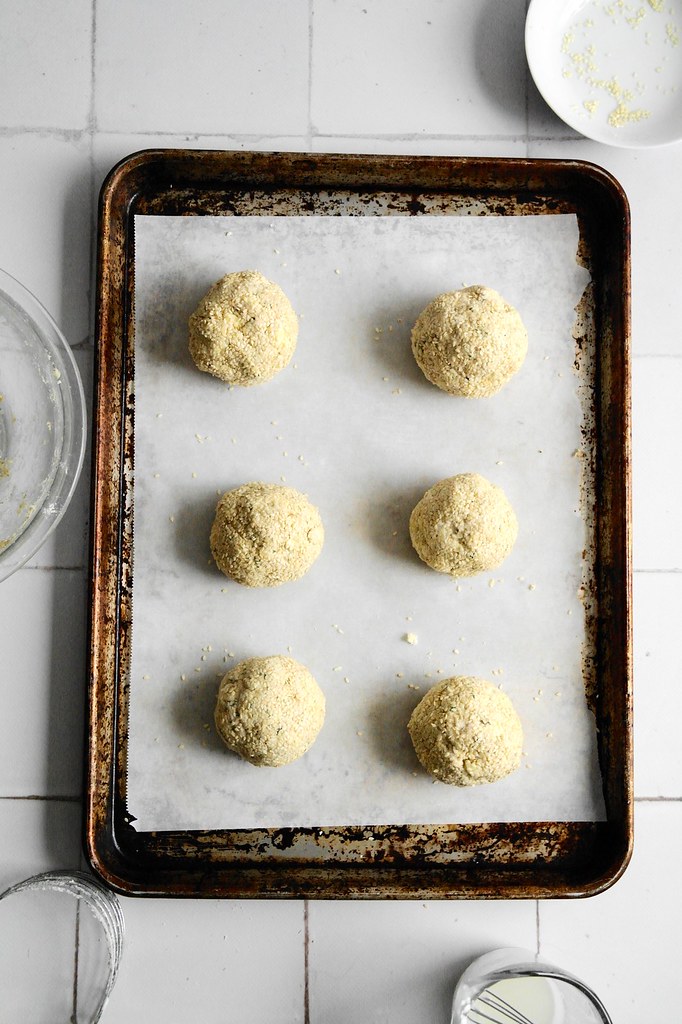
Line a baking tray with parchment paper. Turn the dough out onto a lightly floured surface and deflate it. Cut into 6 portions – each will likely be around 67g. Shape each into a ball. Working with one ball of dough at a time, roll out the ball into a disc (at least about 13cm or 5″ in diameter to accommodate all the filling) making the centre thicker than the edges. Cup the dough in your hand and dollop about 1/6th of the chilled filling over top. Close the dough over the filling and pinch the edges together to seal. Place the filled bun on the prepared tray, then repeat with the remaining pieces of dough.
Cover with plastic or a damp kitchen towel and let rise until puffed, about 45 minutes to 1 hour.
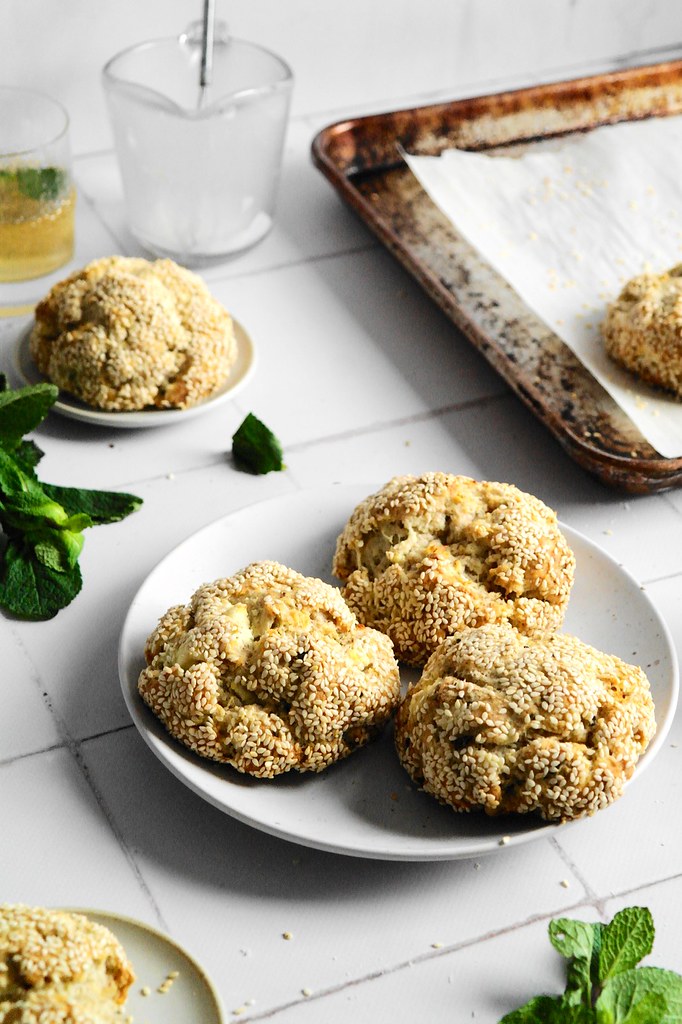
Near the end of the rise start preheating the oven to 400F. Cut the log of topping into 6 slices. Take a piece, turn it so the cut side faces up, and roll it out between two small sheets of plastic wrap into a circle large enough to drape over the risen bun. Drape each bun with a circle of pineapple topping. Brush with beaten egg.
Bake for 5 minutes at 400F, then turn the temperature down to 350 for about 15 minutes more (total 2- minutes) or until the buns are golden. Let cool on a wire rack. Best eaten fresh while the pineapple topping is still crispy. If you save them for another day, store in the fridge and reheat to recrisp the topping.
Note on chipotles: For my tastes, two chipotles gave a nice bit of spice – noticeable but not very spicy – make of that what you will! I recommend adding according to your own taste. When trying the filling be sure to keep in mind that the spice will be diluted with plenty of fluffy bread so the end result will not taste as spicy.