drømmekage carrot loaf

drommekage carrot loaf

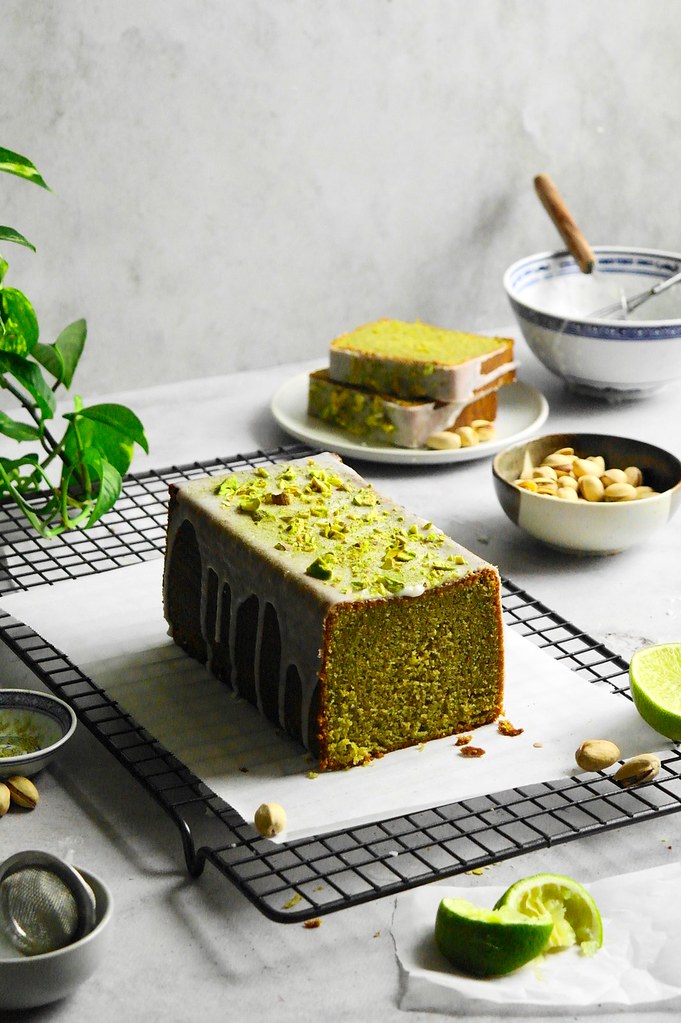
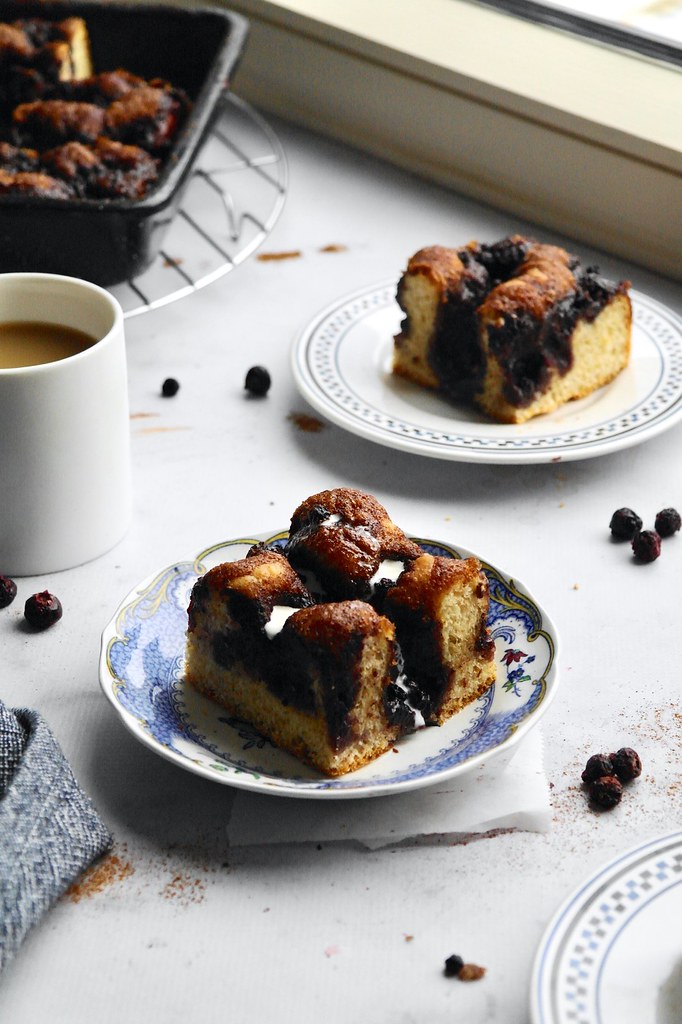
While neatly packaged in an unassuming loaf cake form, I consider this a carrot cake deluxe. It has a drømmekage-inspired topping of caramelized coconut, while a cream cheese filling runs through the middle. It’s sort of two icings, one crispy/chewy and the other creamy, in one cake for the best of both in a handy slice you can eat by hand.

Drømmekage is a Danish sponge cake topped with a coconut, butter and sugar mixture that gets broiled until caramelized. It’s a coconut cousin of toscakake/toscakaka, a sponge cake topped with a caramelized almond topping (speaking of, there are two toscakake variants on the blog – a festive cranberry gingerbread number and an apple-packed gateau invisible). Here I’ve borrowed the coconut topping for carrot cake, a departure from the usual drømmekage, but a pairing that works very well.

The filling is a super simple, lightly sweetened cream cheese loosened with a bit of heavy cream to keep it a bit softer and creamier, and reminiscent of a cream cheese icing. I’ve kept the carrot cake itself mildly sweetened to balance the sweetness of the topping, plus it’s made with whole wheat flour for better flavour!

drommekage carrot loaf

While I’ve enjoyed dolloping drømmekage and toscakake toppings on different sorts of cakes, I’ve found it doesn’t work equally well on everything. The first thing to consider is how level the top of the cake is; if the cake is very domed, the filling can slip from the top of the cake and collect around the edges during baking, and furthermore, is more prone to uneven browning. This carrot cake has minimal doming so the filling can spread in a flat layer overtop of the cake. It’s normal for many cakes to dome as the edges of the cake firm up before the middle, restricting their rise. Obtaining a level cake surface in this case is aided by two things: first, the cream cheese filling results in less height of batter (and thus less rise) in the centre of cake compared to the edges. Secondly, I give the differential batter height a bit of a helping hand by spreading the batter higher on the sides of the cake than the middle.

However, even when you have a flat-topped cake, sometimes the topping has more difficulty staying adhered to baked cake, a problem I’ve had off and on with this carrot cake version. I found that sprinkling the top of the cake with a bit of shredded coconut helps create a more grippy? surface for the caramelized topping.

drommekage carrot loaf

With the flat top crust, this cake looks best baked in a straight-sided pan, such as the pullman loaf tin I’ve used here, as opposed to a flared loaf tin. I’ve tested this cake in a typical loaf tin as well though: use a 2/3 recipe of the cake and filling, but keep the amount of topping the same (more details are in the recipe notes). This smaller cake bakes up fluffier as the cake isn’t quite as large and weighted down!

drommekage carrot loaf

drømmekage carrot loaf

Carrot cake base adapted from Cooks Illustrated carrot cake, drømmekage topping adapted from The Milk Street Cookbook edited by Christopher Kimball. This is a very mildly sweet carrot cake and filling to balance the sweet drommekage topping.

Note: to make this cake in a more standard loaf tin – use a 2/3 recipe of the filling and cake (it’s all multiples of 3 so the math is easy, I promise!), but keep a full recipe of the topping. Bake the cake for closer to 45 minutes.

special equipment: a 9x4x4″ pullman tin. see note above if using a more standard loaf tin

cream cheese filling

  • 150g block cream cheese
  • 22g granulated sugar
  • pinch salt
  • squeeze lemon juice
  • 15g whipping cream

carrot cake

  • 240g whole wheat flour
  • 2 1/4 tsp baking powder
  • 2 1/4 tsp cinnamon
  • 1/4 tsp ground nutmeg
  • 1/8 tsp ground cloves
  • 1/2 tsp kosher salt
  • 375g carrots, peeled and finely shredded – use the finer panel on your grater as more thinly grated carrots give the cake a finer texture
  • 150g brown sugar
  • 3 large eggs
  • 150g oil
  • 75g greek yoghurt
  • 1 1/2 tsp vanilla extract
  • small handful unsweetened shredded coconut

drømmekage topping

  • 45g milk
  • 75g brown sugar
  • 40g butter
  • 1/4 tsp kosher salt
  • 60g unsweetened shredded coconut

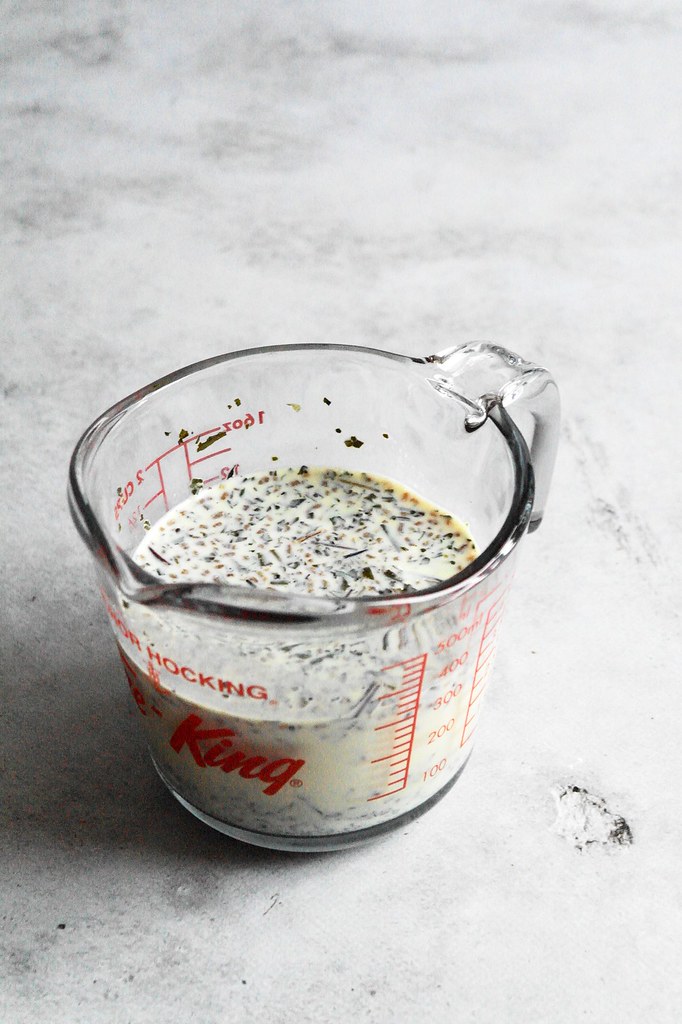
Begin by mixing together the filling. Cream together all ingredients until smooth. Transfer to a piping bag with a ~1.5cm diameter opening. Set aside.

For the cake, preheat the oven to 350F. Butter a loaf tin and line with a parchment paper sling.

Whisk together the flour, baking powder, spices and salt and set aside. Whisk the sugar, eggs, oil, yoghurt and vanilla extract together in large bowl. Add the flour and shredded carrots and mix until combined.

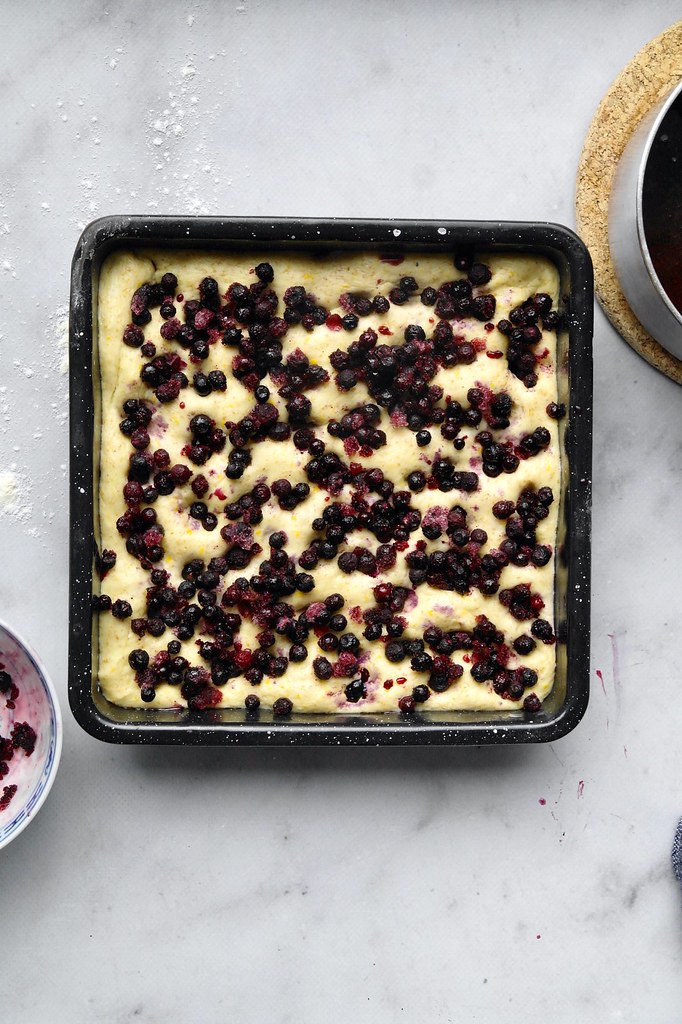
Dollop about half the batter into the loaf tin and spread into an even layer. Pipe the cream cheese filling over the batter, leaving a ~1.5cm border without filling to make sure it is encased within the cake. Scrape the remaining batter overtop and spread into an even layer. To help ensure the cake has a relatively flat surface, use a small offset spatula to spread the batter a little bit higher along the edges of the cake pan (the edges set first and don’t get the chance to rise as much as the centre, so this step offsets the resultant doming a bit). Sprinkle with a small handful of shredded coconut.

Bake for about 60-70 minutes or until browned and springy. An inserted skewer should come out clean and free of batter, though there may be some cream cheese on it.

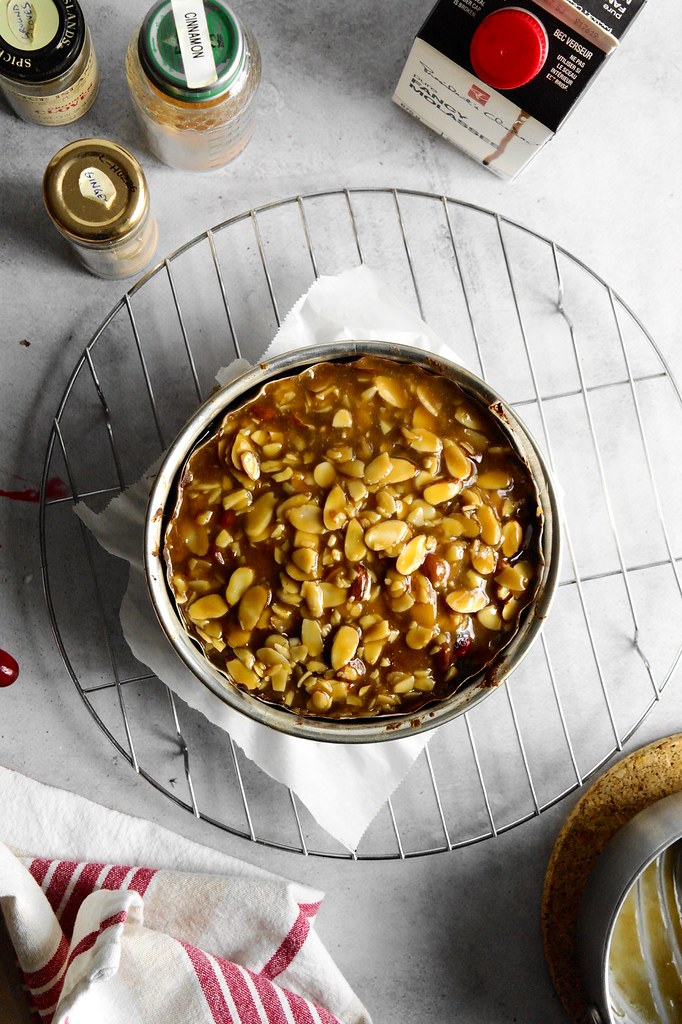
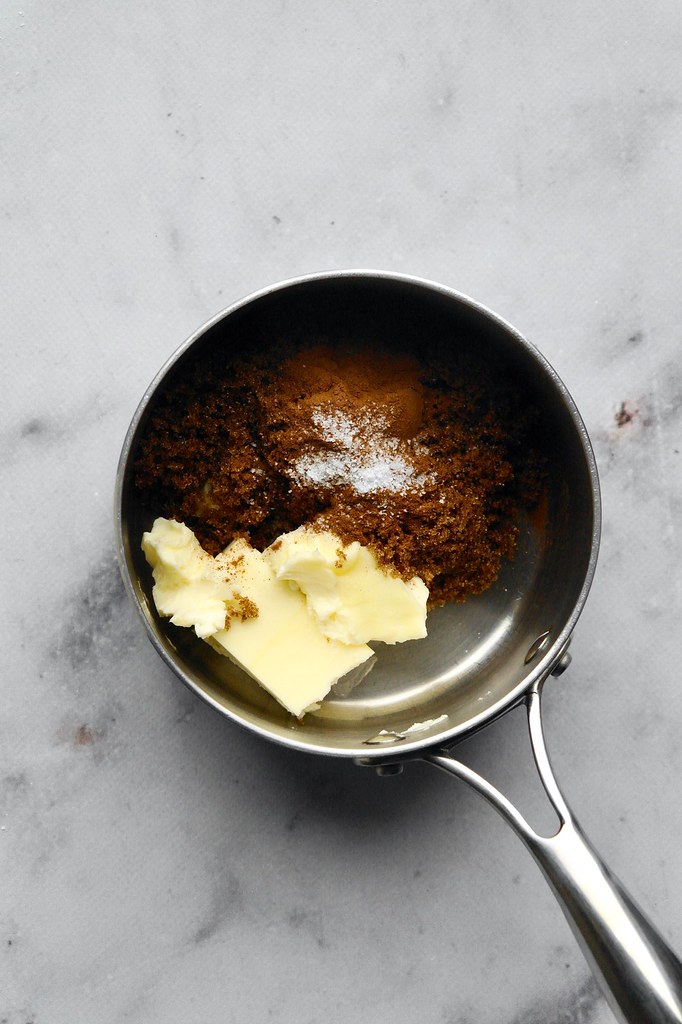
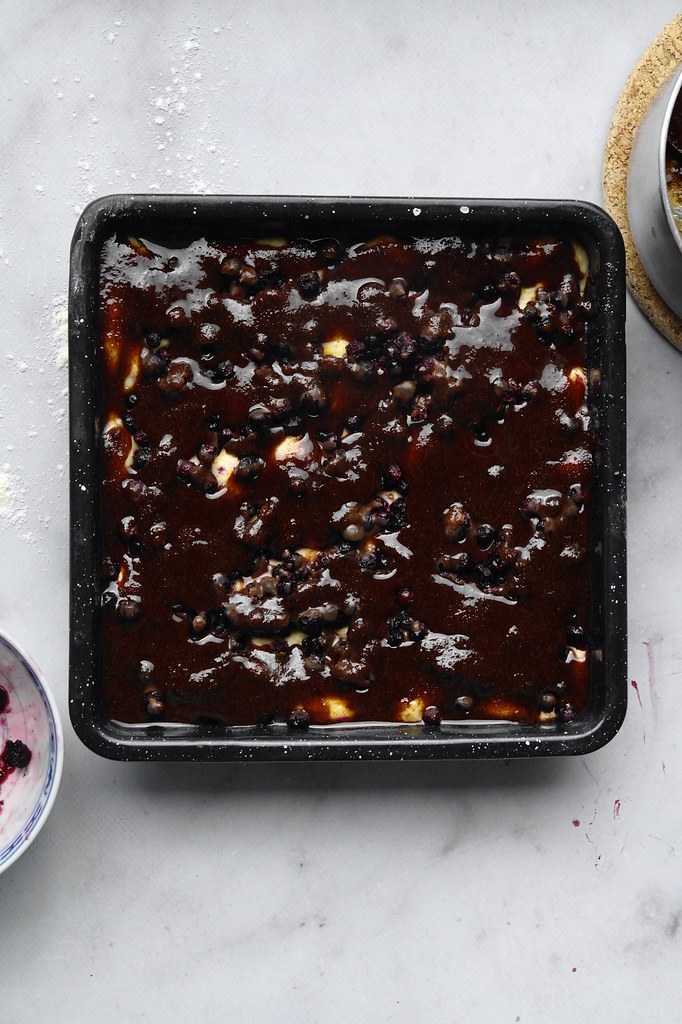
Now prepare the topping. Place the milk, brown sugar, butter and salt in a small saucepan. Bring the mixture a boil and boil for 4 minutes. Remove from the heat and stir in the shredded coconut. Spoon the mixture over the baked cake and spread into an even layer.

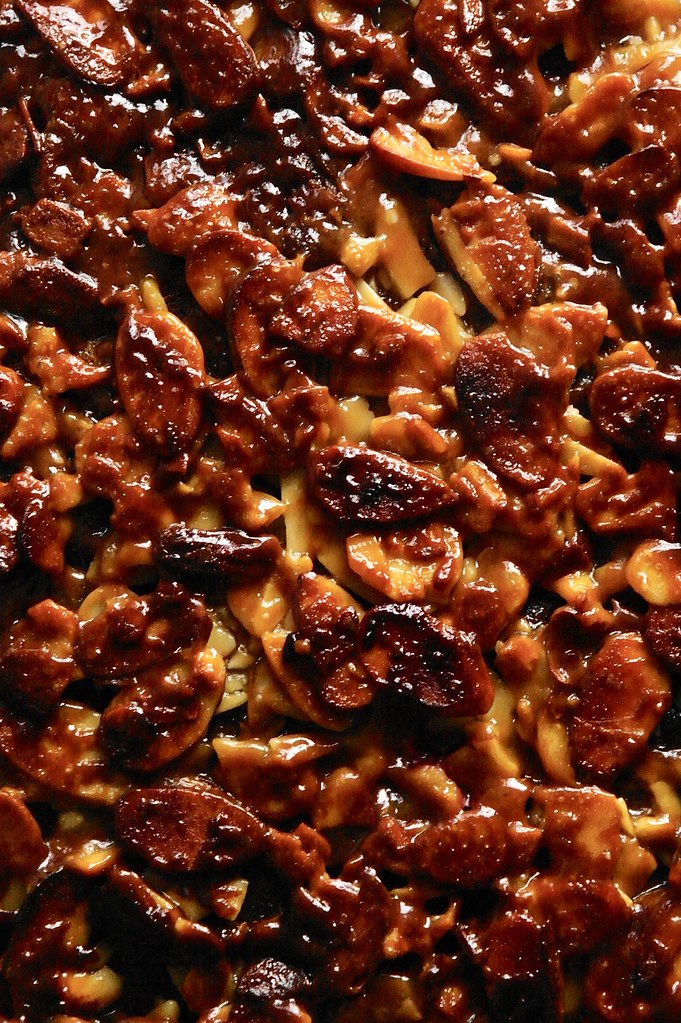
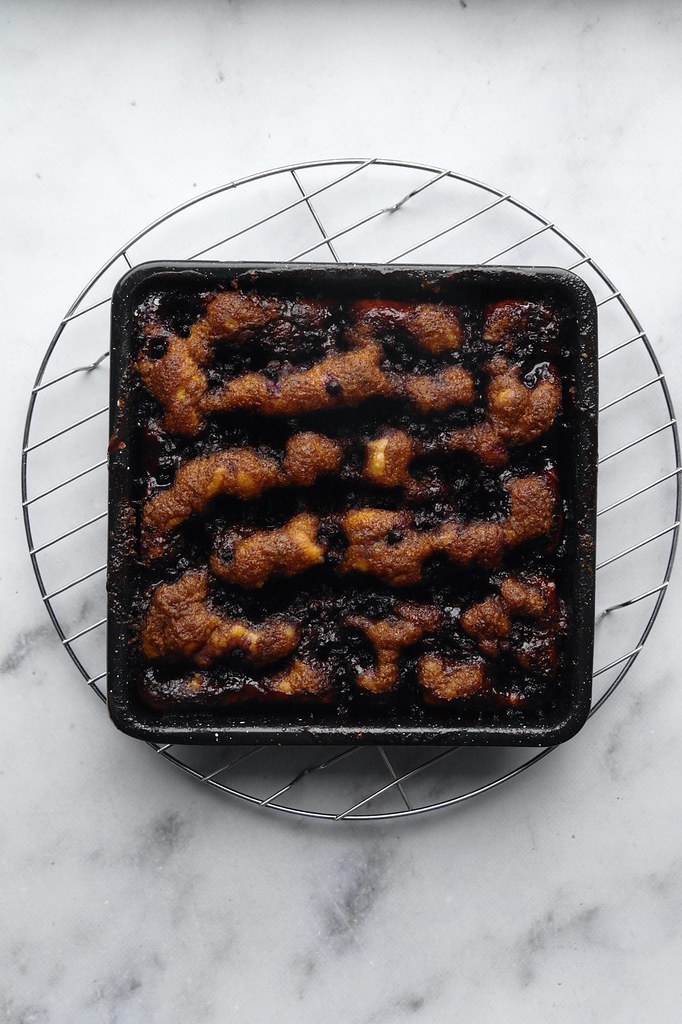
Place the cake back in the oven and turn the broiler on. Broil the topping for 2-5 minutes, rotating every minute or so, until the topping is browned and caramelized. Let the cake cool in the pan on a wire rack for 10-15 minutes before sliding a knife around the edges to loosen them and lifting out the cake via the paper sling.

Let the cake cool completely before slicing. I love this cake the same day when the topping has a crisp caramelized crust overlying the chewy coconut! To make it easier to slice through the brittle top crust, use a serrated knife and saw back and forth.

strawberry, rhubarb & sumac crumb victoria sponge cake (& 9 nine years of tentimestea)

strawberry rhubarb sumac crumb victoria sponge cake

Hello again! Another post! And before the summer ends. Truly! It is still August by my calendar.

I usually do a rhubarb cake of some variety to commemorate another year of blogging – i.e. the convenient portmanteau that is the blogiversary. However, just as I am devoid of any novel commemorative thoughts on blogging, I wasn’t really feeling inspired for any sort of rhubarb cake this year. Not until my sister made a lovely rhubarb sumac crumb cake from Yossy Arefi’s Snacking Cakes, a vanilla cake base topped with rhubarb and a surprisingly fruity sumac-spotted crumble.

Inspired by that, I made this Victoria sponge. It’s a simpler cake, which may be a bit underwhelming for a !!-blogiversary-!! cake, though also rather appropriate… I think it’s a bit more emblematic of the type of baking I’ve been doing this past while, which has been simpler, quicker, and less fuss!

Taking inspiration from the sumac crumb cake, I’ve used ground sumac in both a crumb top and in the strawberry rhubarb jam layered into this cake. I think it goes so nicely in both – a bit lemon, a bit berry, and a very nice speckle.

strawberry rhubarb sumac crumb victoria sponge cake

While I’m still calling this a Victoria sponge, it departs from the classic in a few ways… most glaringly, the crumb top!? If it doesn’t offend the senses too much, I hope you consider it! I ended up enjoying the extra texture, flavour and rustic topography. I did try a dusting of icing sugar over the crumb, but it looked better without, and no extra sweetness is needed anyways.

For simplicity, the cake is baked as a single layer with the crumb on top and then sliced in half to form the two layers, which is handy if you only have one cake tin. As well, though this really varies by recipe, I’ve made the cake layers a bit thinner than usual for a Victoria sponge. For one, this makes the cake a bit easier to slice, and secondly, (in my opinion) also means better ratio of cream to cake. I use enough cream that the cross section is roughly 1 cake:1 cream:1 cake.

While you can certainly go the buttercream route for a Victoria sponge, I always prefer the whipped cream. Cream does necessitate that leftover cake be stored in the fridge, which poses a bit of a conundrum: a filling that is best stored cold sandwiched between two layers of butter cake which are best eaten at room temperature. I’ve used 30% ground almonds in place of flour in this cake, in part because I always love nut cakes, but also because it gives the cake an extra tenderness which helps keep it more palatable if you need to eat the leftovers cold from the fridge.

strawberry rhubarb sumac crumb victoria sponge cake

strawberry, rhubarb & sumac crumb victoria sponge cake

  • Servings: one 7-inch or 18cm round cake
  • Print

Sumac crumb based on Yossy Arefi’s rhubarb crumb cake with sumac crumble from Snacking Cakes. Cake itself is adapted from a standard victoria sponge formula.

Note on the “jam” – this is made to be stored in the fridge and used soon and doesn’t have the sugar content or sterilization for long term storage like proper jam. Anyways, I really like to make this jam (really more of a very thick compote) for various baking projects – you can double the recipe and only stir sumac into half of it so you have another batch for eating/other bakes.

equipment: 18cm/7″ round springform tin

strawberry rhubarb sumac jam

  • 140g chopped rhubarb
  • 70g chopped strawberries
  • 25g granulated sugar
  • squeeze lemon juice
  • 1/2 tsp vanilla bean paste
  • 1 tsp ground sumac

sumac crumb

  • 42g butter
  • 15g brown sugar
  • pinch kosher salt
  • 1 tsp ground sumac
  • 47g whole wheat flour
  • 20g rolled oats

cake

  • 100g butter, softened
  • 65g granulated sugar
  • 1/2 tsp vanilla extract
  • 2 large eggs, at room temperature
  • 70g cake or all-purpose flour
  • 30g almond flour/finely ground almonds
  • 1 1/2 tsp baking powder
  • 1/2 tsp kosher salt
  • 1-2 tbsp milk

to fill

  • 200g whipping cream
  • 1 tsp granulated sugar, or to taste

For the jam, toss the rhubarb, strawberries and sugar together in a small saucepan.Warm the mixture over gentle heat until juices are released from the fruit. Then bring the mixture up a simmer. Cook, stirring frequently, until the fruit breaks apart and the mixture thickens, about 15 minutes. Stir in the lemon juice, vanilla bean paste and sumac. Transfer to a container, let chill, then store in the fridge.

For the sumac crumb, cream the butter, sugar, salt and sumac together. Add the flour, then the oats. Set aside.

For the cake, preheat the oven to 350F. Butter a 7-inch (18cm) springform tin and line the base with a circle of parchment paper.

In a mixing bowl, cream the butter and sugar with a wooden spoon until light. Beat in the vanilla and then the eggs, one at a time, until the mixture is as smooth as it gets, switching to a whisk as it becomes looser.

Whisk together the flour, almond flour, baking powder and salt. Add to the butter mixture and mix until just combined. Add 1 tbsp of milk, and a second if needed, to bring the batter to dropping consistency where it falls from the spoon.

Spread the batter into the prepared tin. Scatter clumps of crumble over top. Bake the cake for about 25-30 minutes or until an inserted skewer is removed clean or with only a few crumbs clinging. Let cool on a wire rack.

To assemble, use a long serrated knife to cut the cake in half. Due to the height of the crumbs, cut a bit below the mid line to make sure the top half still has enough cake – I find the crumb tends to pile up in the middle of the cake, so the cake will be a bit thinner there.

Whip the cream with 1 tsp sugar until it holds its shape. Transfer to a piping bag fitted with a large round tip (the one I used is 1.8cm in diameter). Spread the bottom half of the cake with the jam. Pipe mounds of cream around the edges, then fill in the middle with the rest of the cream, spreading to fill in any gaps if needed. Place the other half of the cake on top.

How do you cut this cake without the cream squishing out? Use a serrated knife and saw gently through the top layer of cake – don’t apply too much downwards pressure and just let the knife work through the cake for you. Chilling the cake will give the cream some time to firm which will help with clean cuts, but if you don’t mind a bit of mess, I think a Victoria sponge is best enjoyed not long after it is assembled while the cake is at room temperature and the cream is cold.

strawberry rhubarb sumac crumb victoria sponge cake

yomogi daifuku roll cake

yomogi mochi roll cake

I’ve been sitting on this recipe for a couple years. Then this spring I was reading about yomogi (mugwort) and was thinking it was a rather fitting cake for spring. Somehow it’s already summer, but finally here we. And still in July too, depending on the timezone!

yomogi mochi roll cake

This cake takes inspiration from yomogi daifuku, combining a yomogi/mugwort powder cake, red bean paste filling and kinako cream plus a generous dusting of kinako on top. (There are similar applications of mugwort in both Chinese and Korean sweets as well!) It’s a wonderful set of flavours between the toasty kinako, sweet red bean paste, herbally mugwort – plus I love the soft muted colour palette of sage green, plum and oatmeal tones.

yomogi mochi roll cake

yomogi daifuku roll cake

  • Servings: about 6 from a small 8-inch long roll cake
  • Print

Sponge cake recipe adapted from Rice ‘n Flour. Yomogi daifuku ingredient reference from 350 Degree Oven blog.

equipment: quarter sheet baking tray

roll cake

  • 3 tsp mugwort powder
  • 4 tsp boiling water
  • 3 eggs, split
  • 45g sugar
  • 30g milk
  • 30g oil
  • 22g cornstarch
  • 23g all-purpose flour
  • pinch salt
  • pinch cream of tartar

filling

  • 160g heavy cream
  • 4g kinako
  • sweetened red bean paste (I like the coarser texture of tsubuan in this, but you can use either that or koshian)

garnish

  • 80g heavy cream
  • 1 tsp granulated sugar
  • kinako

Preheat the oven to 350F. Line a quarter sheet pan with parchment paper (I recommend the method in the original source recipe video for ease and nice sharp edges on the cake).

To smoothen out the mugwort powder, whisk it together with the boiling water in a small bowl until as smooth as you can get it (it won’t be very smooth). In a medium mixing bowl, whisk together the egg yolks with the oil and milk, then add in the mugwort slurry. Sift the flour and cornstarch over top, add the salt, and whisk in until completely combined.

In a stand mixer, whisk the egg whites with the cream of tartar until frothy, then sprinkle in the sugar and whip until firm peaks are formed. Fold one dollop of the egg whites into the batter completely before adding the remainder and folding in lightly. Scrape into the prepared pan, level with an offset spatula and tap to release any large air bubbles.

Bake around 15 minutes or until lightly browned, springy, and an inserted wooden skewer/toothpick is removed clean.

Let cool on a wire rack.

Once completely cooled, prepare the filling by whipping the 160g of cream (sweeten to taste if desired). Right at the end, sift the kinako overtop and whisk in.

To assemble, place the cake right side up (i.e. with the bottom of the cake facing down to become the outside of the roll) and spread with kinako whipped cream, leaving one short edge free of cream. Pipe or shape a log of red bean paste along the opposite short end of the cake (the log about 1.5cm in diameter). Starting from this end, use the parchment paper to help you roll up the cake into round log. Roll tightly, but not so tightly such that the filling is squeezed out. Wrap and chill for at least 45 minutes to allow the cream to firm up before slicing and serving.

Before serving, cut a very thin slice off of each end so the ends look tidy. For optional garnish, whip up the 80g of cream and transfer to a piping bag fitted with a 1cm diameter round tip. Pipe a squiggle of cream over the cake (you probably won’t need all the cream, but it will give you a bit extra to work with just in case). Dust generously with kinako.

matcha lime pistachio cake

matcha lime pistachio cake

I love this combination of flavours, though rather than emerging from any rational thought, this came from pairing colours! I thought of three green things and stuck them together. And it seemed to have worked! I’m sure this doesn’t always happen… but… what else can we pair? saffron/orange/golden beet? grapefruit/strawberry/hibiscus?

This cake reads lime first and foremost on a background of matcha-pistachio, which I found such a pleasant earthy combination. I actually enjoyed pistachio matcha combo so much that it also made an appearance in the holiday cookie box… In this recipe, the addition of lime keeps a hefty slice of cake from being too rich.

matcha lime pistachio cake

What else do I adore? Nut cakes!! Cakes can turn out dry and tough quite easily, but neither are an issue with nut cakes. This one in particular has been one of my favourites, with a super plush crumb. It’s adapted from a lemon/almond/poppyseed cake, and my modifications have been mostly superficial in terms of the flavours.

The lime icing is what really pushes the lime to the forefront. It’s certainly optional, but I like how it gives the cake a finished look, and between the acid and smattering of matcha and salted pistachios, it doesn’t render the cake overly sweet.

matcha lime pistachio cake

matcha lime pistachio cake

Adapted from Ruth Tam’s lemon almond poppyseed loaf.

special equipment: a 9x4x4″ pullman loaf tin (if using a standard loaf tin, it will likely be too much batter so only fill the tin 3/4 full)

  • 125g all-purpose flour
  • 3/4 tsp baking powder
  • 1 tsp coarse kosher salt (use only 1/2 tsp if your pistachios were salted)
  • 175g granulated sugar
  • finely grated zest of 3 limes
  • 125g finely ground pistachios (though I’ve usually cut this with about 25-30% ground almonds because pistachios are so expensive)
  • 100g icing sugar
  • 1 egg white
  • 250g butter, softened
  • 10g (about 2 tbsp) matcha whisked with about 2 1/2 tbsp boiling water to make a smooth paste
  • 6 large eggs, at room temperature

to glaze

  • juice of 1 1/2 limes, divided
  • 80g icing sugar
  • chopped pistachios and matcha, for garnish

Preheat the oven to 350F. Butter a 9x4x4″ pullman tin and line with a parchment paper sling. If using a standard loaf tin it will probably be too much batter – the original recipe recommends just filling up to about 3/4″ below the rim of the tin and baking any leftover batter as cupcakes.

Begin by stirring together the flour, baking powder and salt in a small bowl. Set aside. Take a couple tbsp of the sugar and rub with the lime zest until fragrant, add back to the remaining sugar. Set aside.

In a large mixing bowl or bowl of a stand mixer (using the paddle attachment), stir together the finely ground pistachios, icing sugar and the one egg white to form a paste. Work in the granulated sugar in a few additions. Now add the butter, a couple lumps at a time, creaming each addition until fully incorporated. Add the matcha and mix until combined. Beat until fluffy (if using a stand mixer, about five minutes on medium speed, being sure to scrape down the sides of the bowl and the beater occasionally).

Next, crack the eggs into a measuring cup and whisk a bit to break up the whites. Add a bit at a time to the butter mixture, beating in each addition completely before the next. If using a stand mixer, be sure to scrape down the sides of the bowl and the beater between additions. Finally add the flour mixture and stir until just combined.

Scrape the batter into the prepared pan and spread into an even layer. Bake about 1 hour or until an inserted is removed clean or with only a few crumbs attached.

Use the juice of one lime on the freshly baked cake: Prick the top of the cake with a skewer and brush with about 1/4 – 1/3 of the lime juice. Let rest five minutes, then tip the cake out onto a cooling rack and prick the bottom – now the top -with a skewer. Brush the (former bottom, now) top and sides with the remaining lime juice. Allow the cake to cool completely.

To make the icing, stir together the icing sugar and approximately the juice of 1/2 a lime (add a bit at a time) to make an opaque but drizzly icing. If it isn’t enough lime juice and the icing is too thick, thin with a bit of water – again being careful to add just a bit at a time. Pour overtop of the cake and use a small offset spatula to spread evenly and allow some to drip down the sides. Scatter with some chopped pistachios and a light dusting of matcha if desired.

cranberry gingerbread tosca cake

cranberry gingerbread toscakake

To kick off some holiday baking, this cake is everything holiday: an almondy gingerbread cake spotted with fresh cranberries and topped with a crackly crust of caramelized almonds. It has an impressive height and a sturdy consistency, while still sporting a tender and super moist crumb. If you like contrasts in texture, this cake has it between the soft cake and crispy topping.

I’ve been sitting on this recipe for a while – I’ve made this cake quite a few times over the past four or five years, tweaking a couple things here and there, but for the most part I’ve kept it just as you’re seeing here. And now it’s finally on the blog!

cranberry gingerbread toscakake

The almond topping is borrowed from Norwegian toscakake, which usually pairs a sponge cake base with the sugared almond top (here’s another toscakake adaptation on the blog). Edd Kimber has a take on toscakake with a hefty almond cake base instead for double the almond. I’ve adapted his cake recipe to be a bit sturdier with an adjusted flour/almond ratio and plenty of holiday flavours. The cake itself is only mildly sweet so the caramelized almond topping doesn’t overwhelm with sweetness.

Finally, a couple tricky toscakake things. Firstly, the cake tends to dome a bit while it bakes – it’s okay if the top isn’t perfectly flat, but a flatter surface helps the topping distribute evenly. I spread the batter in the pan so the edges are taller than the centre to help it rise more evenly. Secondly, while broiling the topping to caramelize it, be sure to keep an eye out for any burning spots and rotate the cake every few minutes. I find I tend to to get more consistent browning by using brown sugar in the topping, though white sugar is more traditional.

cranberry gingerbread toscakake

cranberry gingerbread toscakake

  • Servings: one 7-inch cake
  • Print

Makes 1 hefty 7″ cake. Almond cake base adapted from Edd Kimber. Almond topping from Beatrice Ojakangas’s The Great Scandinavian Baking Book.

equipment: 7″ (18cm) springform tin

cake

  • 90g whole wheat flour
  • 100g finely ground almonds/almond flour
  • 3/4 tsp baking powder
  • 1/4 tsp kosher salt
  • 1 1/4 tsp ground ginger
  • 1 1/4 tsp ground cinnamon
  • 1/4 tsp ground cloves
  • 1/4 tsp ground nutmeg
  • 168 butter at room temperature
  • 50g brown sugar
  • 25g granulated sugar
  • 30g molasses
  • 3 eggs at room temperature
  • 100g (1 cup) fresh cranberries

topping

  • 38g butter
  • 35g (generous 1/4 cup) flaked/sliced almonds
  • 50g brown sugar* see note
  • pinch salt
  • 60g heavy cream

Butter and line the bottom and sides of a 7″ springform pan with parchment paper.

Preheat oven to 350F.

To make the cake, whisk the flour, almond flour, baking powder, salt and spices together. In a large bowl, cream the butter, sugars and molasses with a wooden spoon for a few minutes until fluffy and lightened in colour.  Beat in the eggs, one at a time. Add the dry ingredients and stir until just combined. Lastly, mix in the cranberries.

Scrape the batter into the prepared pan. Spread the batter so that the edges are higher than the middle – as edges cook sooner and don’t have a chance to rise as high, this compensation will help ensure that cake has a flatter top.

Bake the cake for around 50 minutes or until an inserted skewer is removed clean; tent the top with foil if it starts to become overly browned.

Once the cake is baked, immediately start on the topping. Heat the butter, sugar, salt and cream in a small saucepan and bring the mixture to a boil. Boil for 3 minutes, stirring occasionally, allowing the topping to thicken a bit. Stir in the almonds and pour overtop of the cake, spreading out the almonds evenly.

Set the oven to the broiler and put the cake on the middle rack. Broil until the topping is bubbly and browned – about 5 minutes, but watch it carefully! You may want to rotate the cake every couple of minutes to help it brown evenly. Try your best not to step too far from the oven during this, as sugar can burn quickly.

Let cool completely on a wire rack before serving.

Note: I found that using brown sugar in the topping helps the topping brown easier and ensures you don’t end up with a smattering of pale and burnt patches (a risk when using the broiler method). That being said, white sugar is traditional and the flavour is a bit different as well! Feel free to substitute white sugar, just take extra care to rotate the cake occasionally during the broiling step.

cranberry gingerbread toscakake

hibiscus-glazed lemon poppyseed cakes

hibiscus-glazed lemon poppy seed books

These cakes came about as a vehicle for the dried poppy pods we saved from the garden a couple years ago. The combination isn’t too exciting, but it definitely is visually striking – inspired by a cake I saw on Brown Bear Bakery’s instagram, hibiscus has the tartness of lemon and enough flavour to keep the glaze from just being a sugar crust. And of course, with a long enough infusion, it also has some zany colour! The cake base is a wonderfully fluffy pound cake and would be good as is without icing depending on your preferences.

hibiscus-glazed lemon poppyseed cakes

If you’re using your own poppy seeds, wait for the pods to dry and the top will open. They’ll take on a bit of a rattle and a shake will be enough to scatter poppy seeds everywhere. A quick and tidy way to collect the seeds is to put all the pods in a plastic bag, close it and shake – the seeds will fall out and settle in the bottom of the bag.

hibiscus-glazed lemon poppyseed cakes

hibiscus-glazed lemon poppyseed cakes

  • Servings: 6 mini bundts
  • Print

Makes six mini bundts. Adapted from this lemon poundcake recipe from bon appetit. If you’d prefer to make this in a loaf tin format, multiply the recipe by 1.5x (but leave the amount of glaze the same) and adjust the baking time to about 40-45 minutes.

equipment: mini bundt tin

cake

  • 90g granulated sugar
  • finely grated zest of 2 lemons
  • 150g butter, softened
  • 2 large eggs, at room temperature
  • 145g all-purpose flour
  • 1/4 tsp kosher salt
  • 1 tsp baking powder
  • 1 tbsp poppy seeds
  • 60g whole milk, at room temperature

glaze

  • juice of 1 lemon
  • 1 heaping tbsp dried hibiscus
  • 1/4 cup boiling water
  • 1 cup icing sugar
  • poppy seeds for garnish

For the cake, preheat the oven to 350F. Butter and flour a six-well mini bundt tin – brushing the tin with melted butter will help make sure you grease all the crevices.

In the bowl of a standmixer, place the sugar and lemon zest. Rub the lemon zest into the sugar with your fingertips until fragrant. Add the butter and cream with the paddle attachment until light and fluffy. Scrape down the sides of the bowl and beat in the eggs, one at a time, until smooth.

In a separate bowl, stir together the flour, salt, baking powder and poppy seeds. Add half the flour mixture to the butter and stir until just combined. I find it easiest to switch to a wooden spoon at this point, but you can continue to use the paddle attachment. Beat in the milk, then stir in the remaining half of the flour.

Transfer the batter to a piping big cut with a large opening and evenly distribute the batter amongst the wells of the bundt tin. Alternatively, spoon the batter into each well.

Bake for about 18-22 minutes or until browned along the edges and an inserted skewer is removed clean. Let the cakes sit in the tin for 5 minutes before turning them out onto a wire rack.

For the first step of glazing, squeeze the juice of one lemon into a dish and strain out the pulp and seeds. Use a pastry brush to dab the lemon juice on the warm bundt cakes. Allow the cakes to finish cooling completely.

For the hibiscus glaze, pour the boiling water over the hibiscus and set aside to steep until cooled. Put the icing sugar in a small bowl and add the hibiscus tea, a spoonful at a time, until a thick but drizzle-able icing is formed. Pour a bit of the icing over each cooled bundt cake.

genmaicha coconut milk cake

genmaicha coconut milk cake with white peaches

Usually a benefit, but occasionally an occupational hazard, matcha’s eye-catching shade of green means that it will become instantly the most recognizable flavour, regardless of what else is in a dessert. I observed this the first time I made this genmaicha-infused cake, when I added some matcha to the cake soaking liquid for what I thought was just some fun inconsequential green colour to hint at the tea in the genmaicha.

“Is it a matcha cake?” my friend asked while inspecting a slice of cake. “Sort of,” I explained that most of the flavour comes from genmaicha, with just a bit of matcha in there for colour.

He took a bite. “Great matcha flavour.” he replied.

Anyways… in a subsequent cake attempt I refrained from adding any matcha to the soak to avoid the intense suggestive power of matcha, instead leaving it the rather nice straw colour from the genmaicha. I did sprinkle of bit of matcha over top though, because, well, it’s such a pretty colour…

genmaicha coconut milk cake
genmaicha coconut milk cake with white peaches

This cake is a riff off of a tres leches cake, though with some coconut milk in the mix and the soaking liquid infused with plenty of genmaicha. I made this during the summer so I added some sliced white peaches on top – the milkiness of the cake and thick layer of cream lends itself well to fruit! and maybe I was thinking a bit of white peach oolong tea – but it is very much optional and can be substituted for whatever fruit you have on hand, or none at all.

genmaicha coconut milk cake with white peaches

genmaicha coconut milk cake

Sponge cake recipe from Natasha’s Kitchen.

equipment: 8-inch (20cm) square baking pan

milk mixture

  • 330g whole milk
  • 14g genmaicha
  • 300g coconut milk
  • 90g condensed milk, or more to taste for sweetness

sponge cake

  • 4 large eggs
  • 50g granulated sugar
  • 85g flour
  • 1/4 tsp baking powder
  • pinch salt

to serve

  • 200g heavy cream, whipped
  • optional: 1-2 white peaches, cut into wedges (or other fruit!)

milk

Combine the milk and genmaicha in a container. Place the fridge overnight or up to 24h for a cold infusion. The next day strain the milk to remove the tea – you should end up with about 275g of infused milk. Whisk in the coconut milk and condensed milk and set aside.

sponge cake

Preheat the oven to 350F. Very lightly butter an 8″ square pan – I buttered it, then wiped over the pan with a tissue to leave only a trace of butter.  Line the bottom of the pan with a piece of parchment paper.

Place the eggs in the bowl of a stand mixer. Beat until frothy, sprinkle in the sugar, and then continue whipping until very light and fluffy. They are done when you can draw a figure-eight with a ribbon of batter flowing from the whisk, and it stays on the surface of the batter for at least 10 seconds.

Stir together the flour, baking powder, and salt. Sift a third of the flour over the egg whites and fold in until no streaks or lumps of flour remain. Repeat twice more until all the flour is incorporated.

Pour the batter into the prepared pan and smooth out with a small offset spatula. Bake the cake for around 20 minutes or until browned and an inserted skewer is removed clean. Let cool. Poke the cake all over every two centimetres with a skewer right down to the bottom of the pan.

Slowly pour over the cake, being sure to get the sides and middle, adding more milk as it is absorbed. Cover and refrigerate until chilled completely.

to serve

When ready to serve, whip the cream and spread overtop of the cake in a smooth layer. Dust with matcha and top with peach slices or other fruit you have on hand. To cut, use a sharp serrated knife and gentle sawing motion to cut through the peaches.

strawberry matcha pandan chiffon cake

matcha pandan strawberry chiffon cake

The flavours of this cake were inspired by the matcha pandan latte at the cafe Rustle & Still. I’ve made something inspired by this combination before, in these matcha pandan brownies where pandan takes the place of vanilla extract in the brownie base; it’s a nice brownie with a matcha topping and a subtle pandan, but it is first and foremost a chocolate brownie, which doesn’t quite do the matcha-pandan combo justice. This time I wanted to be able to taste (and see!) both flavours more clearly, which resulted in this pandan chiffon cake covered with matcha whipped cream and filled with fresh strawberries.

matcha pandan strawberry chiffon cake

This cake has an intensely green centre from the pandan paste which is hidden by the relatively mild and subtle green of the matcha cream – until you cut the cake open! I think it’s a lovely simple strawberry layer cake for summer!

As I don’t have a tube pan, I approximated one by combining a springform tin with an empty drink can in the centre. Of course if you have a tube pan, that is probably simpler to use, but this trick is handy for getting that tube pan shape. For a smaller 18cm/7″ “tube pan” you’ll need a narrower drink can than the standard pop can, only about 2″ in diameter. They’re relatively common – I had one lying around with a coconut water drink in it. Some carbonated drinks are also sold in these narrower cans, so keep your eye out.

matcha pandan strawberry chiffon cake

strawberry matcha pandan chiffon cake

  • Servings: one 7-inch cake
  • Print

Makeshift tube cake pan method adapted from epicurious. Chiffon cake adapted from Make Fabulous Cakes.

special equipment: 18cm/7″ springform + a narrow ~5.5cm/2″ diameter empty drink can to approximate a tube pan (similar to as seen here, but on a smaller scale) OR a 7″ tube pan

pandan chiffon cake

  • 105g all-purpose flour
  • 1 tsp baking powder
  • good pinch salt
  • 3 eggs, separated
  • 68g whole milk
  • 56g vegetable oil (or ~67mL)
  • 1 tsp pandan extract
  • pinch cream of tartar
  • 65g granulated sugar

to fill and assemble

  • 360g heavy cream
  • 1 tbsp matcha
  • 1 1/2 tbsp granulated sugar, or to taste
  • sliced strawberries

For the chiffon cake, preheat the oven to 325F. Begin by preparing the pan. Line the bottom of a 7″ springform with parchment paper. Butter and flour the sides. Take a narrow empty drink can about 5.5cm in diameter and wrap a piece of parchment around the can, securing it with a piece of string. Put about 2-3 tbsp of water in the can to weigh it down, and place it in the centre of your springform tin. Tube pan approximated!

Now for the actual cake… whisk together the flour, baking powder and salt in a bowl and set aside. Separate the eggs and in a large mixing bowl place the egg yolks along with the milk, oil and pandan extract. Whisk to combine.

Put the whites in the bowl of a stand mixer along with the cream of tartar. Beat until frothy, then sprinkle in the sugar and whip on high speed until nearly stiff peaks.

Meanwhile, add the dry ingredients to the egg yolk mixture and whisk until just combined. Add a large scoop of the egg whites and whisk until mixed in to lighten the batter, then add the remaining whites and gently fold until just combined. Carefully dollop the batter into the prepared tin – I found it’s best transfer scoops of batter all around the pan to not knock over or shift the can in the centre.

Tap the pan on the counter a couple times to pop any large air bubbles, then bake about 40-45 minutes or until an inserted skewer is removed clean.

Carefully tip the pan upside over the sink so any remaining water in the can drains, then let the cake cool upside down, balancing on the drink can in the centre.

To assemble, whip the cream with the matcha and granulated sugar (I found 1 1/2 tbsp was enough to counteract the bitterness of the matcha, add more to taste if you prefer a sweetened whipped cream).

Remove the completely cooled cake from the pan and slice in half. Spread some whipped cream on the bottom half of the cake and arrange strawberry slices overtop. Top with some more whipped cream and spread into an even layer. Put the top half of the cake back on, then cover the cake entirely with the whipped cream.

To garnish, if you like, transfer some softly whipped cream to a piping bag with a large round tip and pipe dollops on top, and swoop a spoon through them. Arrange some strawberry halves over top of the cake as well.

It is best to chill the cake at least an hour before slicing and serving – it let the cream firm up a bit and will make the slicing process a bit tidier.

matcha pandan strawberry chiffon cake

strawberry rhubarb & poppy seed coffee cake

strawberry rhubarb poppy seed coffee cake

it is my favourite season: rhubarb season! I haven’t actually baked anything with rhubarb yet this spring, but I do have this cake from last year – a fruity, crumbly take on a coffee cake made with a yoghurt poppy seed cake, chopped strawberries and rhubarb, and a topping of spiced almond crumb.

The wonders of coffee cake: it’s dessert and it’s breakfast! Also okay for lunch! Honestly, any meal!

strawberry rhubarb poppy seed coffee cake

This cake was inspired by Brown Bear Bakery, a bakery I would love to one day visit! I am always excited by the combination of strawberry, rhubarb and a whole grain streusel – I love using this combination in one way or another as another homage to the strawberry rhubarb crumbles (aka the number one and also only dessert) that I grew up with.

strawberry rhubarb poppy seed coffee cake

strawberry rhubarb & poppy seed coffee cake

  • Servings: 8-inch square cake
  • Print

Cake inspired by Brown Bear Bakery. Crumb adapted from Epicurious. Cake adapted from the sour cream coffee cake recipe in A Good Bake by Melissa Weller.

equipment: 8-inch (20cm) square baking pan

spiced almond crumb

  • 85g butter, melted
  • 40g brown sugar
  • ½ tsp ground cinnamon
  • ¼ tsp ground ginger
  • ¼ tsp ground cardamom
  • pinch nutmeg
  • ¼ tsp kosher salt
  • 100g whole wheat flour
  • 25g finely ground almonds
  • 2 tbsp flaked almonds

poppy seed & yoghurt coffee cake

  • 120g all-purpose flour  
  • 60g whole wheat
  •  1 tsp baking powder
  • ½ tsp kosher salt
  • 12g (about 1 tbsp + 1 tsp) poppy seeds
  • 1 stick butter, softened
  • 100g granulated sugar
  • finely grated zest of ½ lemon
  • ½ tsp vanilla extract
  • 1 large egg, at room temperature
  • 225g greek yoghurt (or sour cream)

fruit

  • 140g rhubarb, chopped
  • 140g strawberries, chopped
  • 1 tbsp granulated sugar
  • 1 tsp tapioca starch

For the crumb, melt the butter in a microwave-safe bowl. Add the sugar, spices and salt and stir to combine. Then add the flour and ground almonds and stir until combined. Break up into lumps and toss in the flaked almonds.

For the cake, preheat the oven to 350F. Butter an 8″ square tin and line with a parchment paper sling.

Whisk together the flours, salt, baking powder and poppy seeds. Place the butter, sugar and lemon zest in the bowl of a standmixer and cream until light and fluffy (or by hand with a wooden spoon). Add the vanilla and egg and beat until combined. Finally, whisk in the yoghurt. Add the flour mixture and stir with a wooden spoon until just combined. Dollop into the bottom of the prepared tin and spread into an even layer with an offset spatula. The batter will be thick.

For the fruit, toss together the fruit, sugar and tapioca. Scatter over the batter.

Finally, scatter the crumb overtop of the cake. Squeeze a bit of the crumb mixture in your hands so it holds together in lumps and then break it up over the top of the cake.

Bake at 350F for about 40 minutes (do a first check at 30 minutes) or until an inserted skewer is removed clean or with just a couple crumbs clinging to it. Let cool completely on a wire rack, then cut into squares.

blueberry brunsviger

blueberry brunsviger

Brunsviger, a Danish yeasted cake baked with a cinnamon-spiced brown sugar glaze, is what you get from crossing a sticky bun with coffee cake. Thanks to a focaccia-like dimpling, a freshly baked brunsviger is a study in texture: the topping crisps on the top of the bread, and leaves behind cavernous dimples laden with molten brown sugar – and burst blueberries, an addition I adore.

It is hefty with sugar and in this case I wouldn’t have it any other way.

blueberry brunsviger

When I first came across a recipe for brunsviger, I skimmed past it. In part because I am always overwhelmed with the array of different Scandinavian desserts and end up quickly flipping through every page, and in part because I thought I had this recipe pegged as a brown sugar topped yeasted cake. Which it is – but I had completely missed the point of the rugged topography of the cake and the textural contrast that ensues. This recipe is the epitome of unassuming, quiet brilliance. As is a lot of Nordic recipes, the basic ingredients are the same: the flour and butter and sugar and eggs and maybe cinnamon or cardamom, but then how they’re put together is what makes each dessert.

This version is not quite a faithful brunsviger. I love adding fruit to dessert and thought that the dimples of brunsviger would be a fitting receptacle for small blueberries – and it is. They bake cradled in sugar and cinnamon until syrupy, a fittingly cozy tribute to the end of summer and entering fall (or anytime! I’ve done it with both fresh and frozen blueberries). I’ve also modified the dough to be partially whole grain and flecked with orange peel. It bakes up soft and fluffy regardless. Cut it into squares and be sure to have with coffee.

One thing to note – compared to fresh, frozen blueberries tend to release more juices while the cake is baking, resulting in a more voluminous and bubbly sugar syrup, and deeper divots in the dough. Either way is equally delicious, so use whichever you have. But be careful especially with the frozen blueberries as the syrup may bubble over – be sure to place the baking tin on a baking tray to catch any drips.

blueberry brunsviger

blueberry brunsviger

  • Servings: 8x8 inch cake which can be cut into 9 or 16 pieces
  • Print

Adapted from Magnus Nilsson’s The Nordic Baking Book.

dough

  • 120g warm milk
  • 1 tsp (4g) instant yeast
  • 1 tbsp granulated sugar
  • 1 large egg
  • grated zest of 1 orange
  • 60g soft butter
  • 1/2 tsp kosher salt
  • 100g whole grain spelt flour or whole wheat flour
  • 130g all-purpose flour

topping

  • 75g butter
  • 120g brown sugar
  • scant tbsp ground cinnamon
  • a couple pinches kosher salt
  • 80-100g small fresh or frozen blueberries (if frozen, do not thaw beforehand) 

Butter an 8×8″ or 9×9″ square pan and line with a parchment paper sling. 

To make the dough, combine the warm milk, yeast and sugar in the bowl of a standmixer. Add the remaining ingredients and stir until a dough is formed. Knead with the dough hook for about 8-10 minutes or until a very soft, smooth and elastic dough is formed. 

Stretch and pat the dough out evenly into the prepared pan. Cover and let rise until about doubled in height, 1 to 1 1/2 hours. 

Near the end of the rise, preheat the oven to 400F.

Prepare the topping once the dough is risen. Combine the butter, sugar, cinnamon and salt in a small saucepan and heat gently until the mixture is melted. 

Dampen your fingers to prevent them from sticking to the dough, the press evenly spaced deep dimples into the dough, rather like dimpling focaccia. Scatter the blueberries over top, mostly aiming for the dimples. Dampen your fingers once again, and then press the blueberries into the dimples to ensure that they are blueberry-filled dimples.

Finally, spoon the warm sugar mixture evenly overtop. 

Place the pan on a tray (this will catch any drips just in case the sugar/butter mixture bubbles over). Place in the oven and bake around 18-20 minutes or until the internal temperature is 190F. 

Let cool a bit on a wire rack. Run a knife around the two edges without parchment paper and use the parchment paper sling to lift the bread from the tin. Slice into 9 or 16 squares and eat while still warm. If you have leftovers, be sure to warm them up before eating!

Updated Oct 2022.