earl grey, raspberry & financier ice cream

earl grey raspberry & financier ice cream

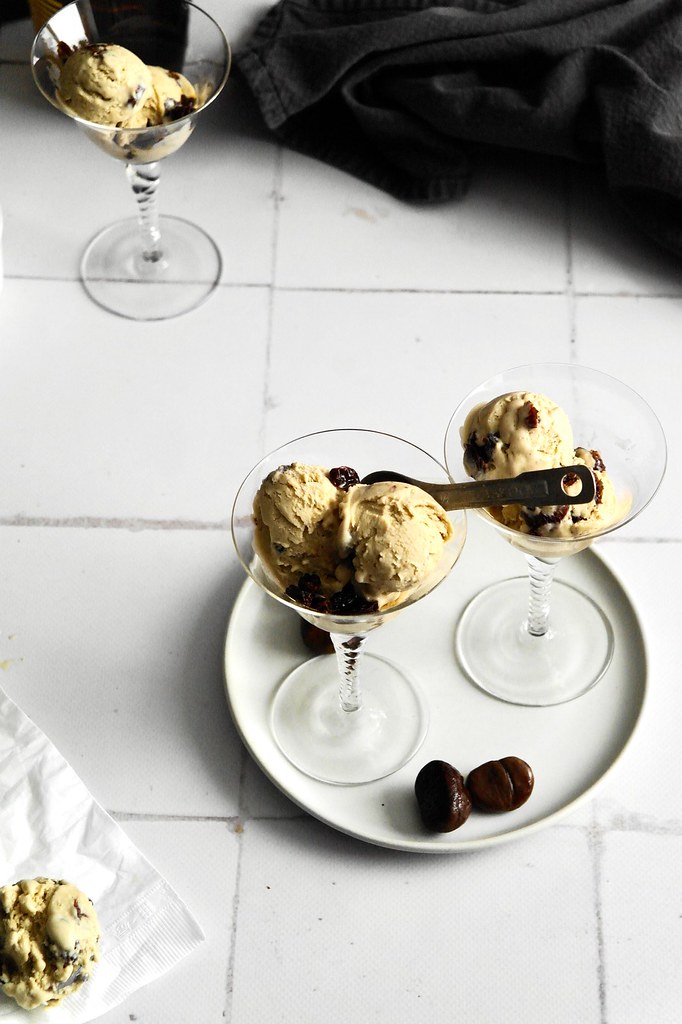
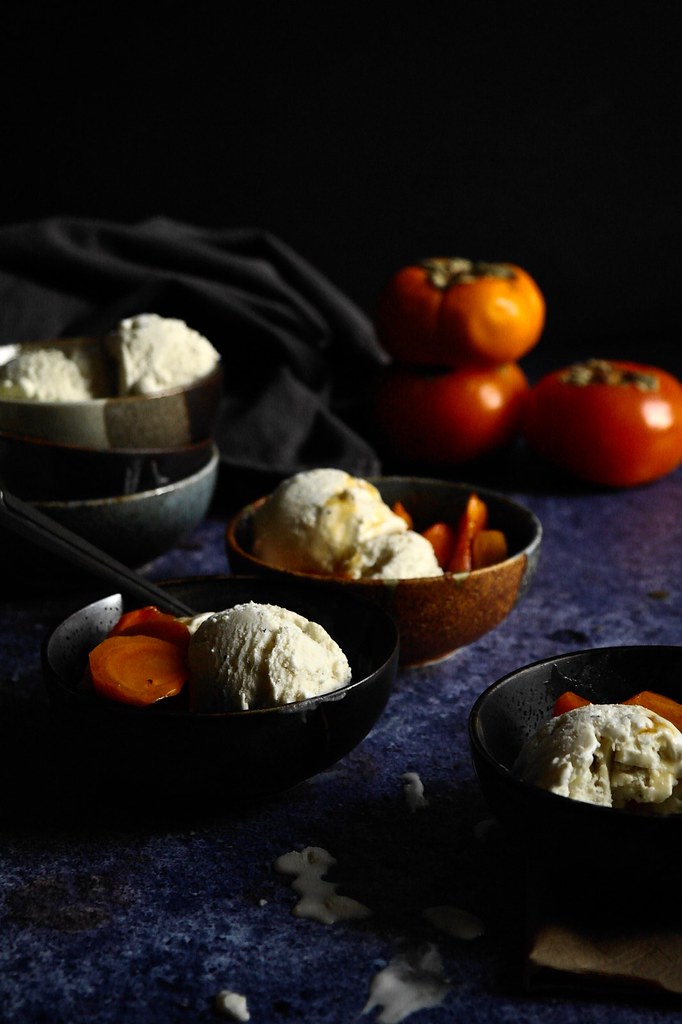
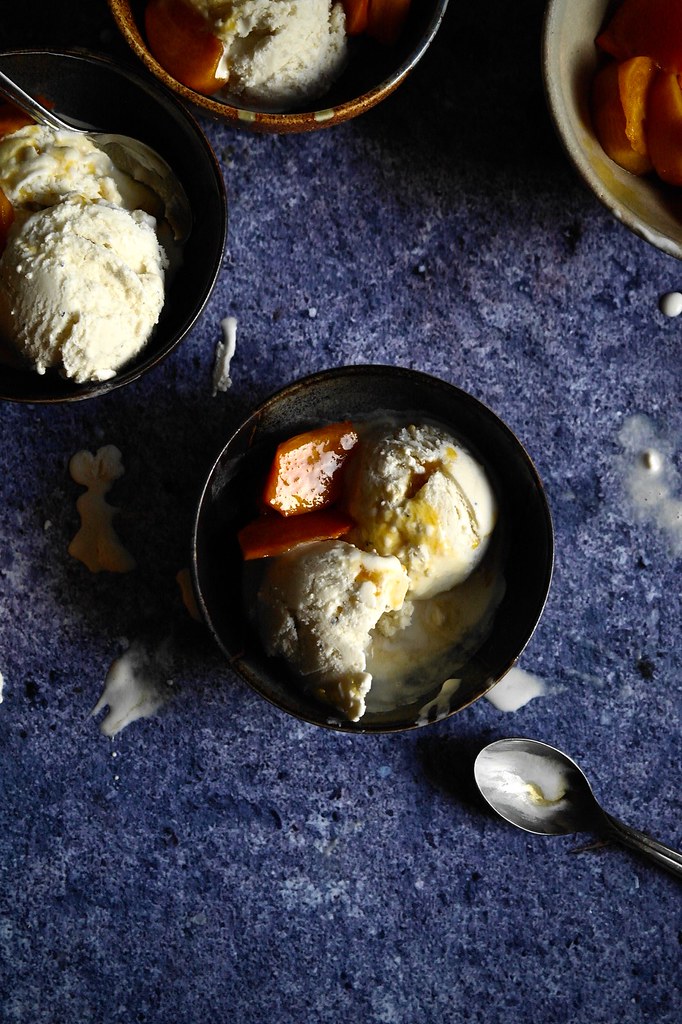
Ice cream is the perfect receptacle for trying out different flavour combinations – an easily infusible base, plus ample room for mix-ins, both solid and swirly. Today’s ice cream is just about copying though… but with such a great combination of flavours (and making use of all the infusible and mixable components), I was a pretty happy copier!

earl grey raspberry & financier ice cream

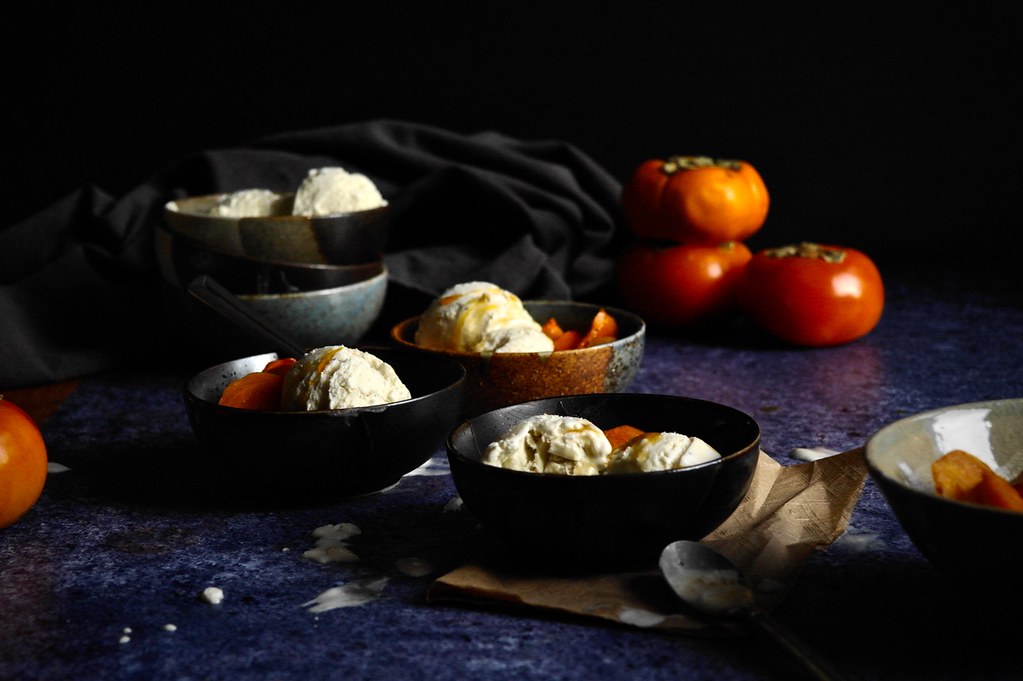
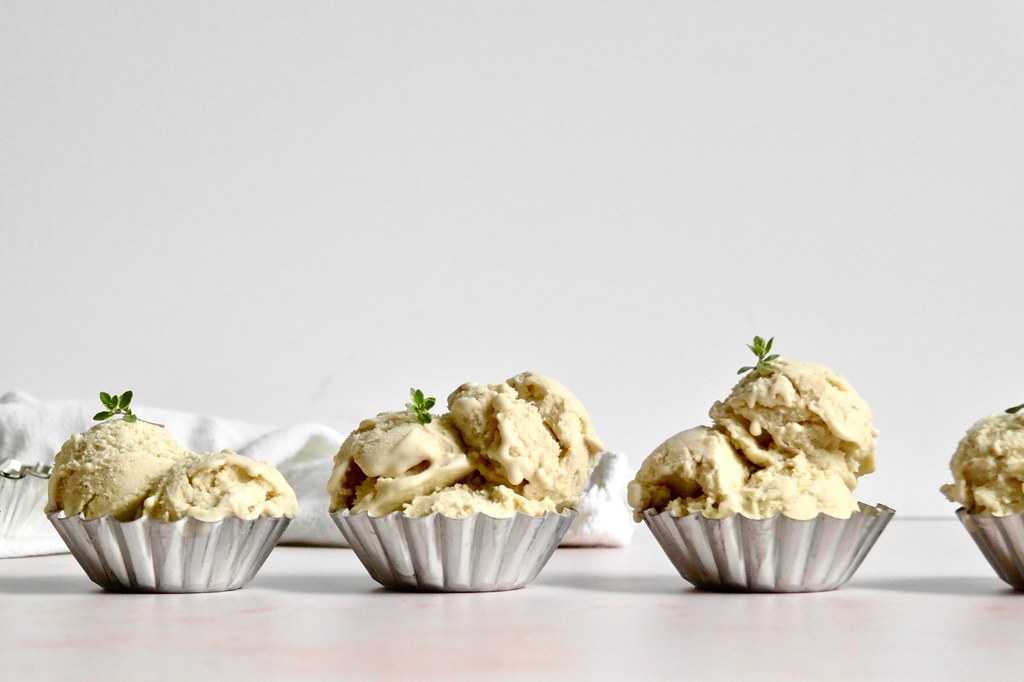
This flavour combination is based off of a Made by Marcus ice cream (not one I’ve had the chance to try, but I hope to eventually!): earl grey-infused ice cream base, chunks of financier and a raspberry jam swirl. In typical Made by Marcus-brilliance, it is fantastic combination.

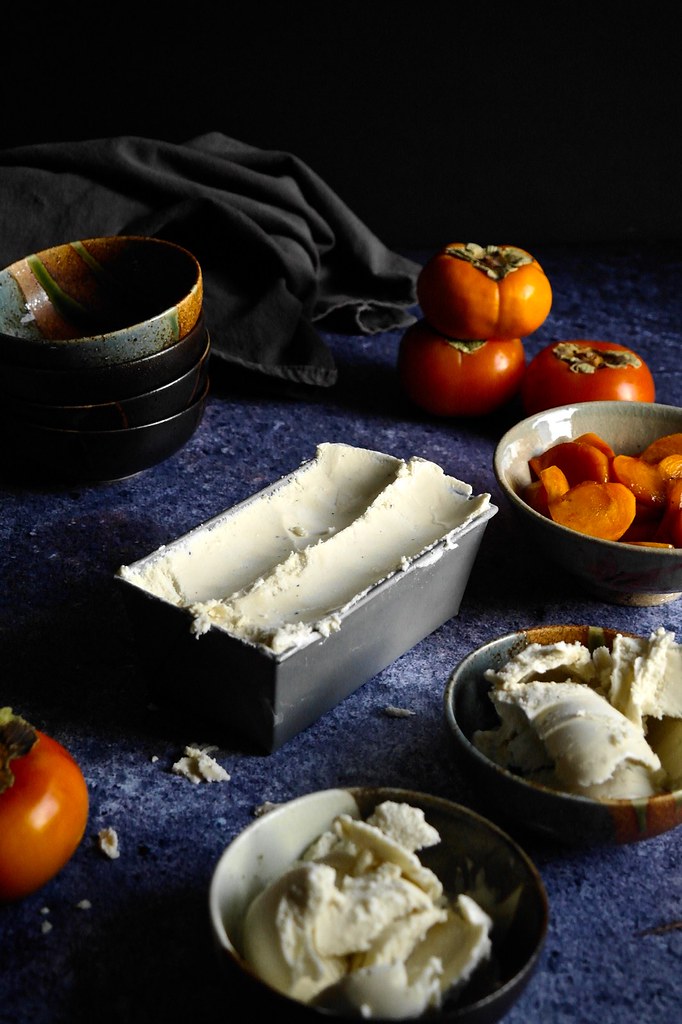
Perhaps the most surprising aspect of this ice cream to me was the financier. I wasn’t too sure how it would freeze and considered brushing the cake with sugar syrup or some rum to help keep it soft. However, it stayed soft and plush, with the chill giving it a bit of a toothsome chew.

earl grey raspberry & financier ice cream

earl grey, raspberry & financier ice cream

  • Servings: about 2 1/2 cups ice cream base
  • Print

Financier adapted from Thomas Keller and Sebastien Rouxel’s Bouchon Bakery. Fruit swirl adapted from Stella Parks.

ice cream base

  • 370g whole milk
  • 10g loose leaf earl grey tea
  • 4 egg yolks
  • 30g granulated sugar
  • good pinch salt
  • 160g heavy cream

financier

  • 50g butter
  • 30g ground almonds
  • 20g all-purpose flour
  • 1/8 tsp kosher salt
  • 40g granulated sugar
  • 50g egg whites
  • 1 tsp vanilla extract

raspberry swirl

  • 200g raspberries
  • 50g granulated sugar
  • pinch salt
  • 1-2 tsp lemon juice, to taste

ice cream base

Combine the milk and tea and let cold infuse in the fridge for 24 hours. Pass through a sieve to remove the tea leaves and extract about 320g of infused milk.

Place the milk, egg yolks, sugar and salt together in a heatproof glass bowl and whisk to combine. Set the bowl over a saucepan of simmering water and cook, stirring constantly with a rubber spatula, until the mixture thickens and reaches 160-165F. Immediately transfer to a container and stir in the heavy cream. Let cool then chill completely.

financier

Preheat the oven to 425F. Line the bottom of a loaf tin with parchment and butter the sides.

Place the butter in a small pan and cook, stirring, until the solids are browned and fragrant. Immediately transfer to a bowl to prevent burning. Set aside to cool a bit while you prepare the rest of the batter.

In a medium bowl, whisk together the ground almonds, flour, sugar and salt. Make a well in the centre and add the egg whites and vanilla extract. Whisk to combine until smooth. Fold in the butter in a few additions.

Scrape the batter into the bottom of the prepared pan and spread into an even layer. Place in the oven and turn the temperature down to 375F. Bake for about 10 minutes or until just browned along the edges and a skewer inserted into the centre is removed clean. Let cool on a wire rack.

Cut into 1cm cubes and freeze.

raspberry swirl

Place the raspberries, sugar and salt in a small saucepan. Heat over medium to soften the berries and crush them with your spoon. Bring to a simmer and cook for about 6 minutes, stirring frequently, until the raspberries are reduced and thickened – the weight should be about 160-170 when you take it off the heat.

Put the hot raspberry mixture into a sieve set over a bowl. Use a rubber spatula to vigorously press as much of the raspberries through as possible, leaving the seeds behind. It will take a bit of time and effort, but you should end up with about 100-110g of smooth raspberry sauce. Cover and place in the fridge to chill completely.

assembly

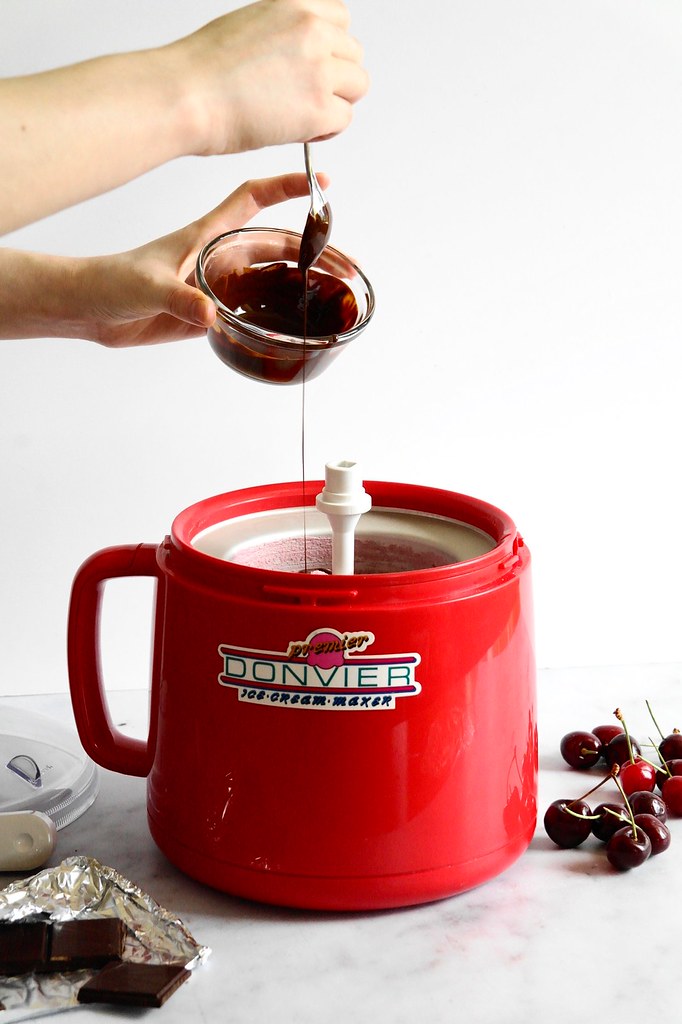
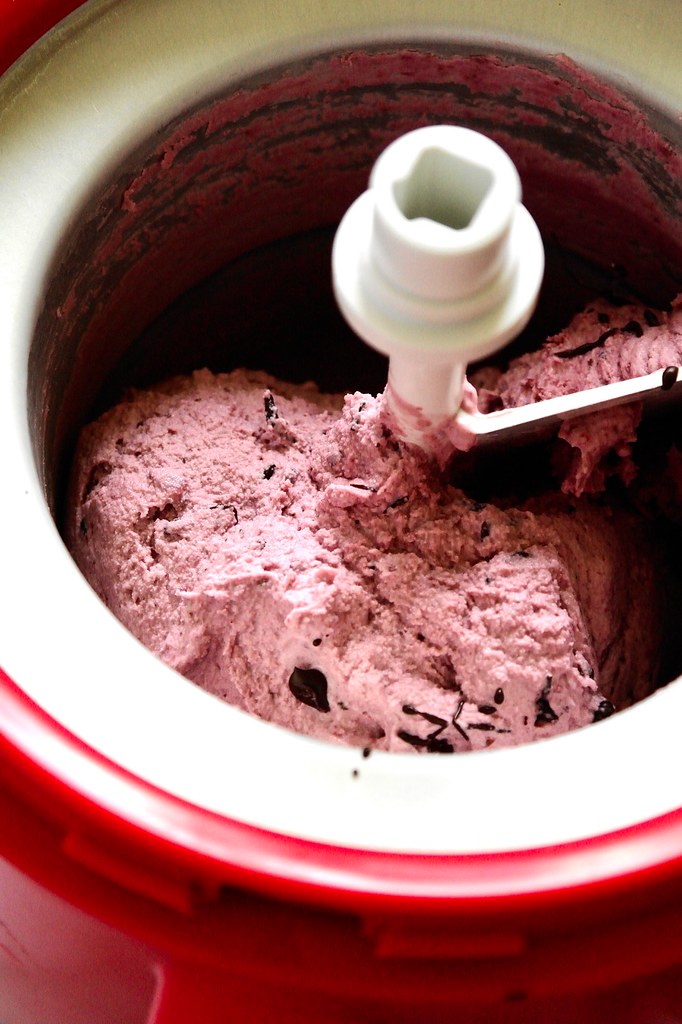
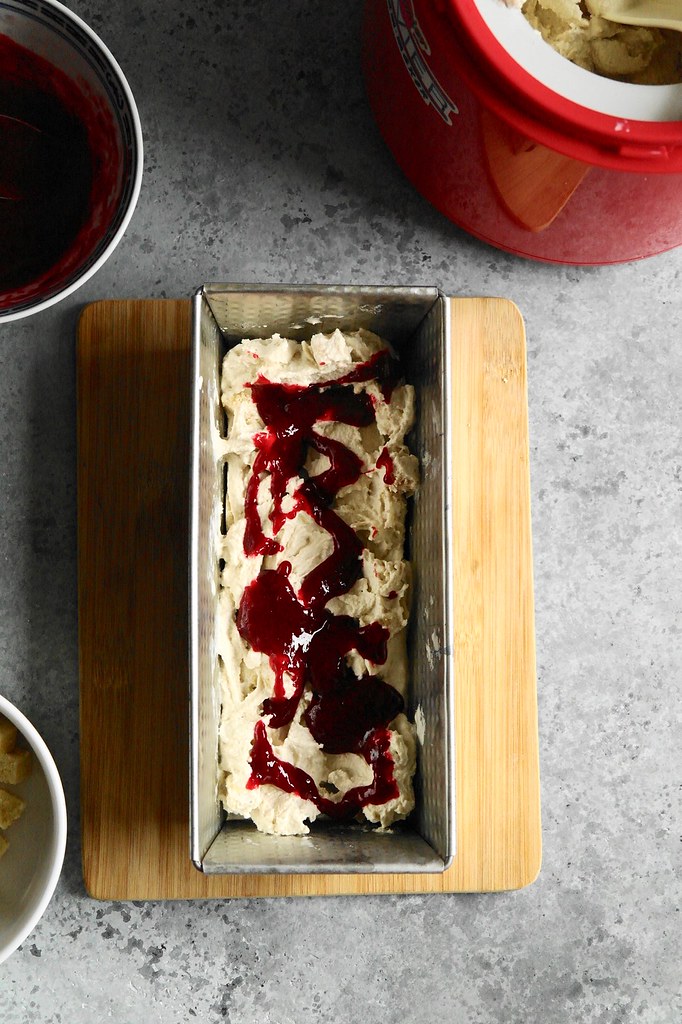
Churn the ice cream base in an ice cream maker according to the manufacturer’s instructions. At the end add about 2/3 – 3/4 of the financier cubes (depending on how chunky you like it) and churn in. Spread half of the ice cream base into a pre-chilled loaf tin. Dollop half of the chilled raspberry sauce over top. Top with the remaining ice cream and then remaining raspberry sauce. Use a small offset spatula to swirl the ice cream a few times and scatter some more financier cubes over top. Freeze completely.

chestnut rum raisin ice cream

chestnut rum raisin ice cream

Rum raisin ice cream should be something that I adore (rum + cream + dried fruit + grandpa vibes) but I’ve always had a less than stellar impression of it. Probably because I’d only ever tried a supermarket version of it once: super sweet, slightly freezer-burned. and rum-flavoured as opposed to actual rum. Homemade rum raisin, on the other hand, is properly alcoholic, and all that I imagined it to be and more!

(Maybe I would have liked the supermarket one too if it wasn’t too freezer-burned…)

chestnut rum raisin ice cream

For this take on a rum raisin ice cream, I made an ice cream base thick with pureed chestnuts – it only adds to the coziness and goes well with the rum. Just before churning, stir in rum-plumped raisins and any excess rum. Soaking the raisins in rum not only rehydrates any particularly desiccated ones, but also offsets the sweetness and keeps them soft and chewy even when frozen. And finally, thanks to the alcohol content of the ice cream base, it stays semi-scoopable even when made with lower sugar content.

chestnut rum raisin ice cream

chestnut rum raisin ice cream

  • Servings: about 3 cups ice cream base
  • Print

Adapted from Saveur’s rum raisin ice cream.

  • 75g (1/2 cup) raisins
  • 105g (1/2 cup) dark rum
  • 300g (1 1/4 cup) whole milk
  • 5cm length of vanilla bean
  • 150g (1 cup) peeled roasted chestnuts
  • 3 egg yolks
  • 25g granulated sugar (or use 50-70g for a more standard sweetness)
  • 240g (1 cup) heavy cream

Combine the raisins and dark rum in a small jar or covered dish and set aside overnight or up to a couple days.

Place the milk in a medium-small saucepan. Cut the vanilla bean in half and scrape out the seeds, adding both the seeds and pod to the milk. Bring the milk to a simmer, stirring occasionally and add the chestnuts. Partially cover and allow to simmer gently for 15-20 minutes or until the chestnuts are tender. Remove from the heat.

Use a slotted spoon to scoop out the chestnuts and set aside. Discard the vanilla pod.

In a bowl, whisk together the egg yolks and granulated sugar. Return the milk to the stovetop and heat until it begins to steam. Slowly pour into the egg yolks while whisking constantly to temper them. Return the custard to the saucepan over medium-low heat, stirring constantly with a rubber spatula. Cook until the custard thickens enough to coat the back of a spoon and hold a line drawn in it, or the temperature reaches 160-180F.

Remove from the heat and add the chestnuts. If you have an immersion blender, transfer to a tall glass measuring cup or the cup that comes with the blender and puree until smooth. Otherwise, transfer the mixture to the bowl or a stand blender or food processor and puree until smooth, scraping down the sides as needed. The mixture will appear thick and silky. Chill completely.

When ready to make the ice cream, stir in the cold heavy cream, the rum-soaked raisins, and all the excess rum. Transfer the ice cream base to an ice cream machine and churn according to the manufacturer’s instructions.

Note: I don’t personally recommend it, but if you prefer the alcohol cooked off: put the raisins and rum in a microwave proof container, cover with plastic leaving a small gap for steam to escape, and microwave for about 1 minute or until it is bubbling.

houjicha ice cream with caramelized persimmons

houjicha ice cream with caramelized persimmons

This ice cream has been a work in progress for a few years so I am glad to finally post it! I had initially envisioned it as a persimmon houjicha ice cream with hachiya persimmon pureed into the ice cream base. In try #1, I had let the ice cream base sit for a couple days before churning and it took on a the fermented flavour of very over-ripened persimmon. A year later, when persimmon season returned, a second try did not taste much better, even when churning the ice cream right away – though in part it might be because I am a bit oversensitive to the taste of overripe fruit. To avoid any over-ripeness issue, once persimmon season swung around once more the following year, I tried roasting fuyu persimmons (which do not need to be fully ripened to eat) and then pureed that. The roasting merely dried out and toughen the persimmons, which yielded a “puree” of coarsely chopped fibres that could have been a particularly orange hairball. I couldn’t bear to put that in the ice cream (ate it over oatmeal instead) so I tried churning the houjicha base on its own – and loved it.

I still wanted the persimmons in there somehow though, so I also prepared some caramelized fuyu persimmon slices to go alongside. It’s a wonderfully mellow and autumnal combination. Sometimes I guess it doesn’t all need to be crammed into the ice cream itself!

houjicha ice cream with caramelized persimmons

This ice cream base is made with a long and slow cold infusion using looseleaf houjicha (roasted green tea). I’ve been really tending towards the long cold infusions lately as a way to get lots of flavour. While sometimes tea can get a bit bitter, the roasting of the houjicha helps it remain mellow despite a long infusion – strong flavour without the bitterness – and goes it so well with a milky ice cream base!

That and warm caramelized persimmons spooned overtop… sometimes it’s not too bad when your initial plans go awry.

houjicha ice cream with caramelized persimmons

houjicha ice cream with caramelized persimmons

  • Servings: 2 cups ice cream base
  • Print

houjicha ice cream

  • 280g heavy cream
  • 5g loose leaf houjicha
  • 240g milk
  • 3 egg yolks
  • 1 1/2 tbsp sugar, or to taste

caramelized persimmons

  • 50g granulated sugar
  • 2 tbsp water
  • 2 fuyu persimmons, peeled and sliced
  • butter
  • salt

houjicha ice cream

Combine the cream and houjicha in a container. Cover and let steep for 48 hours in the fridge. Press through a sieve to extract the cream. 

Whisk together the egg yolks and sugar. Place the milk in a saucepan and heat until steaming. Slowly pour the hot milk into the yolks while whisking constantly to temper, then return the milk mixture to the saucepan over medium-low heat. Cook, stirring constantly with a rubber spatula, until the temperature reaches 160-180F or the custard thickens enough to coat the back of a spoon and hold a line drawn in it. Immediately transfer to a bowl or container. 

Stir in the infused cream (and taste for sweetness – add more sugar if desired!) and chill the ice cream base completely. Churn in an ice cream machine according to manufacturer’s instructions.

caramelized persimmons

This makes enough for about 4 servings. Scale up or down depending on how much ice cream and many people you’re serving. 

Begin by making a caramel syrup. Place the sugar in a small saucepan and add enough water to dissolve the sugar. Bring the water to a boil until the sugar is dissolved (if you stir, make sure you swirl the pan to pick up and dissolve any granules of sugar along the sides!), and then continue to boil until the sugar syrup caramelizes, reaching a deep amber colour. Whisk in the 2 tbsp of water. Be careful while adding the water as the caramel may sputter a bit. If parts of the caramel harden, return to the heat, stirring until smooth. Set aside to cool until needed.

Melt 1 tsp of butter in a pan over medium-high heat. Add the sliced persimmons and saute until softened. Spoon in 2-3 tbsp of the caramel syrup and stir until the persimmon slices are coated in syrup and it has formed a smooth sauce.

Take the ice cream out from the freezer about 10-15 minutes before serving. Scoop and serve with the caramelized persimmons.  

houjicha ice cream with caramelized persimmons

cherry mint stracciatella

cherry mint stracciatella

The ice cream has a mint-infused roasted cherry base ribboned throughout with snappy veins of chocolate. It makes a wonderfully fruity mint ice cream with a chocolate flavour that doesn’t overwhelm.

cherry mint stracciatella

I first thought of this ice cream as a cherry mint chocolate chip. My mum, however, isn’t a fan of how hard frozen chocolate chips get, so I decided to use a stracciatella-type technique. Stracciatella is a term which applies to both gelato and egg-ribboned soup; on the gelato side it is usually done by drizzling melted chocolate into a gelato base while it churns. The chocolate freezes upon contact with the ice cream, forming small shards which snap and melt in the mouth. To enhance the meltiness, I took inspiration from Stella Parks’s recipe in which she stirs in some coconut oil to lower the melting point (here I used a smaller quantity of canola oil, given its even lower melting temperature).

If you have a manual ice cream maker like me, drizzle in a bit of chocolate, then replace the lid and give the base a few churns. Repeat several times until the chocolate is done. I found I didn’t need too much chocolate (though of course you can add more if you prefer) so it goes quite quickly despite the extra steps.

(In the pictures I’m pouring David Lebovitz’s chocolate sauce made with a good pinch of salt.)

cherry mint stracciatella

cherry mint chocolate ice cream

  • Servings: about 2 cups ice cream base
  • Print

Some techniques taken from Stella Park’s cherry ice cream and stracciatella

  • 400g cherries
  • 2 tbsp granulated sugar, divided
  • 250g heavy cream
  • 4g (1/4 cup gently packed) fresh mint leaves, coarsely chopped
  • 100g whole milk
  • 1 egg yolk
  • 30-60g dark chocolate
  • 3-6g neutral oil

Begin by roasting the cherries. Preheat the oven to 400F. Use a baking casserole or line a small baking tray with parchment paper. Combine the cherries and 1 tbsp of granulated sugar. Bake, stirring every so often, for about 45 minutes or until the cherries are cooked and have started to wrinkle a bit. Do turn down the heat if anything begins to burn. 

Once the cherries have cooled, pop out the pits and reserve. Grind up the roasted cherry flesh using either an immersion blender or a food processor.

Then infuse the cream. Warm the cream until it is steaming. Stir in the reserved cherry pits and mint leaves. Cover and let cool, then transfer to the fridge to infuse overnight. The next day strain the cream to remove the mint and cherry pits.

Prepare the custard. Whisk together the milk, egg yolk and remaining 1 tbsp of sugar in a glass bowl. Set the bowl over a pot of simmering water. Stir constantly until it thickens or reaches about 160F. Transfer to a container, cover and chill completely.

Combine everything together. Stir the roasted cherry puree into the cream, then whisk in the custard. At this point to make it a bit smoother you can use an immersion blender or transfer the base to a blender/food processor. 

Churn the ice cream. Melt the chocolate and stir in the oil. Once the ice cream has become thick, but still soft enough to churn, drizzle in the chocolate. You can either drizzle it in continuously while the ice cream stirs. As my ice cream maker needs the lid on to stabilize the paddles, I drizzled in just a spoonful of the melted chocolate at a time, closed it up, gave it a few turns, then repeated it again until all the chocolate was used. 

roasted strawberry star anise ice cream with black sesame caramel swirl

strawberry, star anise and black sesame caramel ice cream

This ice cream is another quasi-take on PB&J: an ice cream base infused with star anise and roasted strawberry puree, and swirled through with a black sesame caramel.

Roasting fruit and then pureeing it into ice cream base has become one of my favourite ways of incorporating fruit into ice cream (I have another couple recipe drafts using this technique with apricots and cherries!). It’s a technique I borrowed from Stella Park’s cherry ice cream, where roasting reduces down the fruit and makes up a significant portion of the base. Though, unlike the original recipe, I like to put in full puree instead of straining in because that way I don’t need quite as much fruit and there’s no chance of waste!

strawberry, star anise and black sesame caramel ice cream

Some reasons to love roasting fruit for ice cream: Firstly, it reduces the water content of the fruit, preventing the ice cream base from becoming crystalline. Second, it also makes for a thicker ice cream base which better holds air from churning and fluff up more (this is only a concern when you churn your ice cream by hand). Finally, I think the concentrated fruit mixture also helps keep the ice cream a bit softer at freezer temperature – though whether that’s due to the first two reasons or something about fibre content, I’m not sure!

strawberry, star anise and black sesame caramel ice cream

This ice cream has gone through a few renditions to get here. The first time I made this ice cream, I tried to use swirl straight black sesame paste into the ice cream. But I found that frozen black sesame paste has a pretty terrible texture for ice cream swirling – it stiffened immediately upon contact with the ice cream and spotted the ice cream with grey fragments.

It was later when I was photographing an ice cream with a caramel sauce that I noticed the caramel kept a wonderful, soft, swirly texture even when frozen (yay sugar!). So in my second try, I made a caramel to act as a vehicle for the black sesame paste. Diluting the paste in caramel also let me add plenty of swirls while keeping the black sesame flavour from overwhelming the ice cream base. But I found that the ice cream was a bit too rich and cloying as the roasted strawberries had lost their brightness.

So for the third attempt, I reduced the proportion of cream a bit and added plenty of lemon juice to brighten the strawberry puree – while the roasted strawberries do taste different from fresh, the acidity keeps the ice cream a bit brighter, all the better to contrast against the sweet, salty and nutty black caramel. Finally, if you’re no so into the black sesame, I also quite like the roasted strawberry and star anise ice cream base on it’s own, so skip the caramel if prefer!

strawberry, star anise and black sesame caramel ice cream

strawberry star anise ice cream with black sesame caramel swirl

  • Servings: about 2 cups ice cream base
  • Print

You’ll only use about half of the caramel. As it makes a fairly small amount of ice cream, if you want to double the recipe, you only need to double the strawberries and ice cream base (there is sufficient caramel for a double recipe). 

black sesame caramel swirl

  • 55g granulated sugar
  • 2 tbsp water
  • 70g heavy cream, heated until quite warm
  • Two finger pinch worth of kosher salt
  • 18g roasted black sesame paste, or to taste

roasted strawberries

  • 400g chopped strawberries
  • 1 tbsp granulated sugar
  • 1 tbsp lemon juice, or to taste

ice cream base

  • 180g heavy cream
  • 3 whole star anise
  • 120g whole milk
  • 20g granulated sugar
  • 2 egg yolks

black sesame caramel swirl

Place the sugar and water in a small saucepan. Heat over medium high to dissolve the sugar, then allow it to bubble away, swirling the pan occasionally, until the sugar caramelizes. Cook to an amber – lighter if you prefer sweeter, and darker if you prefer a bit of bitterness.

Remove from the heat and pour in the hot cream carefully (it will bubble up) and stir to mix. If lumps of hard caramel form, return to the heat and stir until melted. Stir in the salt.

Transfer the caramel to a bowl and stir in the black sesame paste. Set aside to cool completely.

roasted strawberries

Roast at 350F for about 20-25 minutes or until shrunken/reduced, cooked through and the juices have mostly evaporated (after the evaporative losses, I ended up about 180g worth of roasted strawberries.) Transfer to a container (I like to transfer it directly to the cup that comes with the immersion blender as I’ll be blending it eventually) and let cool. Stir in the fresh lemon juice – the strawberries lose their brightness when roasted, and this helps recover it.

ice cream base

Combine the heavy cream and the star anise. Place in the fridge for 24 hours to cold infuse. The next day, fish out the star anise from the cream and set aside.

Get a double boiler ready – set a small saucepan of simmering water on the stovetop and find a glass bowl that fits on top. Whisk together milk, egg yolks and sugar in the bowl. Add the star anise. Place the bowl over the pot of simmering water and stir constantly with a rubber spatula until the temperature reaches about 165F, or thickens enough to coat the back of a spoon and hold a line drawn in it.

Pass through a sieve to and ensure no fragments of star anise remain. Transfer to a container, add the infused cream, and chill.

Add the chilled ice cream base the roasted strawberries and puree until smooth, either using an immersion blender (most convenient) or a stand blender/food processor. 

Put a pan or a container into the freezer so it will be pre-chilled.

Churn the base in an ice cream maker. Stop while the ice cream base is still fairly soft so you can swirl in the caramel a bit. If the caramel doesn’t drip from a spoon, stir in a bit more cream. Spread half the ice cream into the bottom of the pan and drizzle with some black sesame caramel. Repeat with the remaining ice cream and drizzle with more caramel. You’ll have quite a leftover caramel – save the remainder for serving or other applications.

banana, thyme & chamomile ice cream

banana chamomile thyme ice cream

So I am 40% certain I don’t like bananas. It may be because of historic precedence – I’ve always considered myself not a banana person. I prefer to eat bananas when they’re still a bit green and when they are best described as tasting not very much like a banana at all.

But given some of my favourite recipes on the blog are this banana bread and this tart … I’ve begun to think maybe I could be a banana person after all, so long as banana is in combination with other flavours. (i.e. green curry paste/coconut and miso/star anise, respectively).

Continue reading “banana, thyme & chamomile ice cream”

chocolate, prune & whiskey ice cream

chocolate prune whiskey ice cream

This ice cream is all at once intensely deep and chocolatey all while not being too chocolatey at all. It’s a chocolate ice cream for those who don’t really love chocolate all that much. Which, okay, I know might just be me.

But stay with me for just a bit longer – it’s also a chocolate ice cream for those who like chocolate paired with other, complementary flavours! The dried fruit and whiskey lends it the muted acidity of a dark aged fruitcake, and that slight acidic undertone in combo with chocolate comes across as coffee. It’s complicated! And so very alcoholic, too.

Continue reading “chocolate, prune & whiskey ice cream”

brown sugar, kinako & strawberry ice cream

brown sugar, kinako & strawberry ice cream

This ice cream has a bit of a peanut butter and jelly vibe – though without tasting too much like peanut butter as I am not much of a peanut butter-person. Brown sugar and kinako (toasted soybean powder) flavours a mellow, toasty ice cream base interrupted by a strawberry swirl.

Kinako has a long tradition in Japanese desserts such as warabi mochi. To learn more about kinako, Ai of Ai Made it For You wrote an amazing guest post on The Cupcake Project.

Continue reading “brown sugar, kinako & strawberry ice cream”

mango cardamom lemongrass ice cream

mango cardamom lemongrass ice cream

Growing up, mango was my favourite ice cream flavour, especially as it was an occasional treat at some restaurants. At home I would acquiesce to strawberry.

This mango ice cream is rather different from the one I used to love, infusing the base with cardamom and lemongrass. It’s not an intensely mango ice cream to avoid overwhelming the other flavours – rather it comes across creamy and fragrant, with a gentle layering of fruit for brightness.

mango cardamom lemongrass ice cream

I’ve used the combination of cardamom and lemongrass before, and here I love it paired with the mango. I think of cardamom and lemongrass as both “citrus analogues”, or in other words citrus-y flavours without the acidity of citrus. Together they make for a soothingly smooth ice cream in both texture and taste.

Curiously, this ice cream also stayed quite soft for a homemade ice cream despite the low sugar content. I wonder if it’s related to the mango puree in terms of it’s sweetness or fibre as I have noticed that frozen mango chunks are quite chewable. This ice cream can be scooped almost right away with a scoop dipped in hot water and some arms muscles, though it’s always best to either give it 15-30 minutes in the fridge or about 10 minutes on the counter to soften first.

mango cardamom lemongrass ice cream

mango cardamom lemongrass ice cream

  • Servings: about 2 cups ice cream base
  • Print

  • 1/2 stalk lemongrass, sliced crosswise into rounds
  • A heaping ½ tsp of green cardamom pods, cracked open with heel of your hand or flat of a knife
  • 180g whipping cream
  • 120g whole milk
  • 3 egg yolks
  • 30g granulated sugar, or more to taste
  • 175g mango puree (from about 1 1/2 to 2 ataulfo mangoes)

Combine the sliced lemongrass, cardamom pods and cream in a container. Place in the fridge to cold infuse for about 24 hours.

The next day, whisk together the milk, egg yolks and sugar in a glass bowl. Set the bowl of a pot of simmering water and cook, stirring constantly with a rubber spatula until it reaches at least 160F or it’s thick enough to coat the back of a spoon and hold a line drawn. Transfer the custard to a container. Strain the infused cream and add to the custard. Chill completely.

When ready to churn, combine the custard base with the mango puree (you can also taste for sweetness at this point; I like a mildly sweet ice cream, but add some additional sweetener if desired!).

Churn according to your ice cream machine protocol.

Post updated March 2021, and again in April 2023.

red beet gingerbread ice cream

it’s feeling like the right time of year for gingerbread! this time a creamy and spice-heavy red beet gingerbread ice cream. the beet gives it this sort of brightness in flavour and of course a gorgeous colour

red beet gingerbread ice cream

This time around I just have to give it to the beets. They are doing some good work in this ice cream.

Abundant annual beet harvests and a lack of beet ideas soured my relationship with beets over the years. I broke back in high school when I brought the dinner leftovers, a large container of sliced boiled beets, for lunch – since that meal of pure beet, I’ve never been able to look beets in the eye in same trusting way as I used to.

And so in baking with an abundance of beets, I started to wonder how I could mask their flavour. Unfortunately for that quest, beets are pretty resilient. But I’ve realized that rather than trying to cover up the beet, beet-baking can instead focus on flavour combinations that attenuate the intensity of their beetiness, while still highlighting them in different ways. Of course, those sorts of statements never really make much sense without an illustrative example. Enter the red beet gingerbread ice cream.

Continue reading “red beet gingerbread ice cream”